Modification 1 of inflation parameters
What to start with:
1) Select the drawing from the bank of already created drawings
2) Open the pane (Access to the volume effects window)
Click on the effect_volume.jpg button
 |
|
 |
 |
|
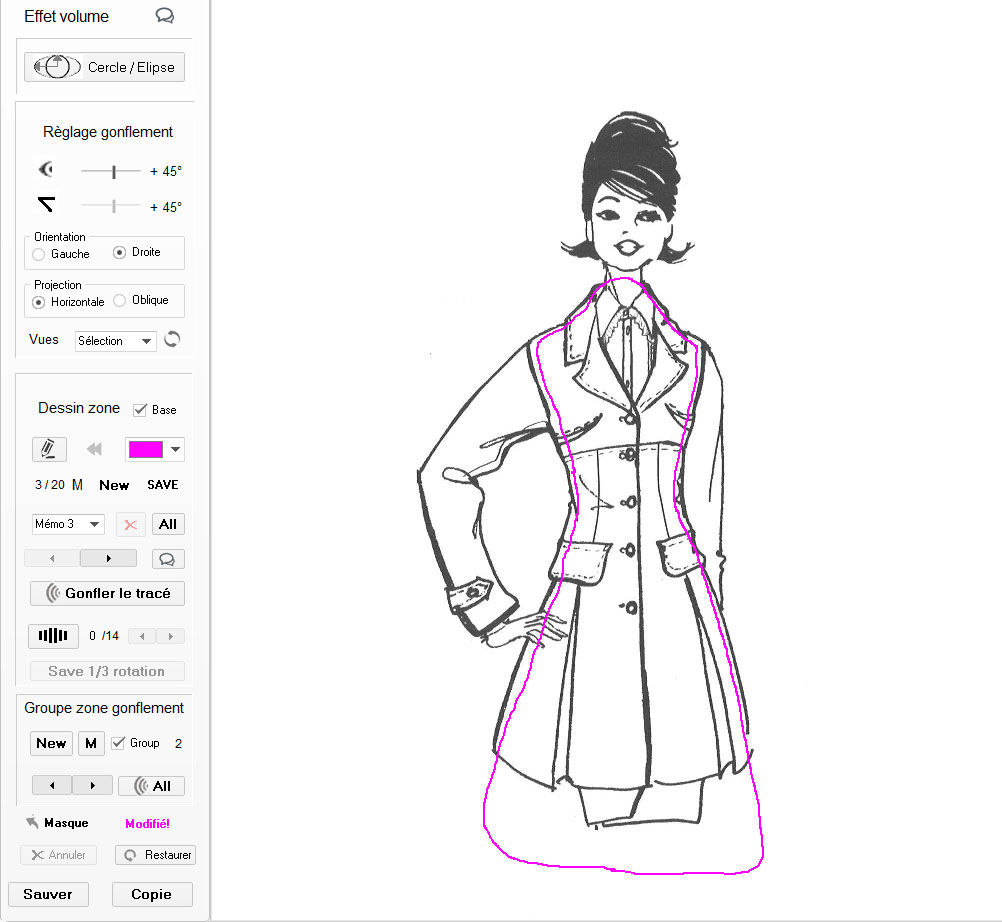
1) click on the NEW button in the Group panel to start a new zone group. 2) Select the track by browsing the list of tracks already created or by creating a new one, save it then click on the M to add the track to the group Note: here we have selected a path (Pink Path) which takes the central part of the jacket |
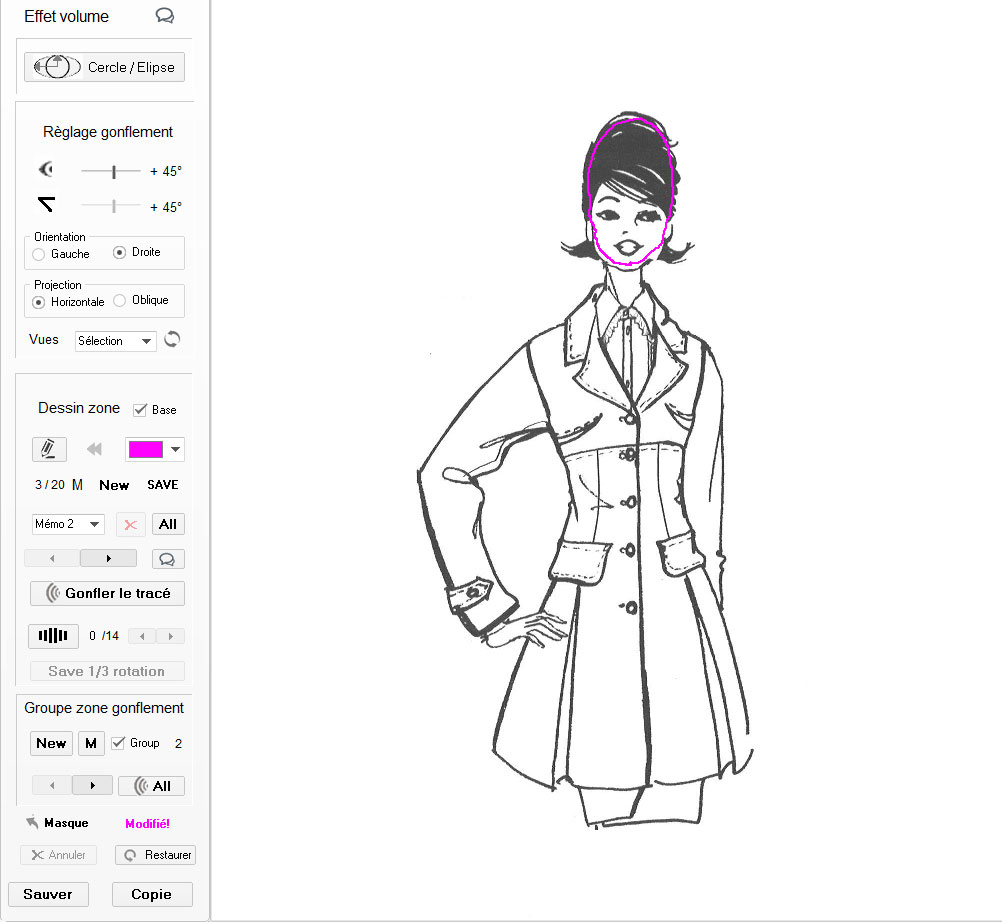
3) Select the track by browsing the list of tracks already created or by creating a new one, save it then click on the M to add the track to the group Note: here we have selected a path (Pink Path) then represents the inside of the face.
|
We have therefore added 2 paths in the group which will be used one after the other to apply the 3D effect to these 2 areas defined in Pink.
Note: It can be noted that the areas in Roses are not very precise, the main constraint being not to bite the outer contour of the area to be inflated
under the deformation quill of the layout area (we only inflate the inside of a zone).
3) Adjustment of inflation and orientation parameters
Note: The default setting is (Rotation +45°) to the right with Horizontal projection.
|
First possibility: If we have selected only 1 zone to inflate, we click on the (Inflate trace) button or on the (All) button if the group contains at least 1 memorized trace. Second possibility: If we have selected and memorized (M) at least 2 zones to inflate, click on the (All) button in order to use the zones one by one contained in the group (automatic procedure). Once the (Inflate plot) or (All) button, as the case may be, has been clicked, you must wait for the end of the 3D application carried out by PERSPECTIVE. Each zone will be inflated one after the other, this waiting time is more or less long depending on the number of zones and the surface to be treated (10 to 30 seconds). |
4) Applying 3D effect to selected areas
We will modify these parameters and put:
- an angle of +70° to the left
- with a Horizontal projection.
Two possible cases:
1) If we only had one plot selected, we could directly click on the button (Inflate Plot)
2) We have 2 plots in our group that can accept them (10 maximum), so we must click on the All button in order to apply the 3D effect
one after the other on the drawing, once click on the All button wait for the end of the construction of the final drawing with 3D effect.
Note: the 3D Effect only applies to the 2 selected areas, here the face and a central part of the jacket (see below)
Note: the Rose paths disappear during the creation of the view with 3D Effect.
|
 |
|
Basic 2D Image |
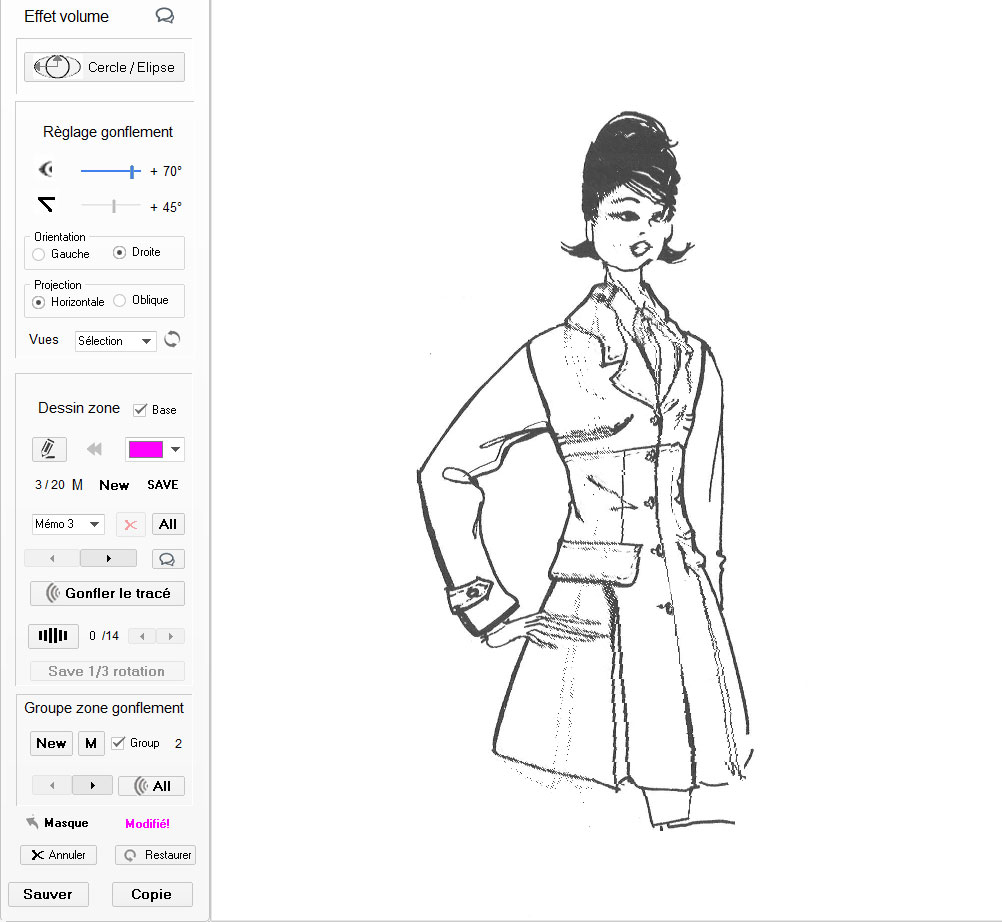
Image with 3D Effect on selected areas - an angle of +70° to the RIGHT - with a Horizontal projection.
|
At this stage, it is a matter of configuring the inflation according to your needs, see the following section for more details
4) Applying 3D effect to selected areas
We will modify these parameters and put:
- an angle of +70° to the right
- with an Oblique projection at 45°
Two possible cases:
1) If we only had one plot selected, we could directly click on the button (Inflate Plot)
2) We have 2 plots in our group that can accept them (10 maximum), so we must click on the All button in order to apply the 3D effect
one after the other on the drawing, once click on the All button wait for the end of the construction of the final drawing with 3D effect.
Note: the 3D Effect only applies to the 2 selected areas, here the face and a central part of the jacket (see below)
Note: the Rose paths disappear during the creation of the view with 3D Effect.
|
 |
|
Image 2D de Base |
Image with 3D Effect on selected areas (Oblique Projection) - an angle of +70° to the RIGHT - with an Oblique projection at 45° |
At this stage, it is a matter of configuring the inflation according to your needs, see the following section for more details
4) Applying 3D effect to selected areas
We will modify these parameters and put:
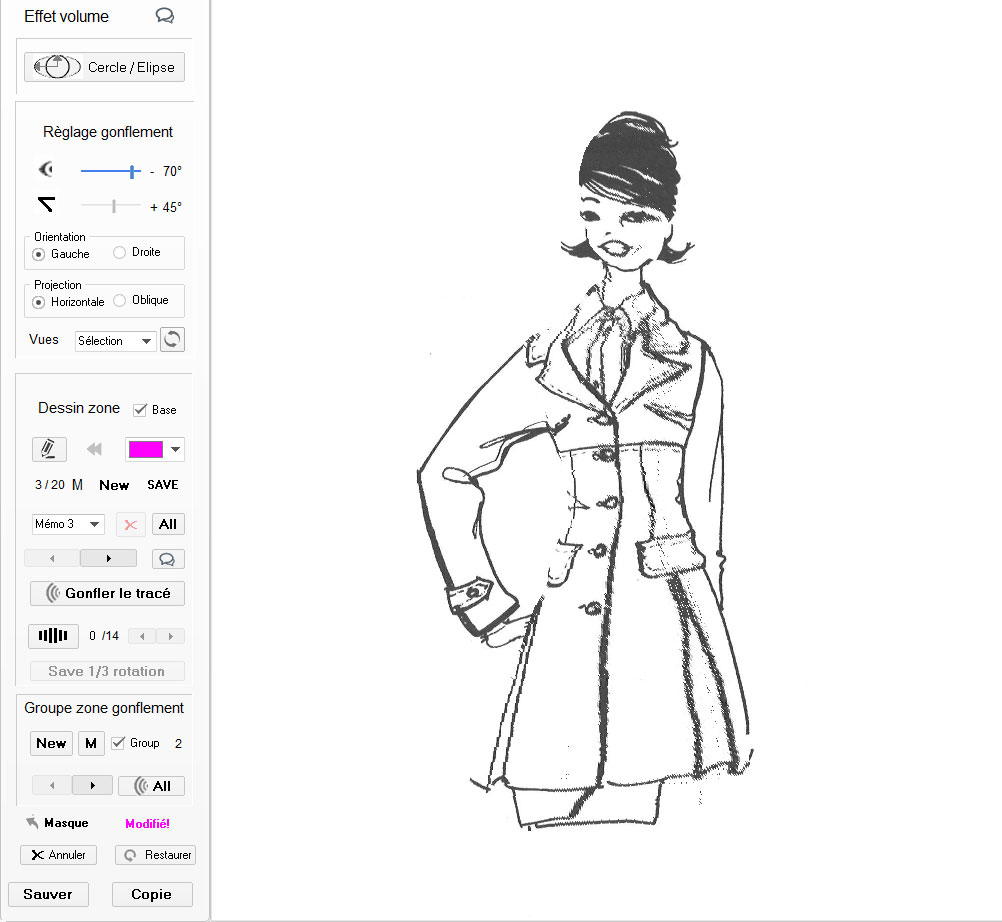
- an angle of +70° to the left
- with an Oblique projection at 45°
Two possible cases:
1) If we only had one plot selected, we could directly click on the button (Inflate Plot)
2) We have 2 plots in our group that can accept them (10 maximum), so we must click on the All button in order to apply the 3D effect
one after the other on the drawing, once click on the All button wait for the end of the construction of the final drawing with 3D effect.
Note: the 3D Effect only applies to the 2 selected areas, here the face and a central part of the jacket (see below)
Note: the Rose paths disappear during the creation of the view with 3D Effect.
|
 |
|
Basic 2D Image |
Image with 3D Effect on selected areas (Oblique Projection) - an angle of +70° to the left - with an Oblique projection at 45° |
Voir le vidéos YouTube
• Tracer de zone puis effet 3D sur image 2D et assemblage scrapbooking sous PERSPECTIVE 2024 v1
• Création d'un effet 3D sur un dessin 2D avec PERSPECTIVE 2024
• Création d'un StrapBooking avec PERSPECTIVE 2024
• Création d'une rotation de -60° à +60° soit 120° sur un dessin 2D avec PERSPECTIVE 2024
• Effet 3D sur plusieurs groupes de zones d'un dessin 2D
")
")

")