


 Mail non identifié ou déjà supprimé!
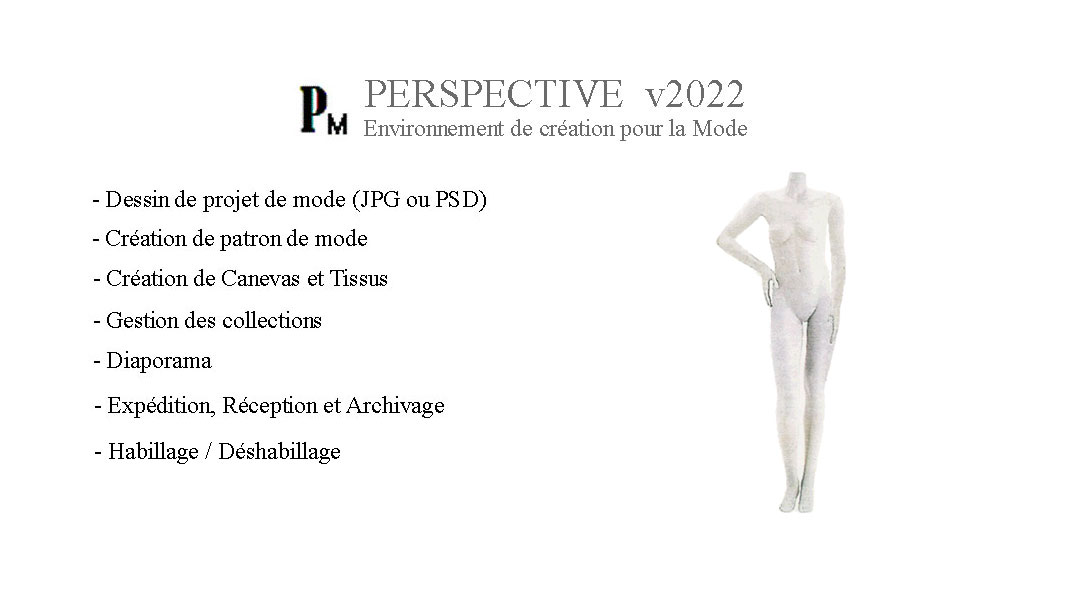
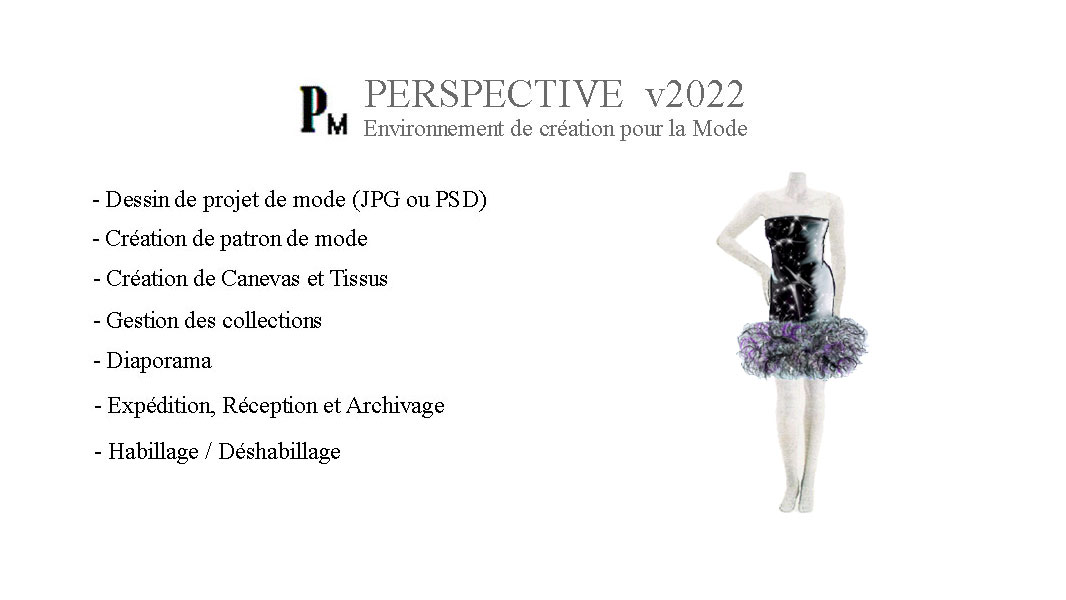
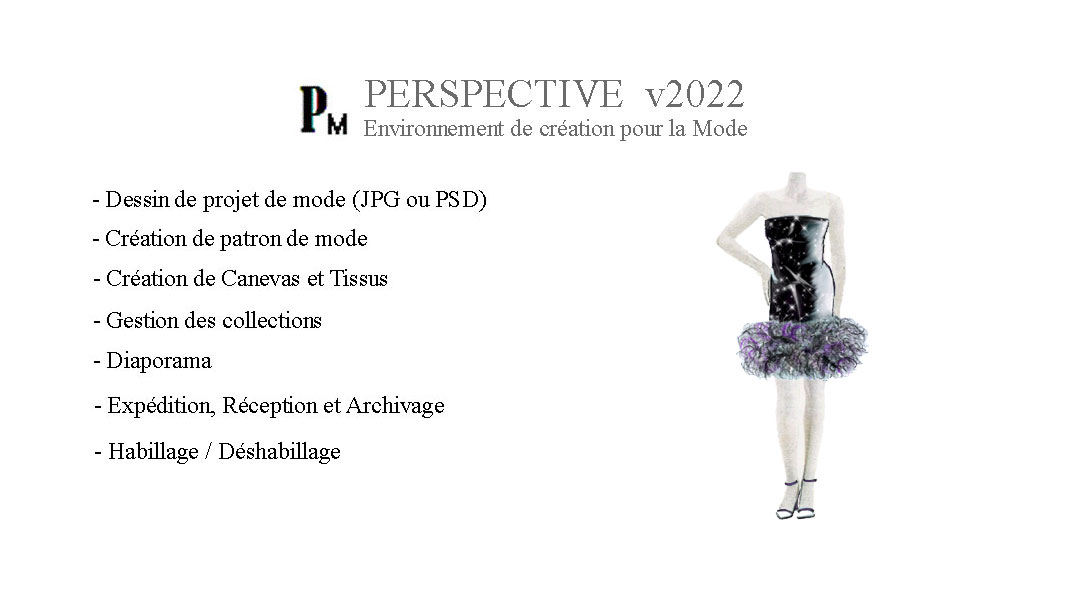
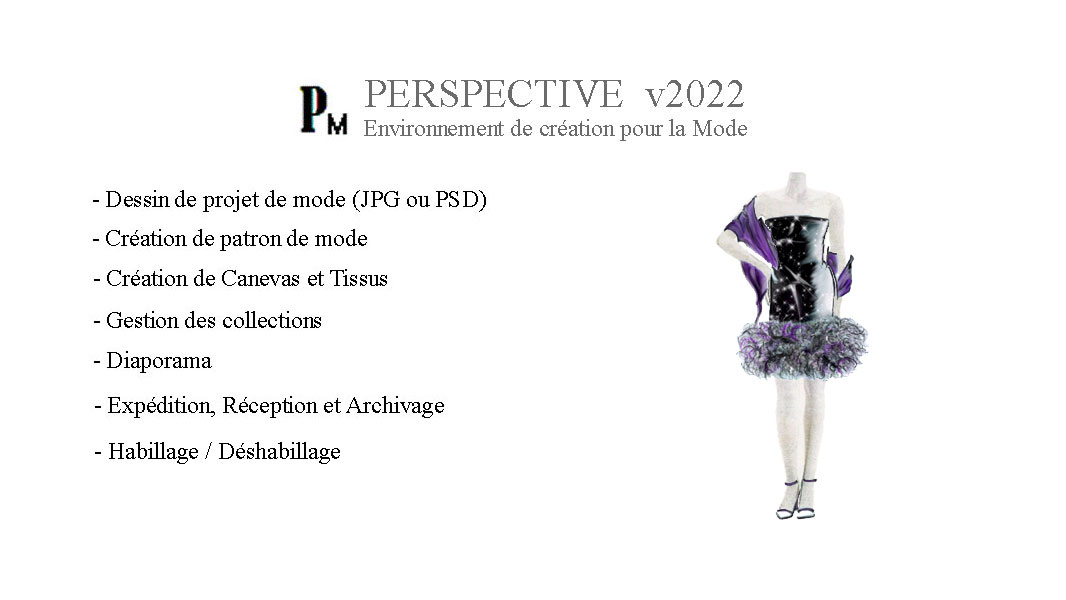
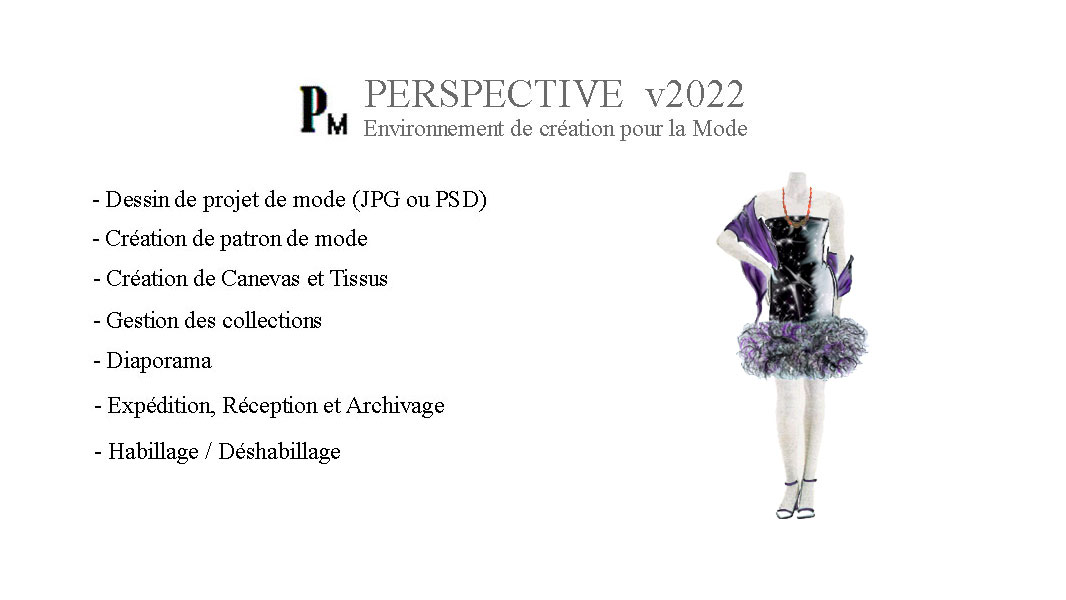
L'outil de création des Habillages / Déshabillages
Création des habillages:
Cet outil est utilisé pour créer des habillages de modèles
Pour Perspective, un habillage c’est l’assemblage d’un mannequin de vêtements et d’accessoires.
VISION est composé de 3 outils distincts :
- 1 outil permettant la création des habillages.
- 1 outil permettant de modifier les habillages déjà créés.
- 1 outil permettant une visualisation grand format des habillages créés.
Cette version de VISION, permet des habillages à 9 éléments maximum soit :
- 1 mannequin
- 8 (vêtements et accessoires)
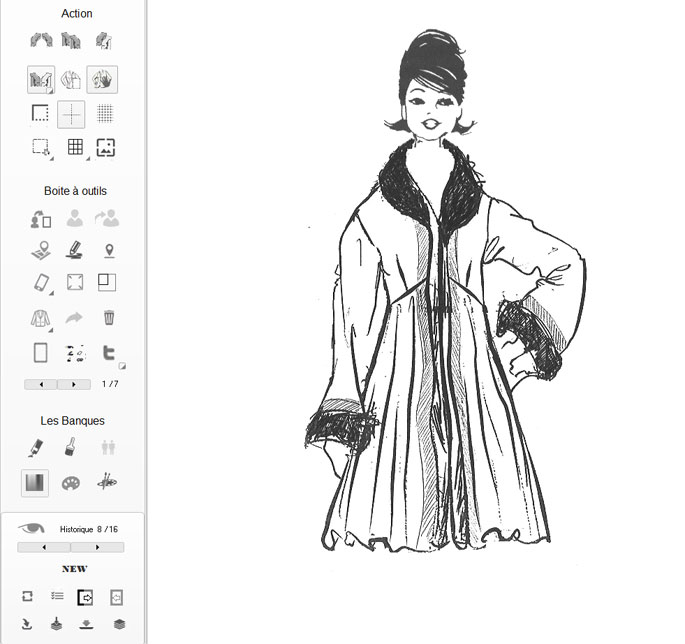
Interface de l'outil d'habillages :
Pour créer un nouvel habillage, procéder comme ceci:
En (1) clique sue le bouton NEW pour initialiser un nouvel habillage
En (2) sélectionner le type de mannequin (Homme, Femme ou enfant) ici Femme pour l'exemple.
En (3) parcourir la liste des mannequins que vous avez créés selon le type sélectionné.
En (4) non obligatoire, on peut agrandir le mannequin pendant sa sélection.
En (5) une fois la sélection faite (ici un mannequin Femme) on clique sur Mannequin pour le sélectionner avant l'enregistrement initial de l'habillage en cours de création.

Modification d'un habillage (déshabillage)
Cet outil est utilisé pour modifier un habillage déjà créé.
Rappel : VISION 8.1 permet des habillages à 9 éléments maximum soit :
- 1 mannequin
- 8 (vêtements et accessoires)
Note : la version 8.1 de VISION permet à présent de modifier l'ordre des éléments inclus dans un habillage par un Glisser / Déposer dans la liste des éléments le constituant.
Interface de l'outil de déshabillage :
Pour modifier un habillage, procéder comme ceci:
En (1) cliquer sur l'onglet déshabillage afin d'entrer dans l'outil de déshabillage.
En (2) sélectionner le l'habillage qui doit être modifier (ici Habillage test 2017)
En (3) cliquer sur Rappel de l'habillage ou double cliquer sur (2).


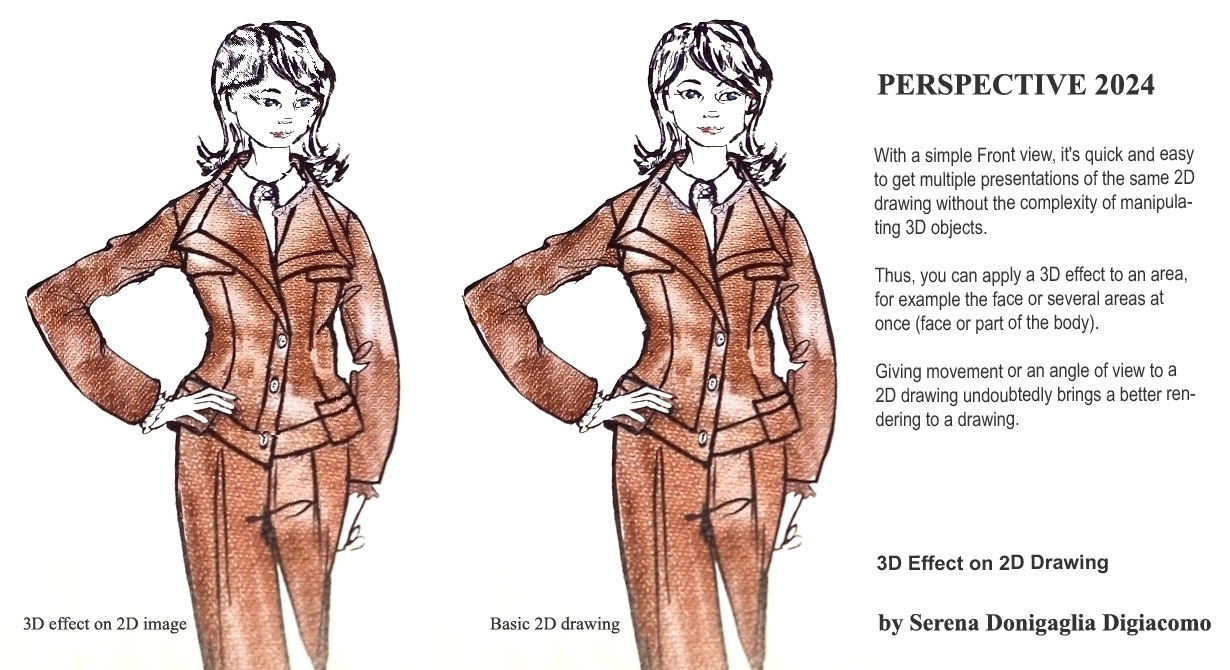
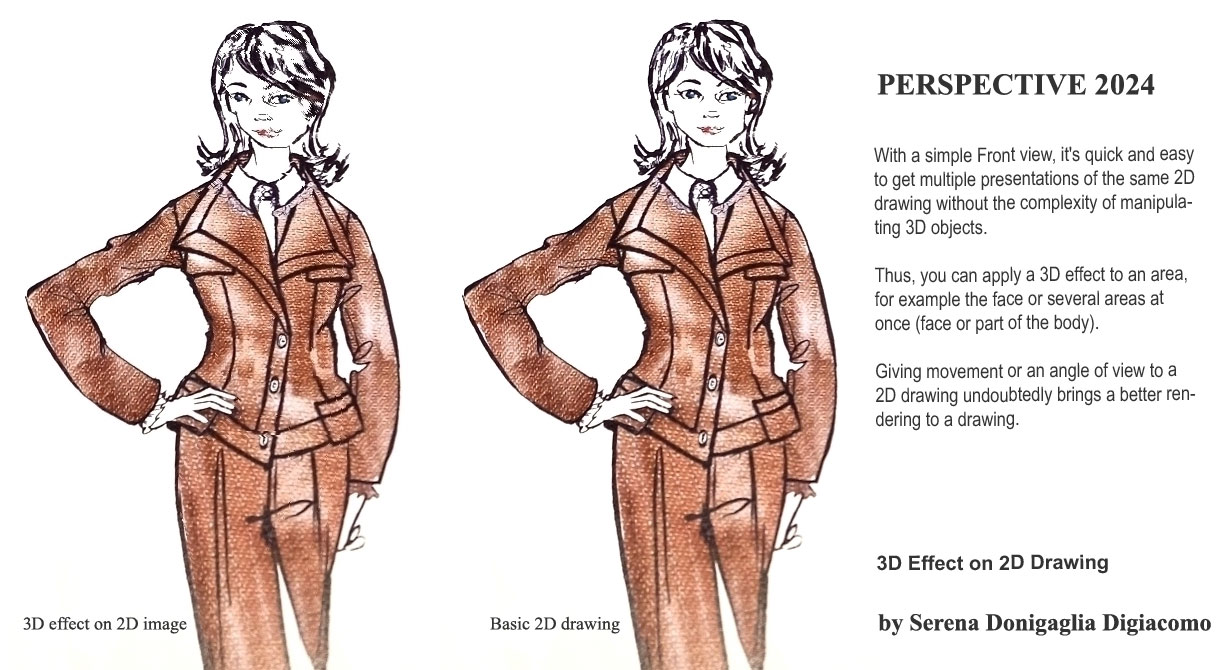
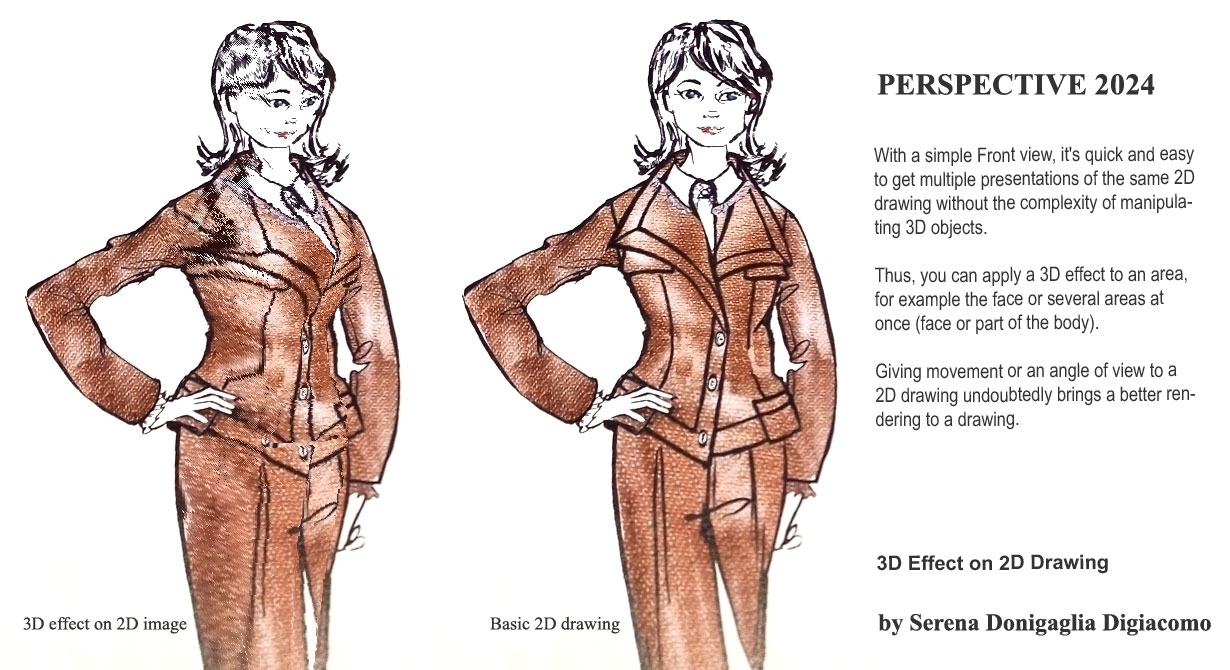
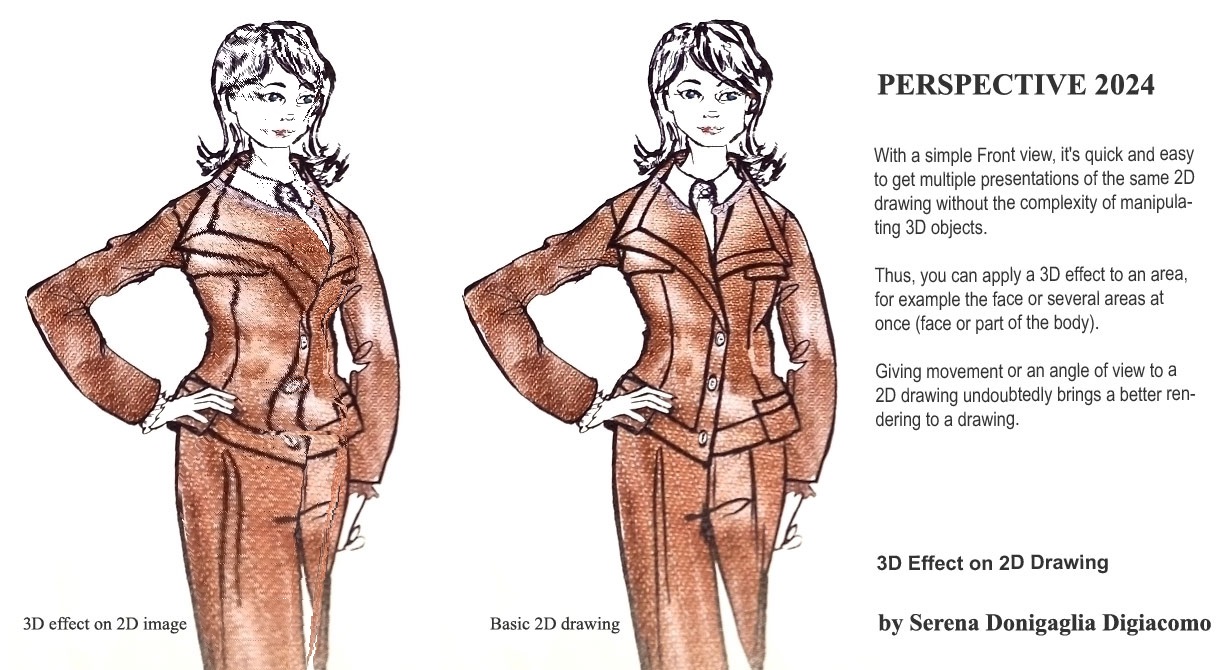
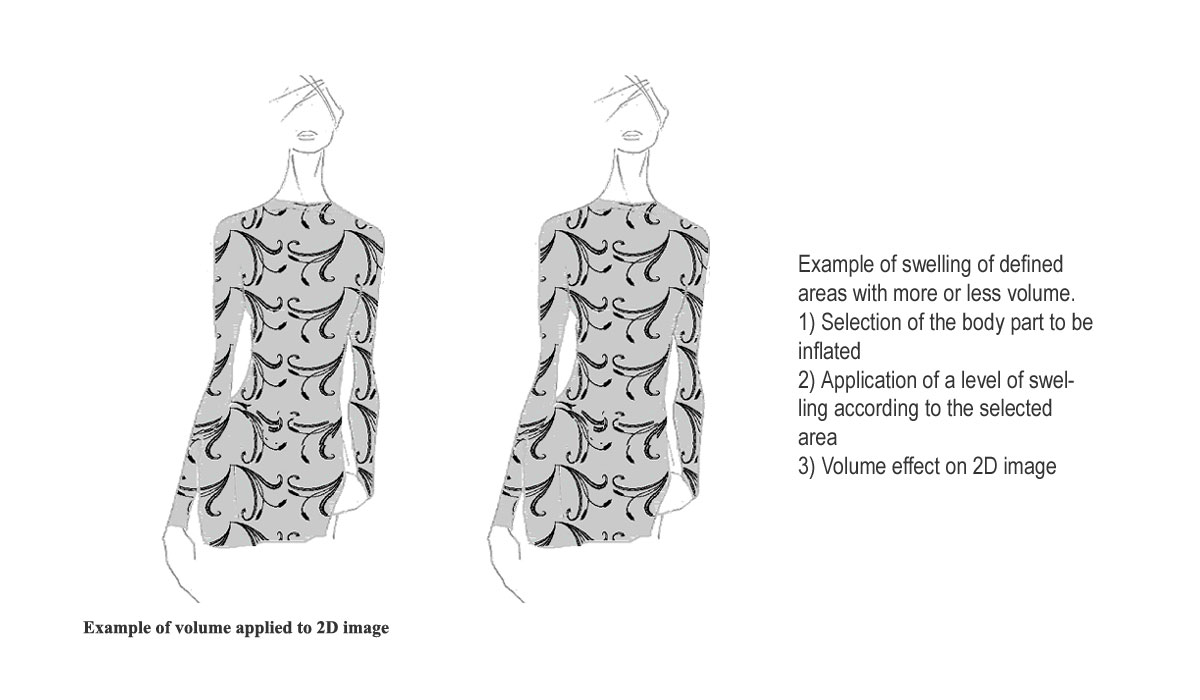
• Exemple d'Habillage dans VISION
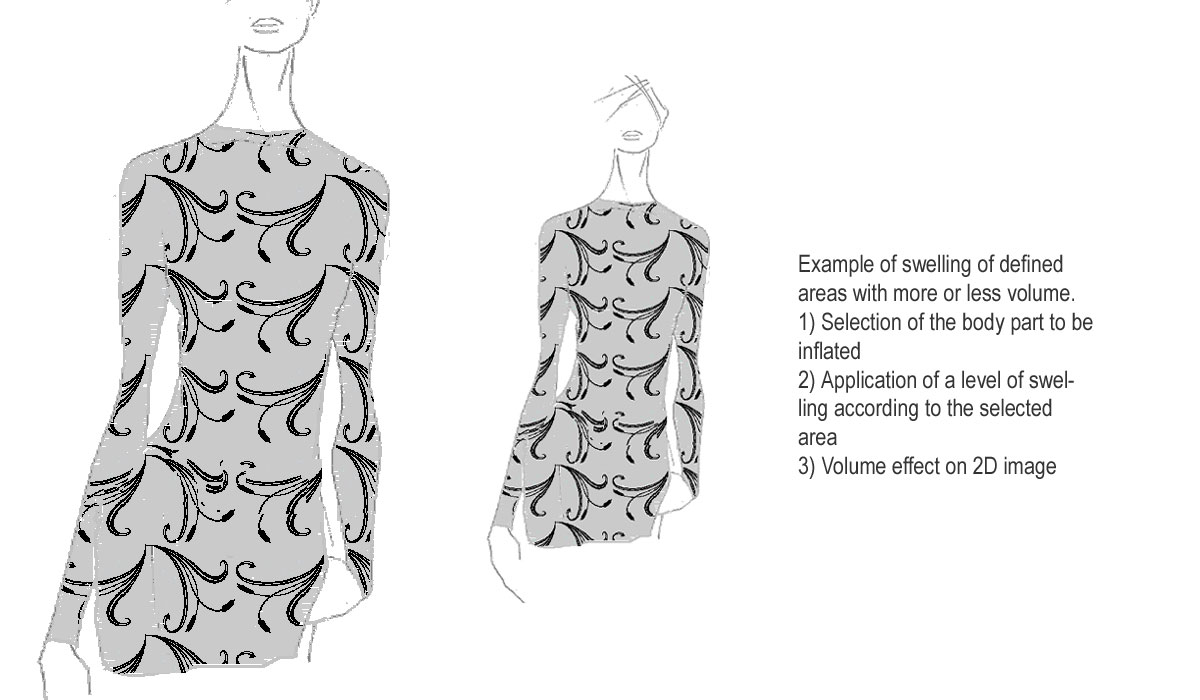
• Exemple 1 d'un déshabillage dans VISION
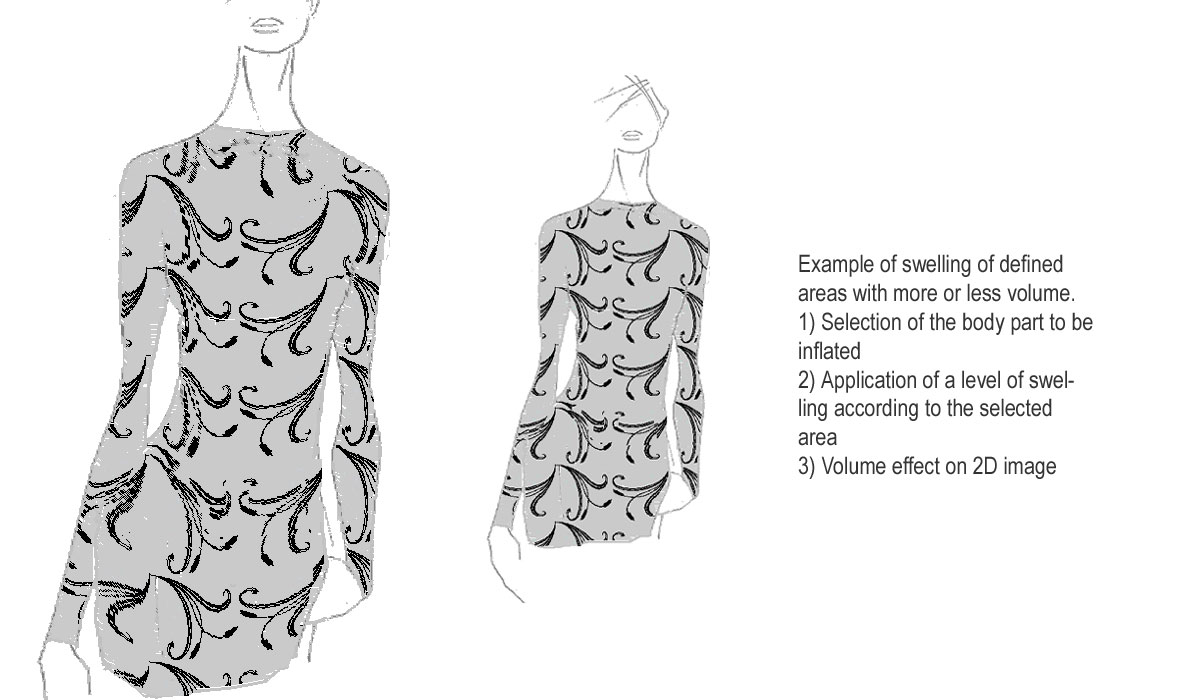
• Exemple 2 d'un déshabillage dans VISION
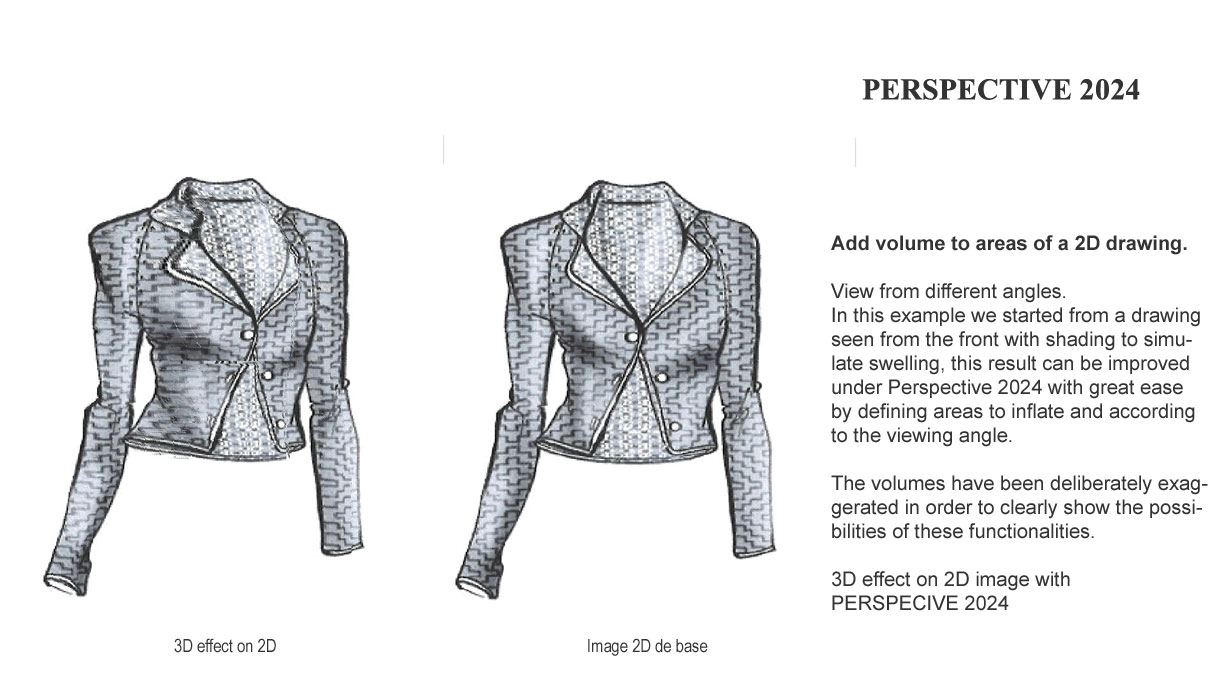
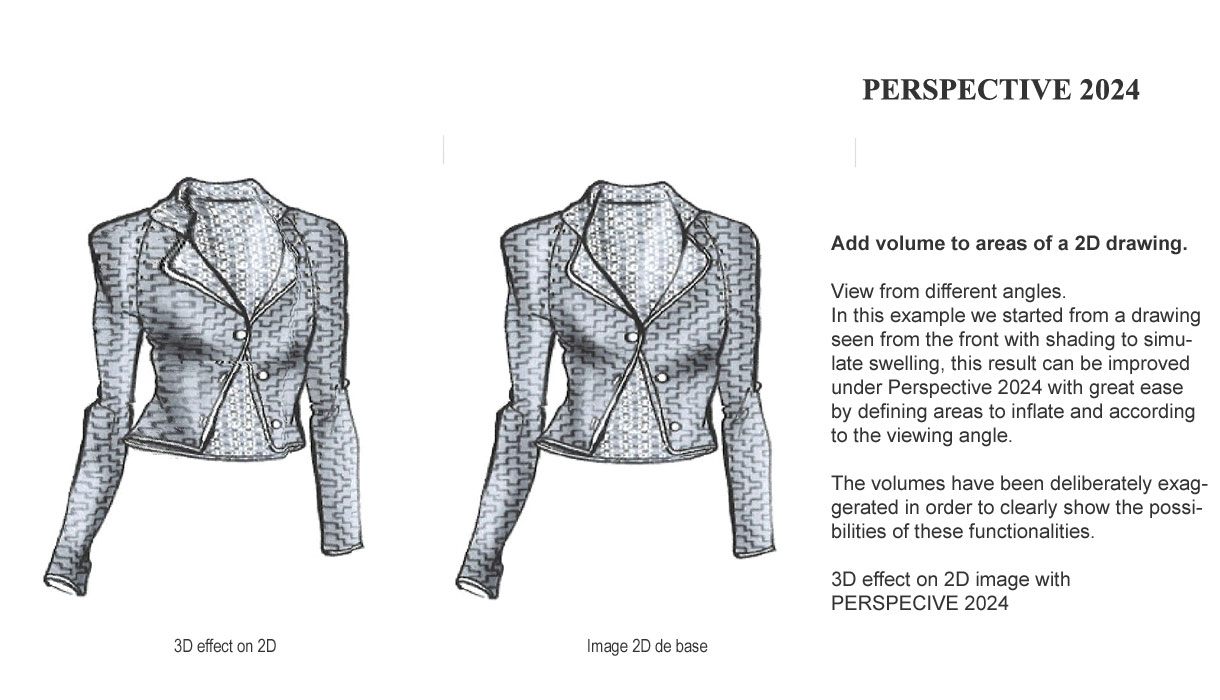
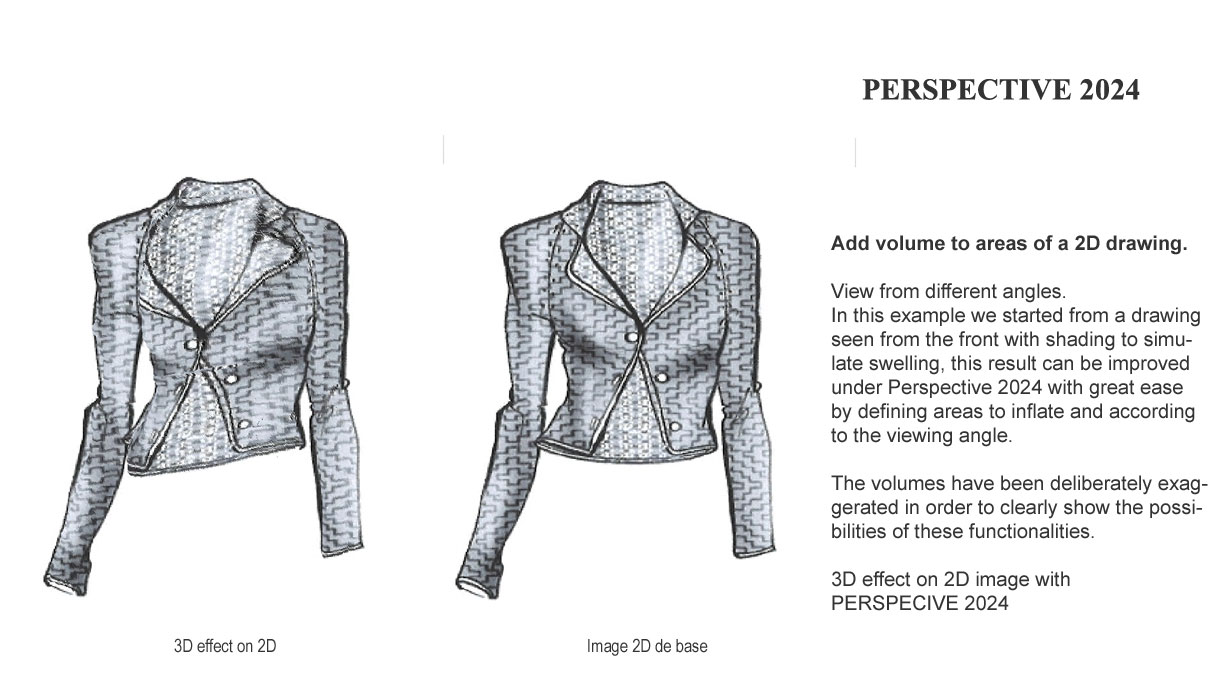
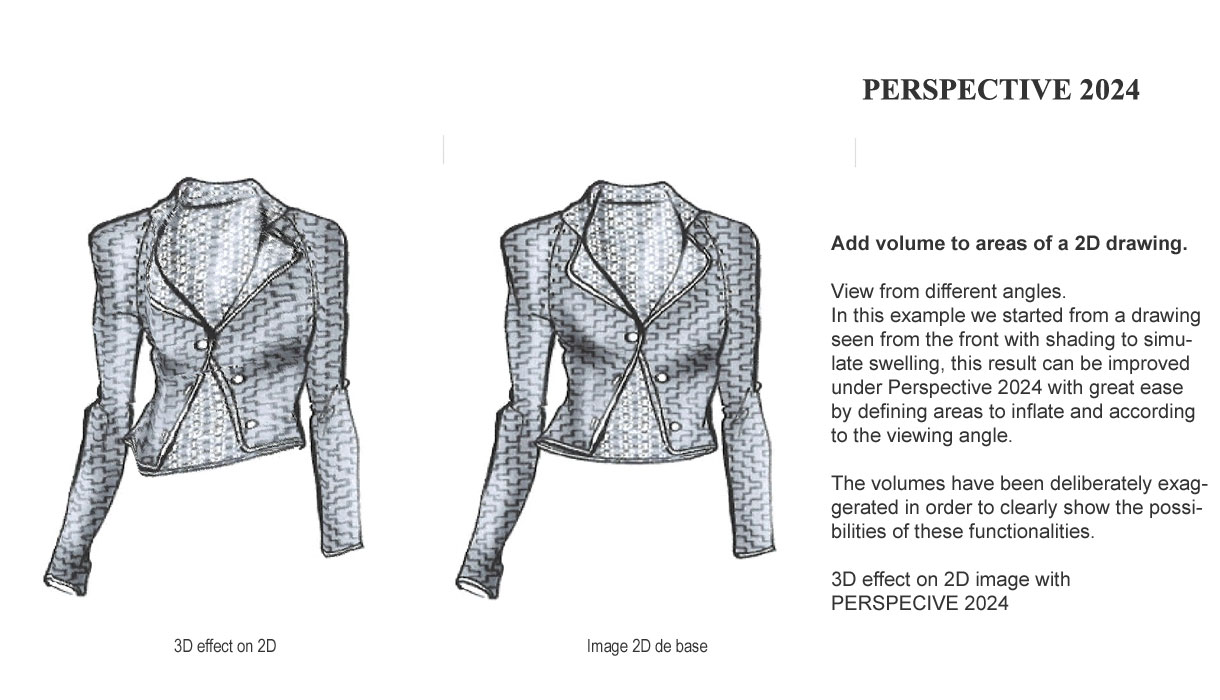
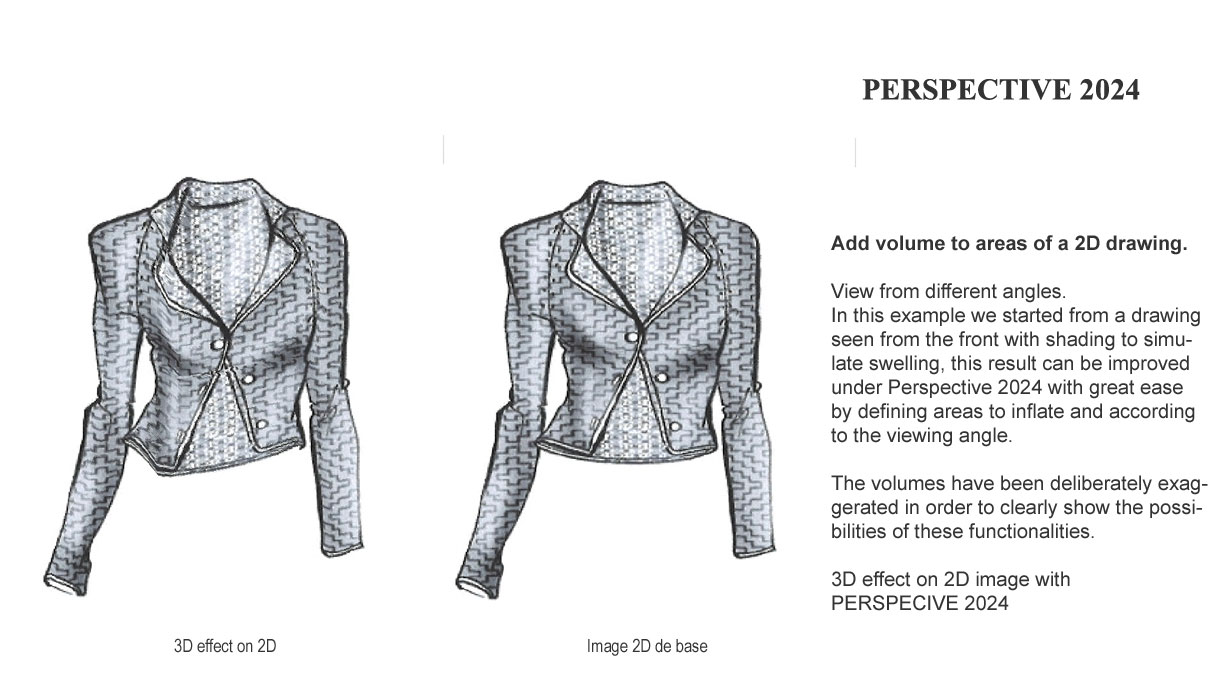
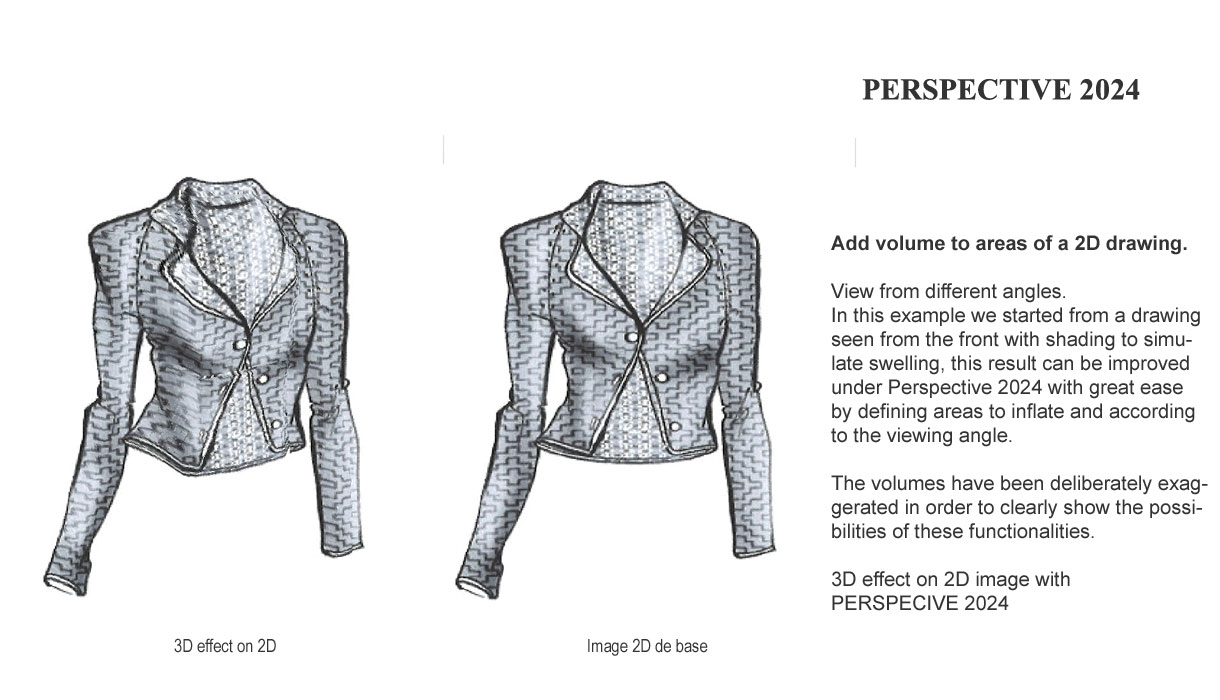
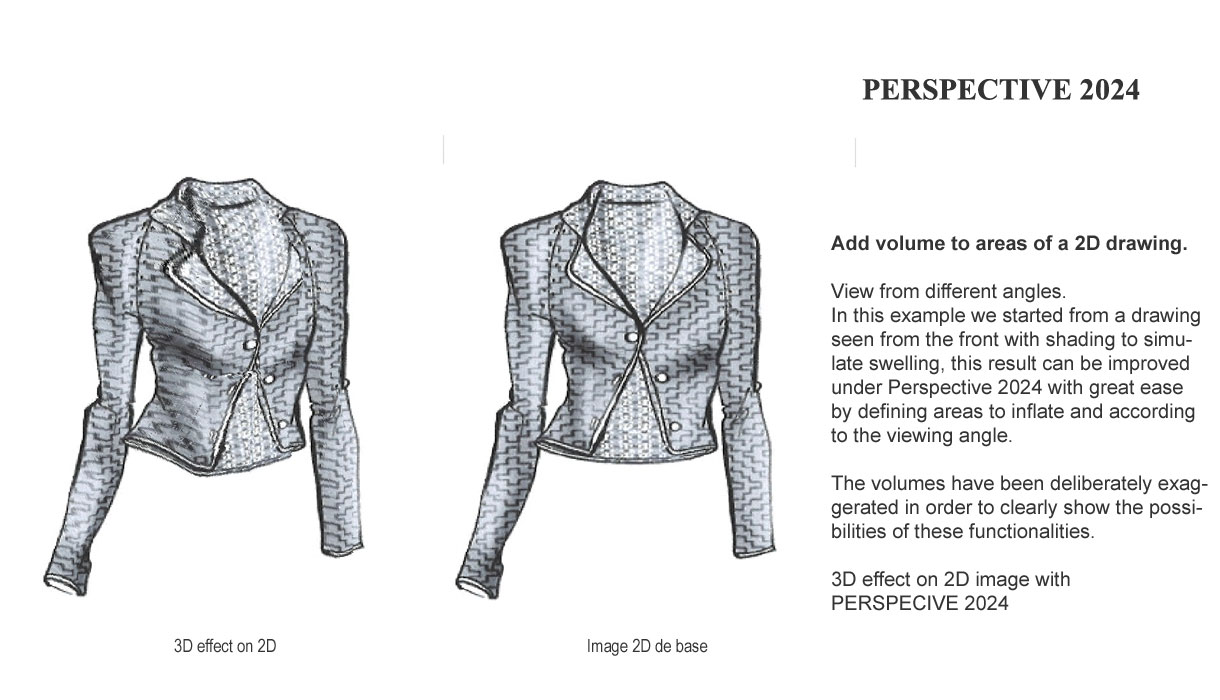
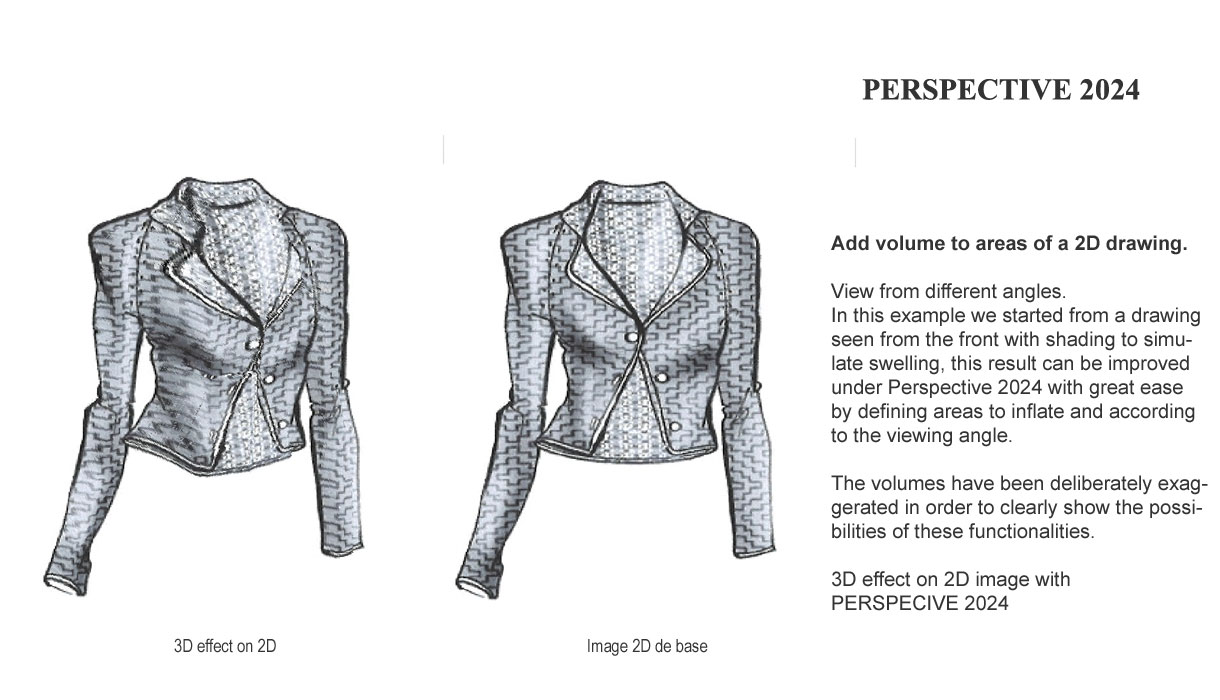
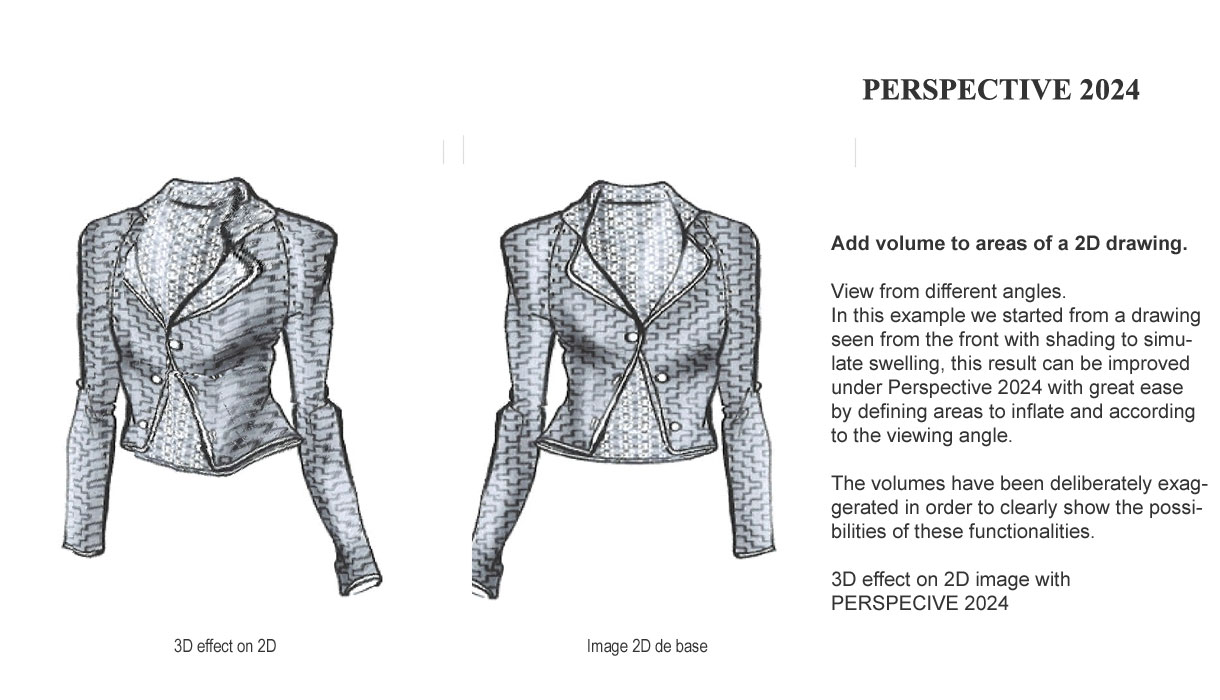
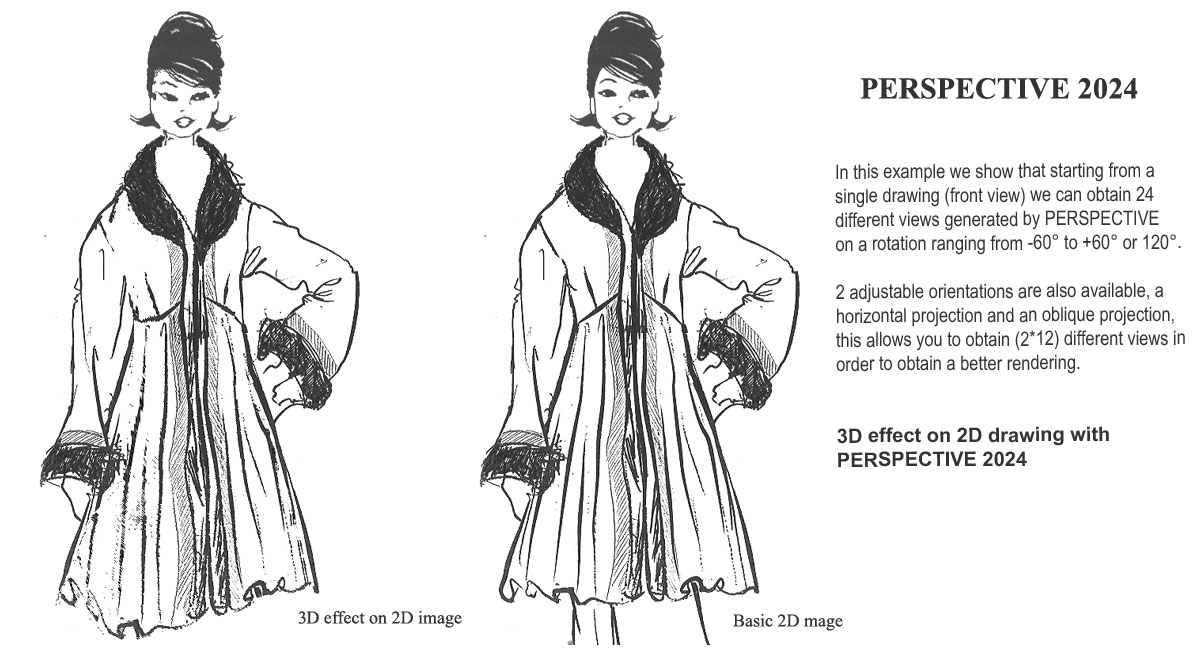
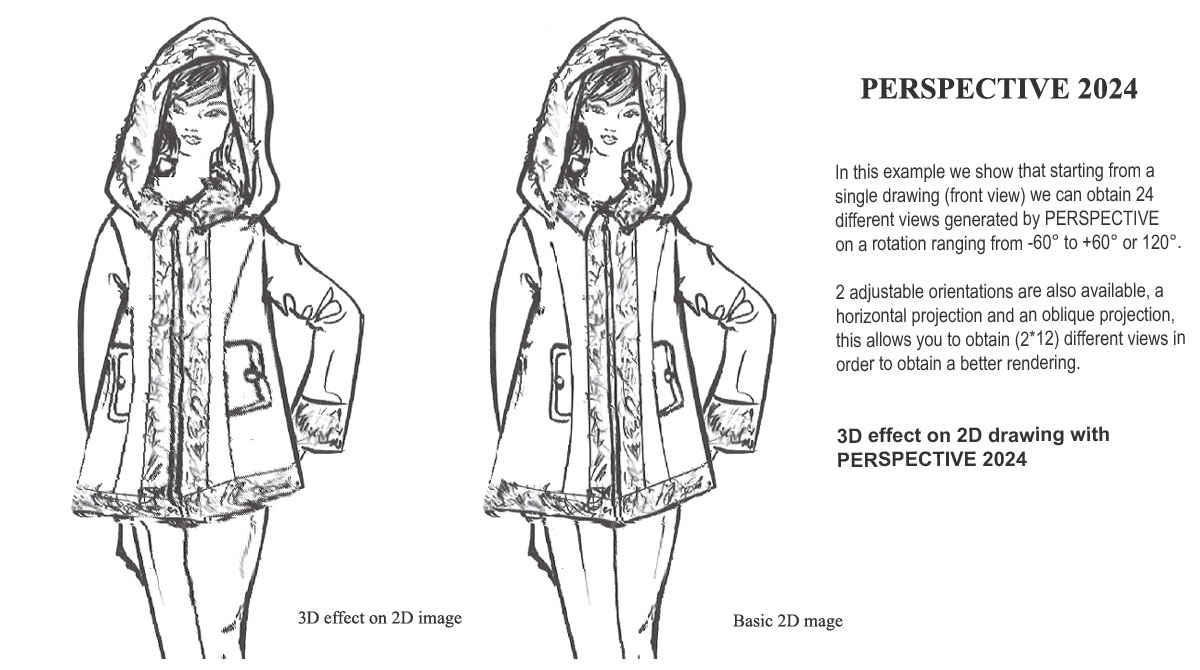
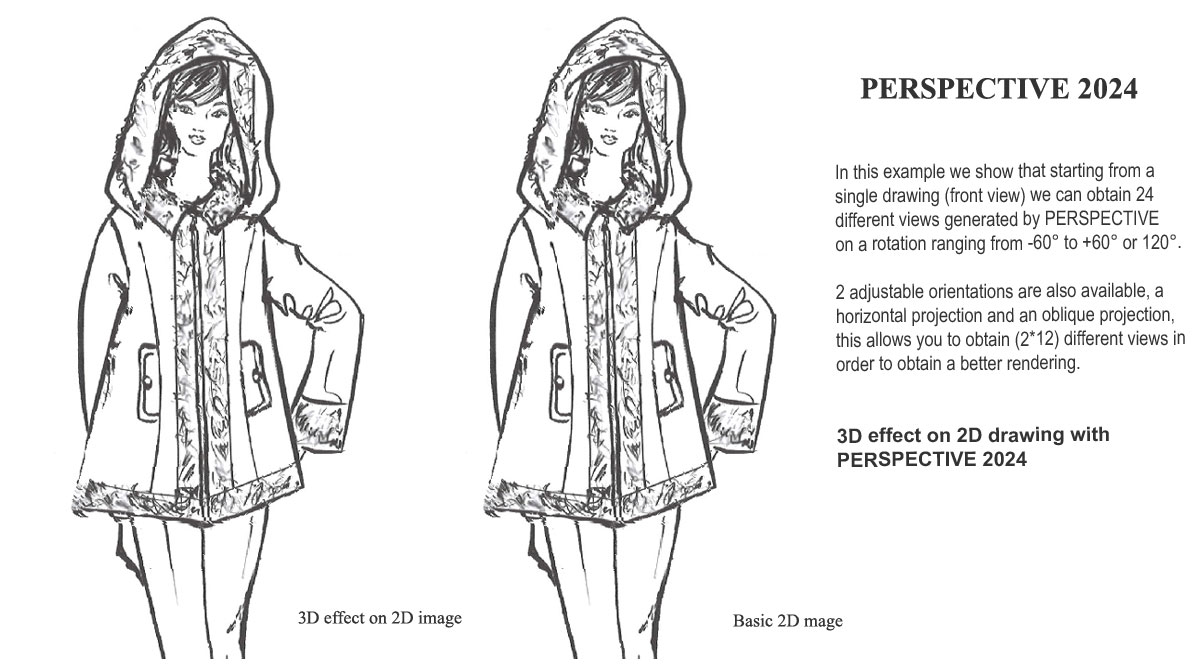
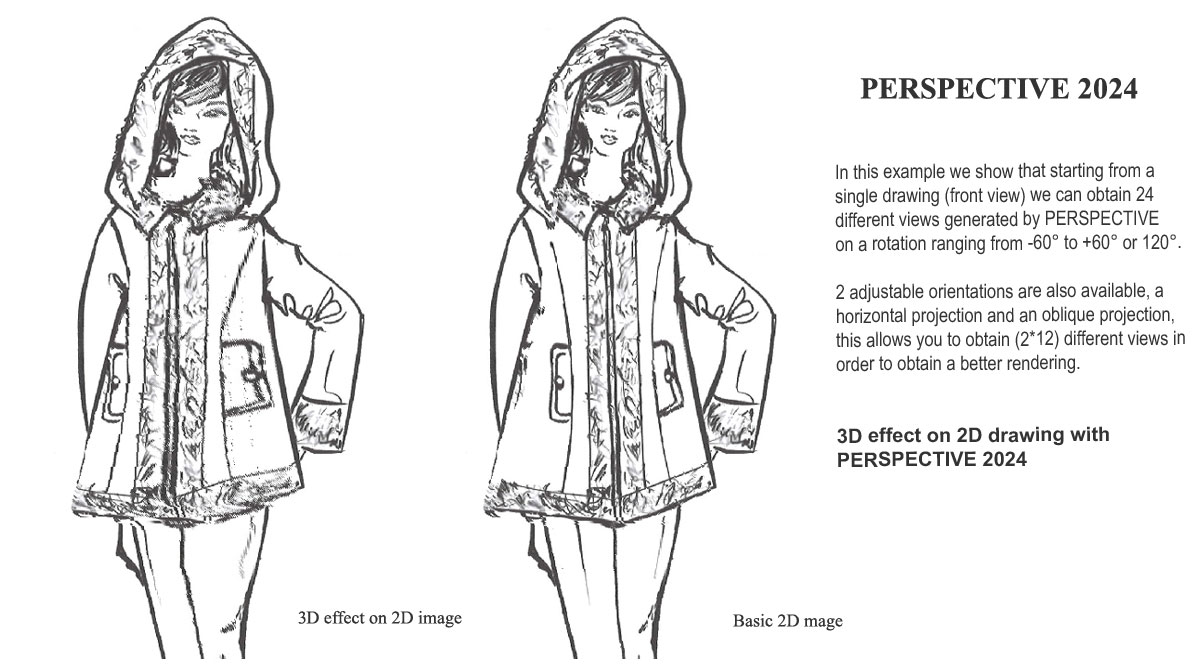
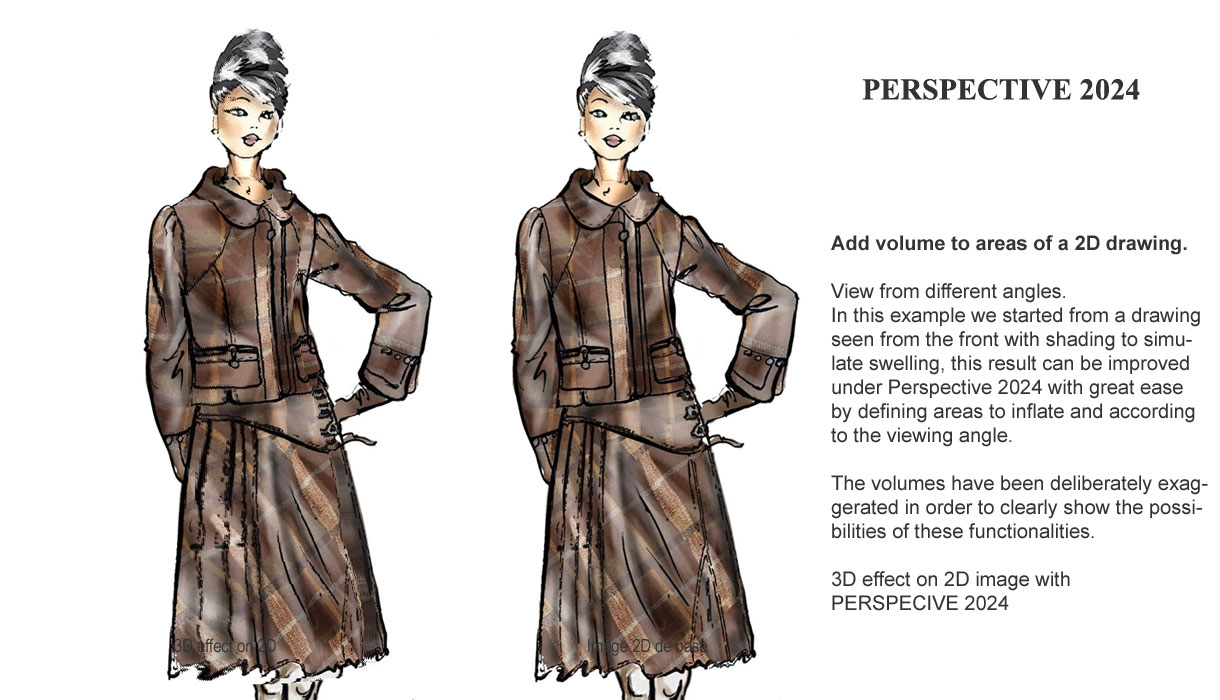
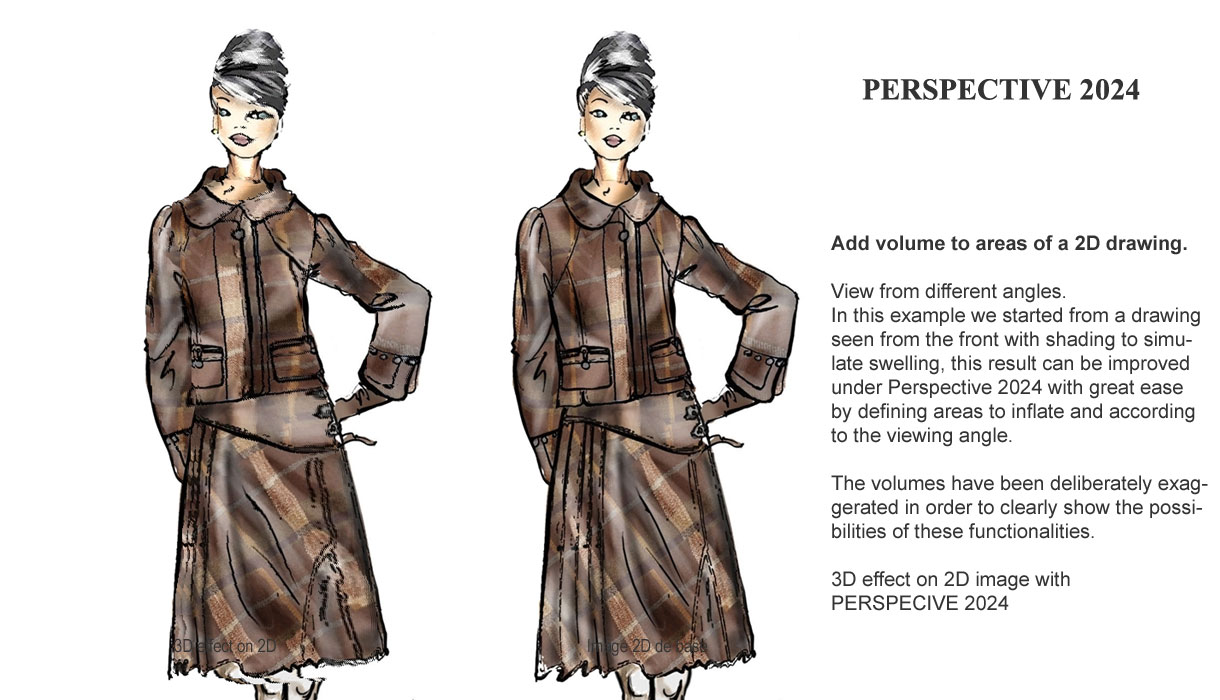
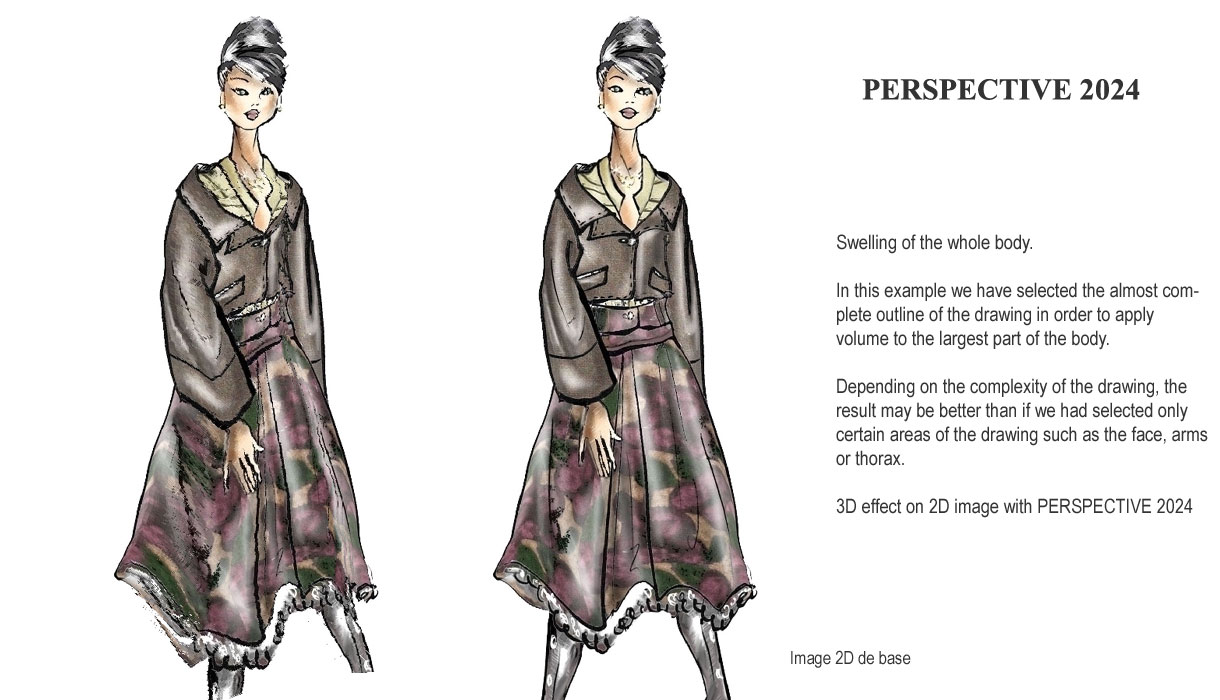
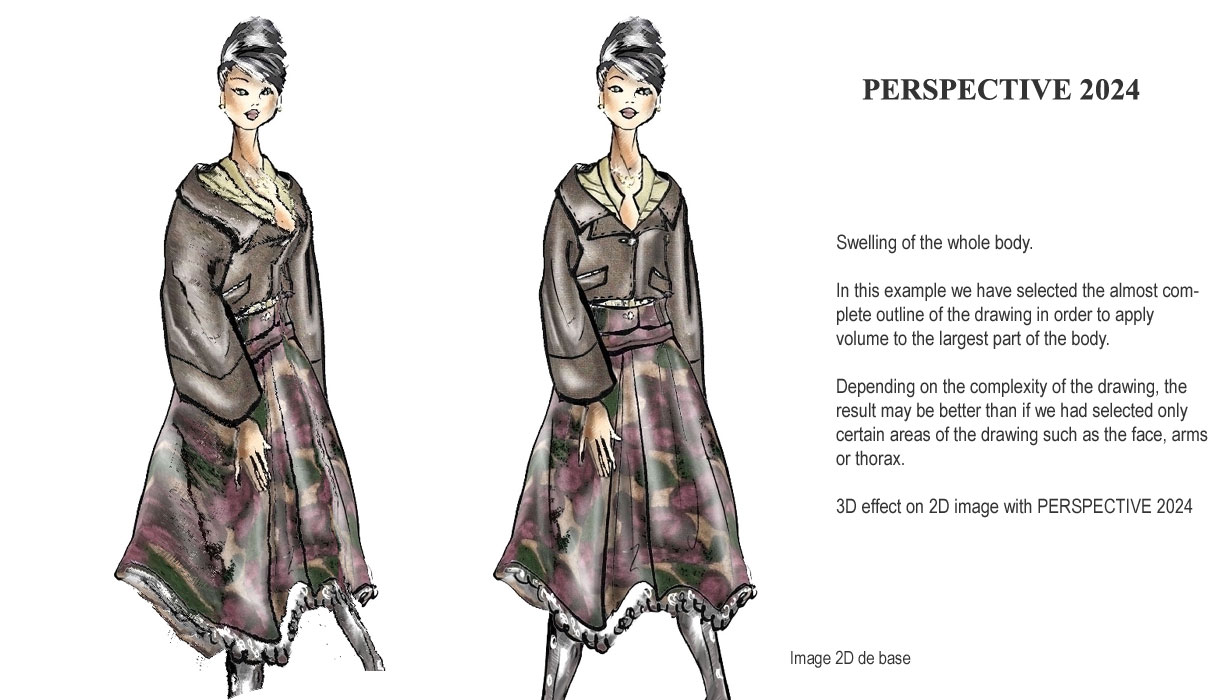
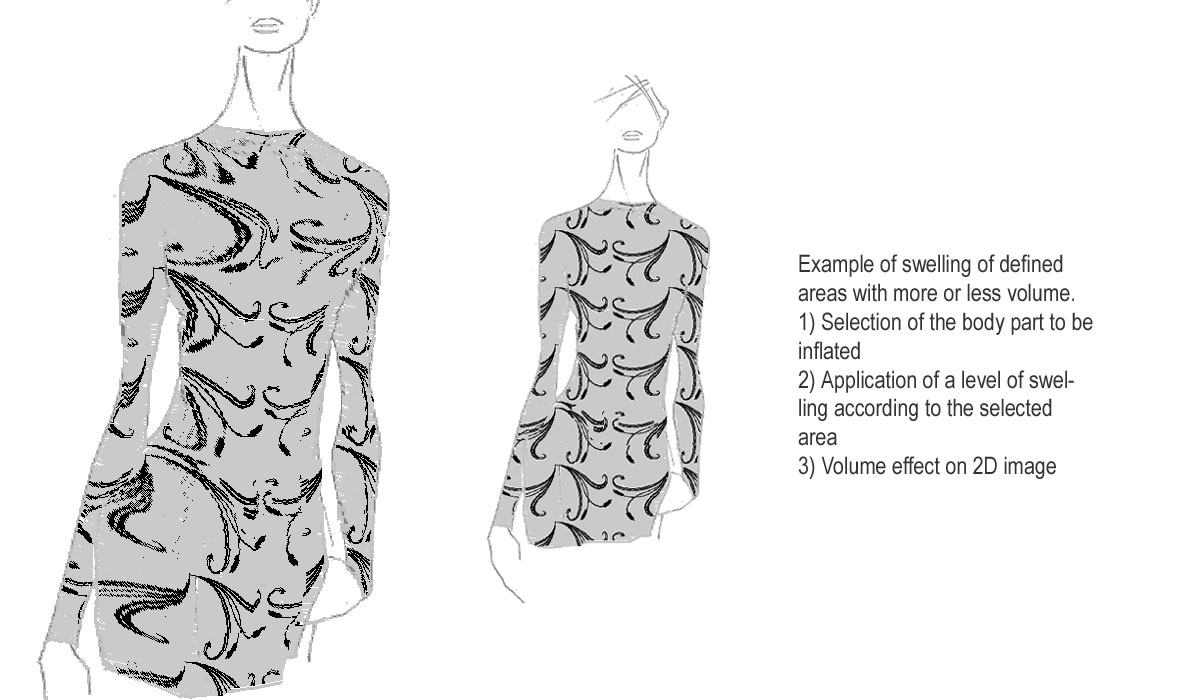
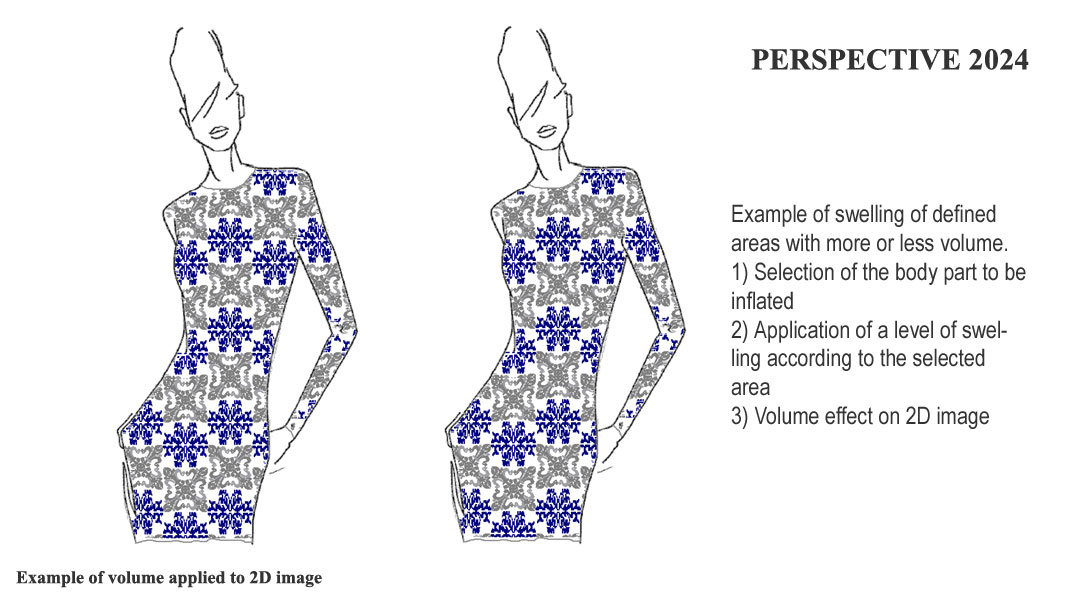
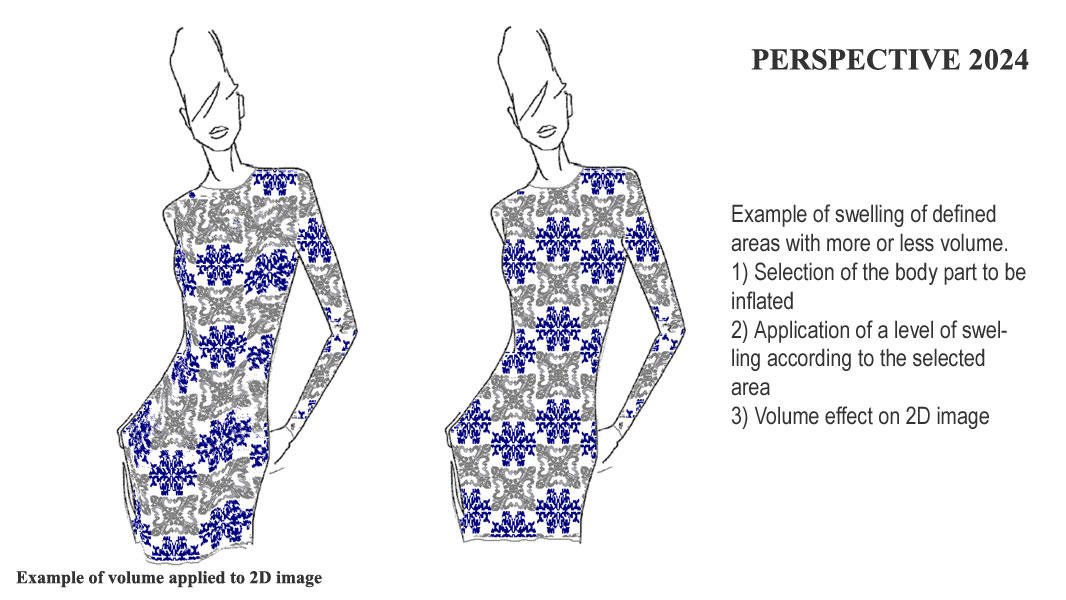
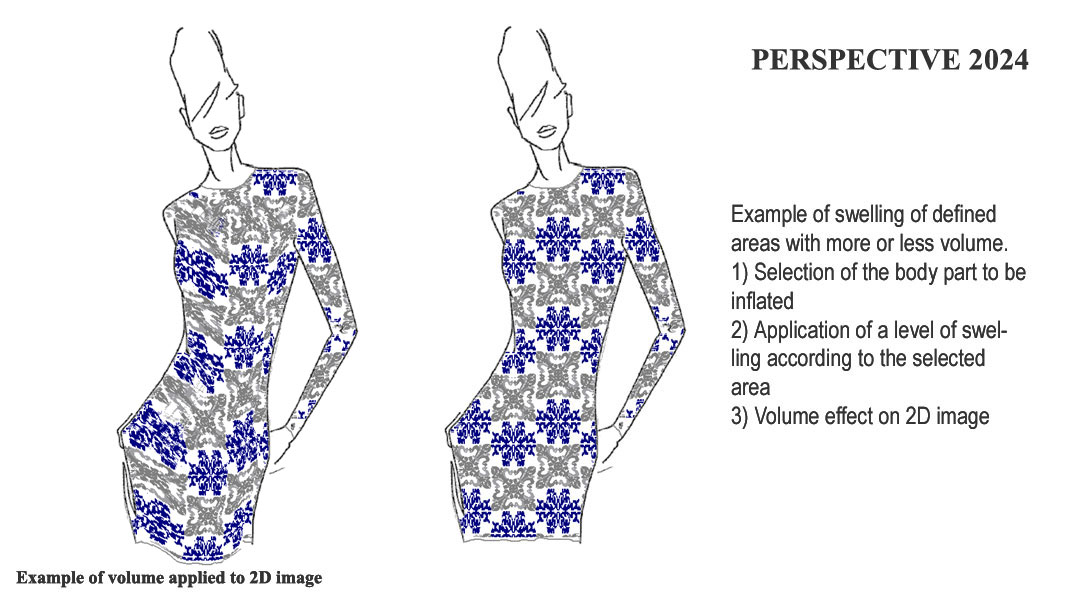
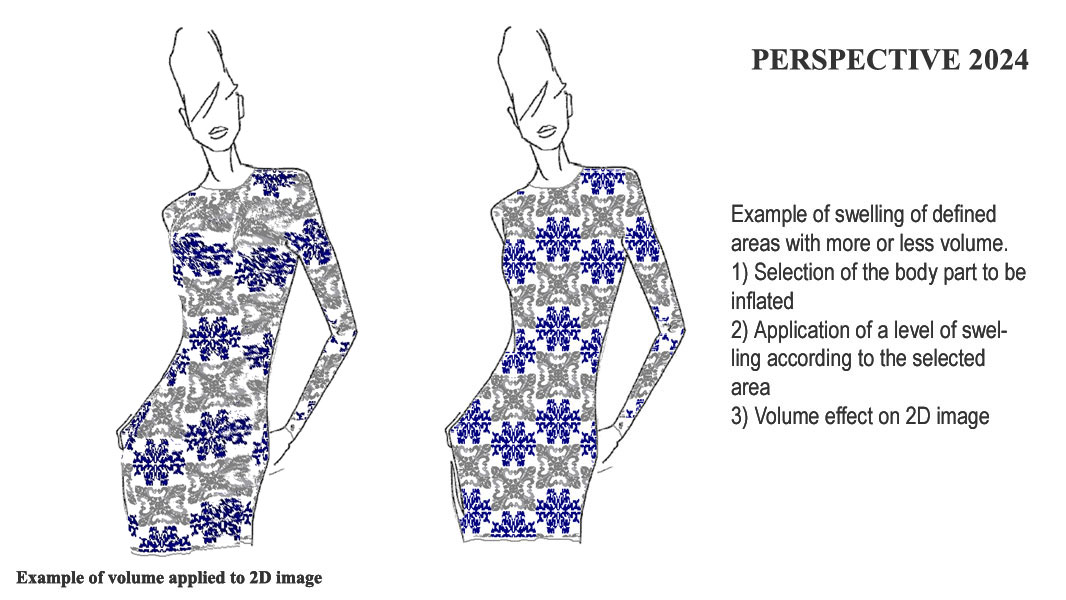
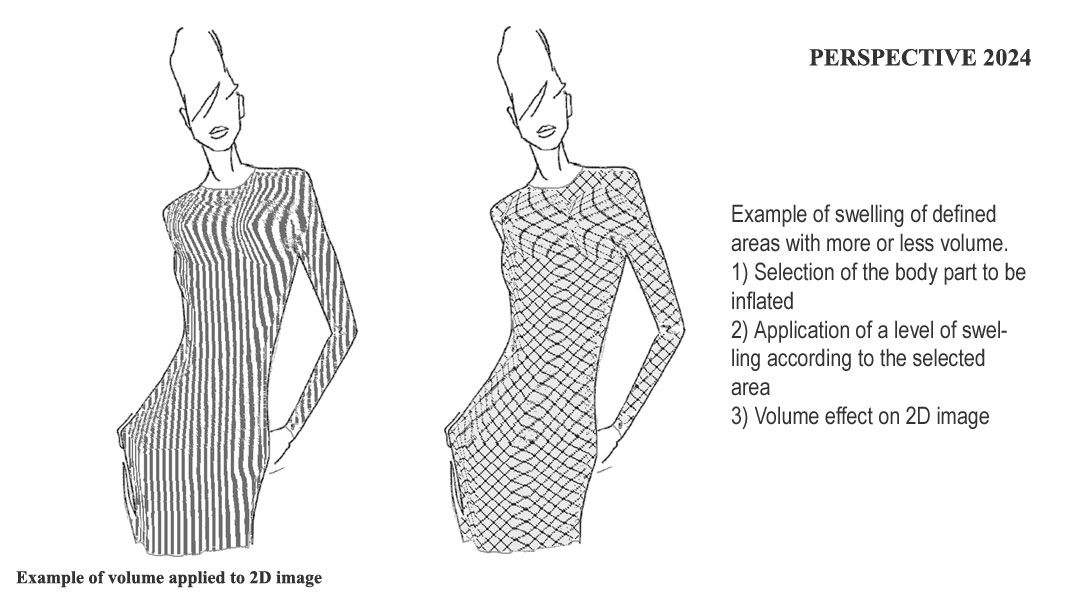
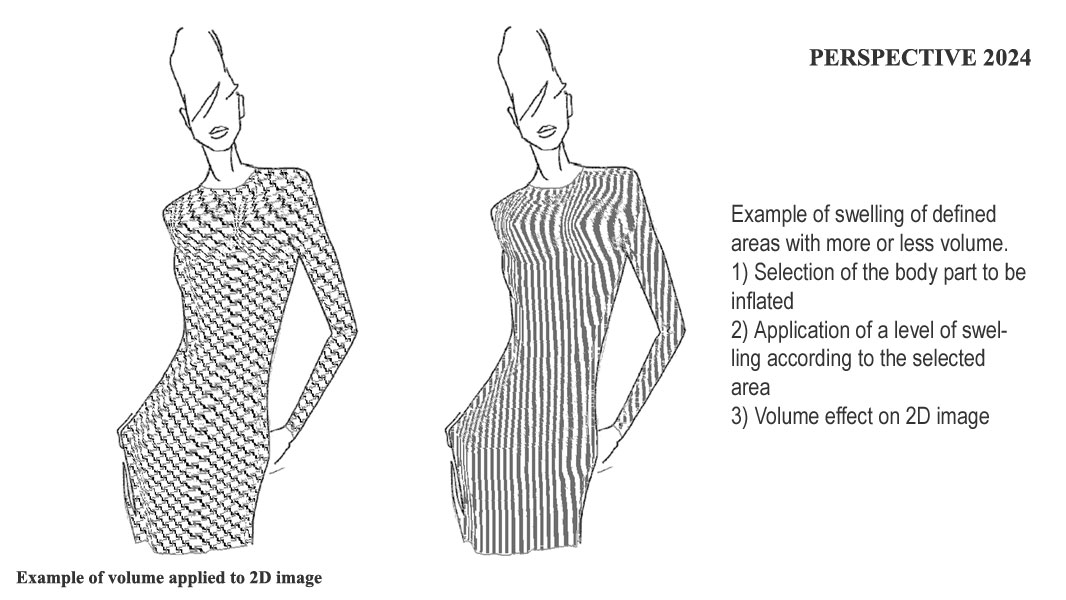
Modification 2 of inflation parameters
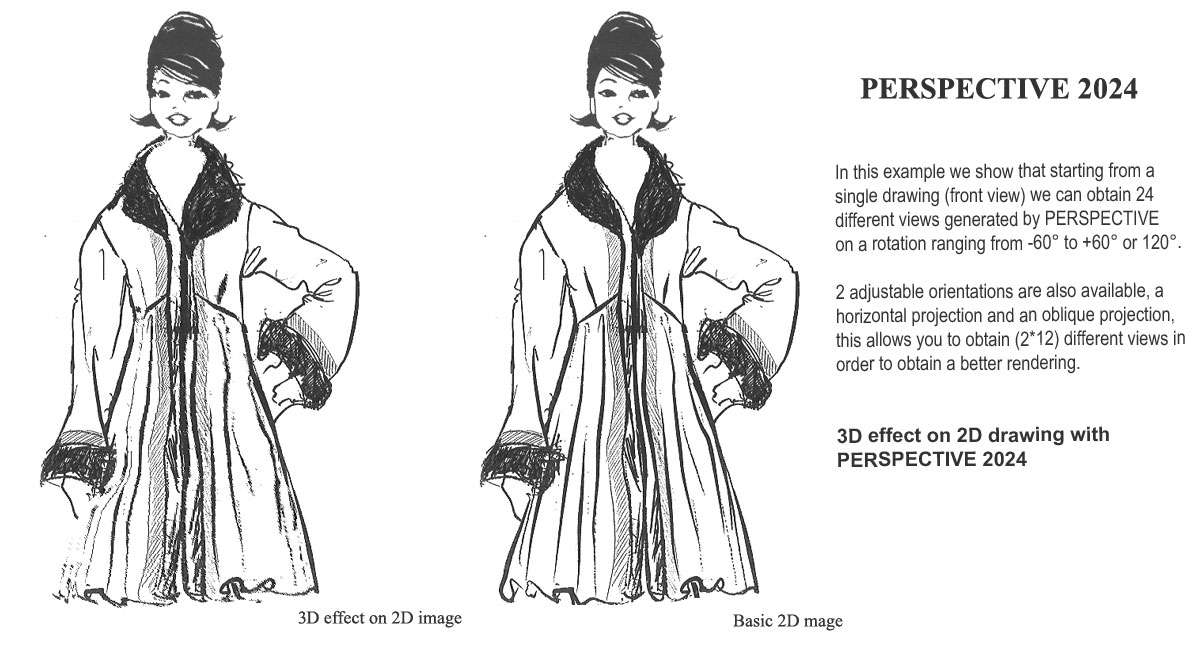
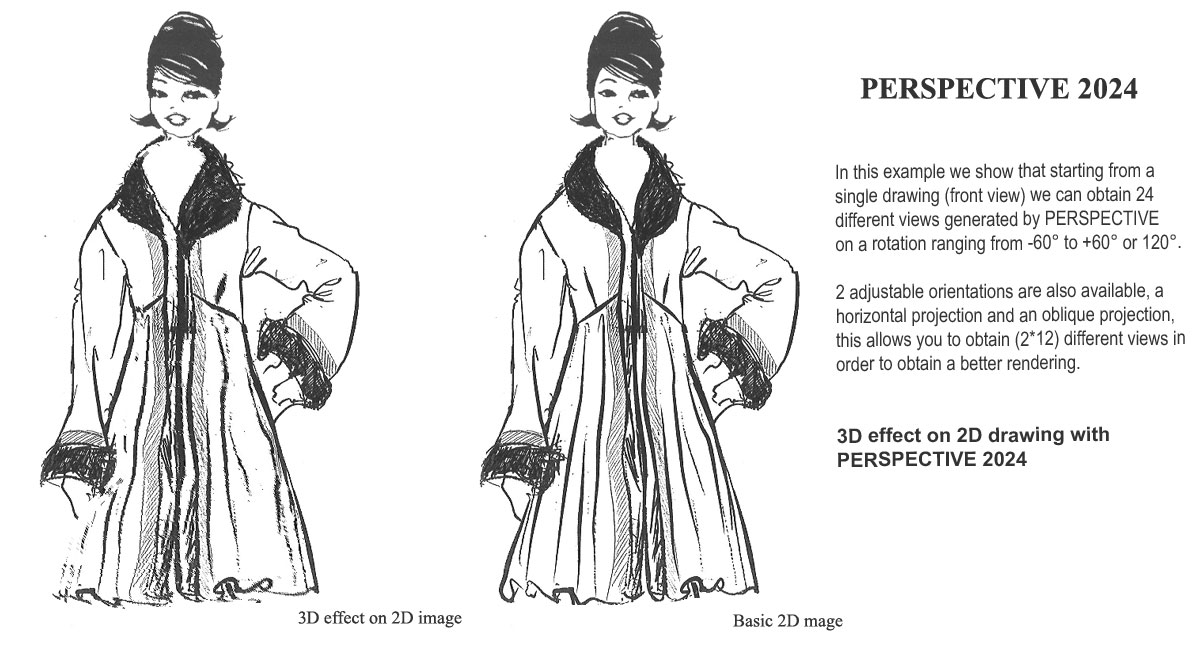
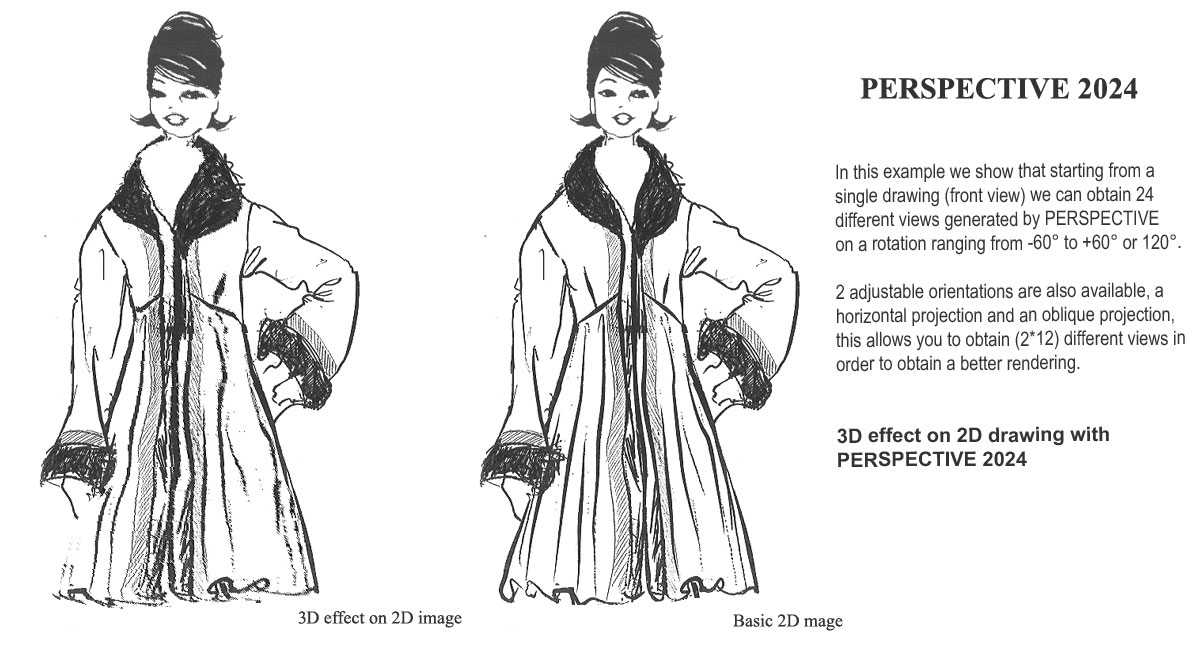
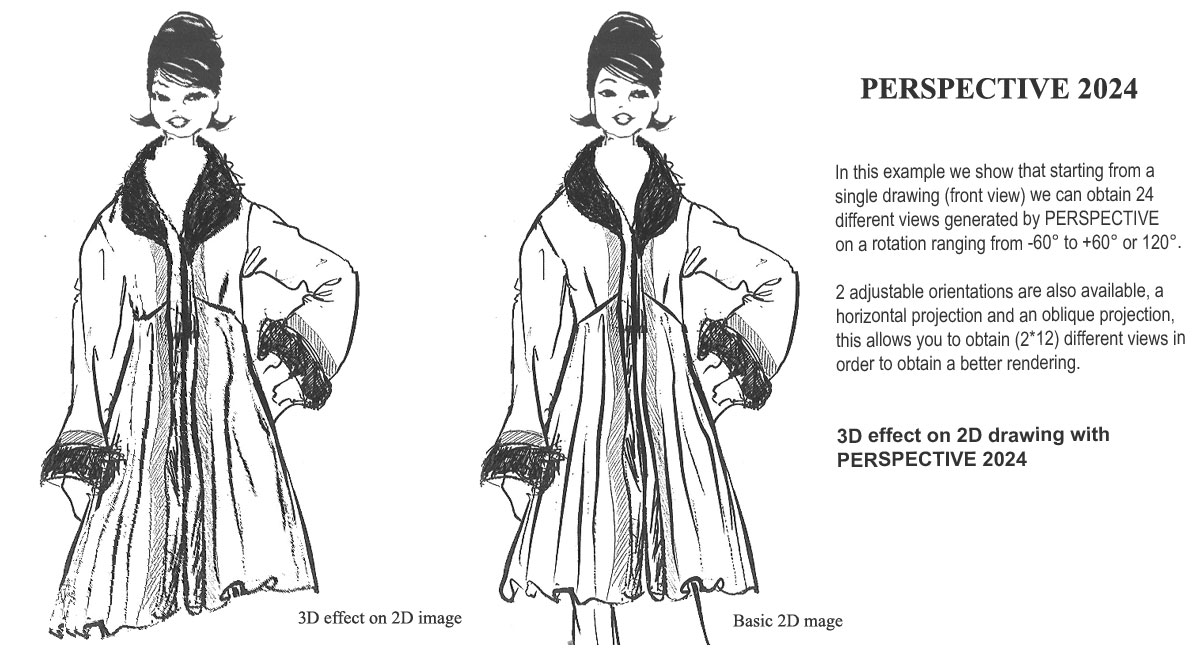
What to start with:
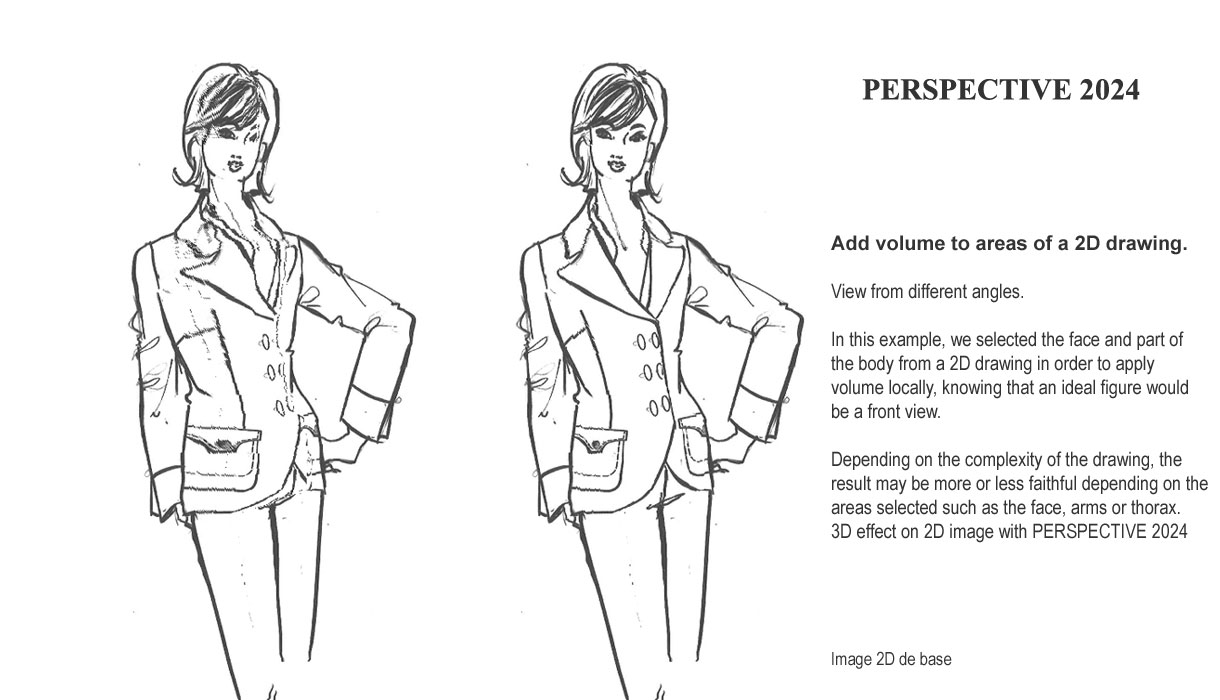
1) Select the drawing from the bank of already created drawings
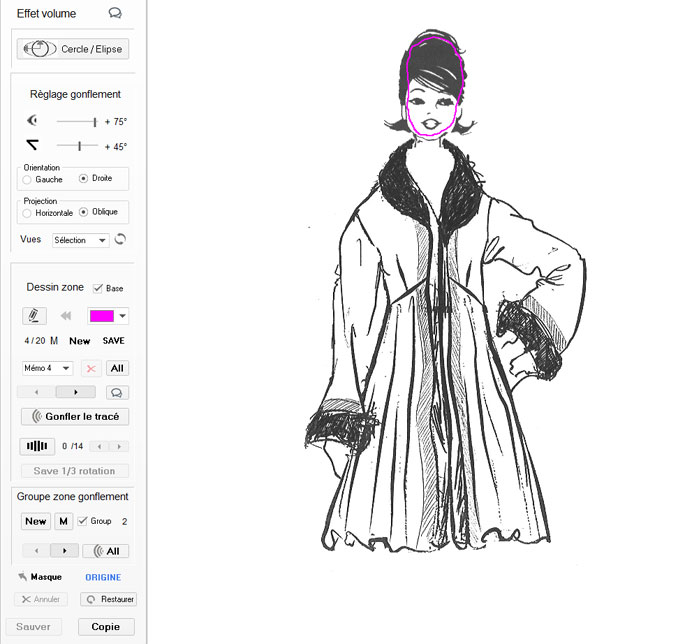
2) Open the pane (Access to the volume effects window)
Click on the effect_volume.jpg button
  |
|
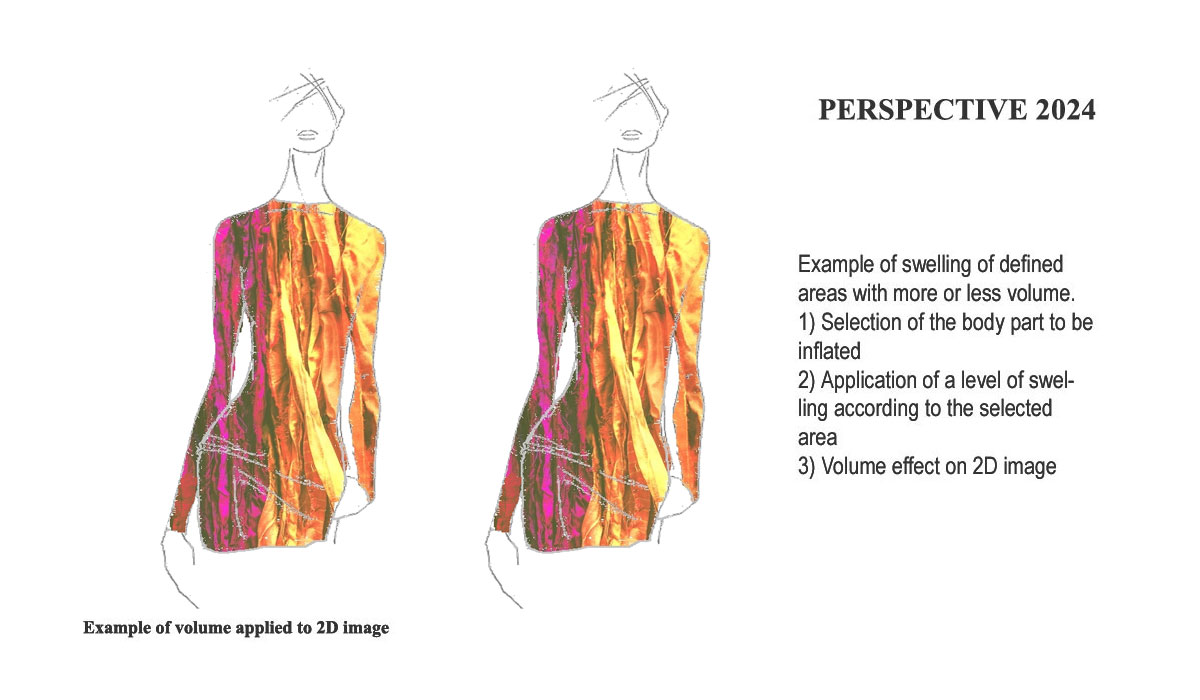
At this stage, it is a matter of configuring the inflation according to your needs, see the following section for more details
2) Selection of zone layouts
  |
  |
|
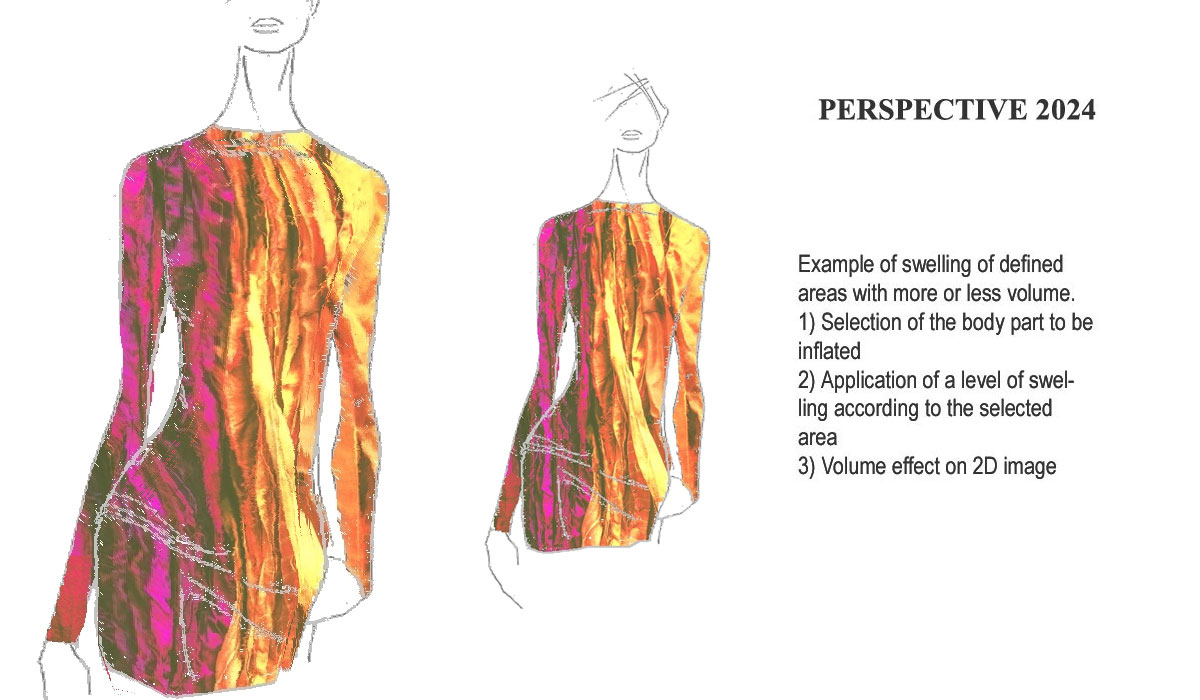
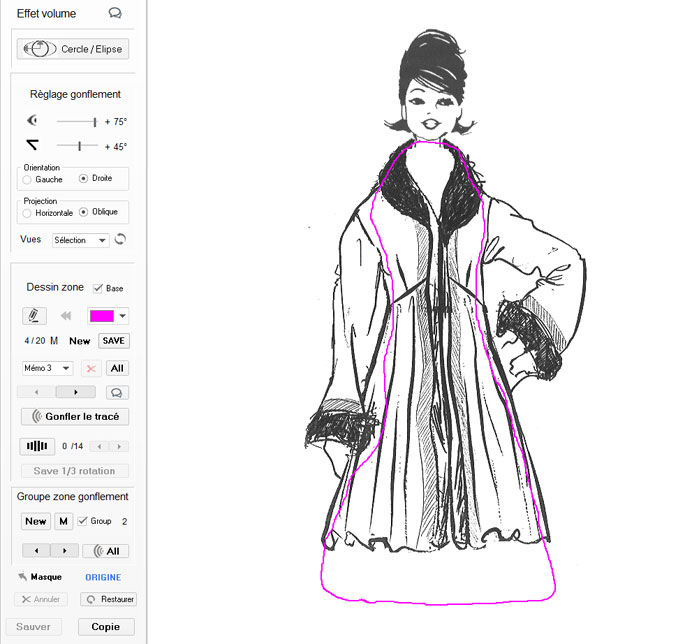
1) click on the NEW button in the Group panel to start a new zone group. 2) Select the track by browsing the list of tracks already created or by creating a new one, save it then click on the M to add the track to the group Note: here we have selected a path (Pink Path) which takes the central part of the jacket |
3) Select the track by browsing the list of tracks already created or by creating a new one, save it then click on the M to add the track to the group Note: here we have selected a path (Pink Path) then represents the inside of the face.
|
We have therefore added 1 path in the group which will be used one after the other to apply the 3D effect to these 2 areas defined in Pink.
Note: It can be noted that the areas in Roses are not very precise, the main constraint being not to bite the outer contour of the area to be inflated
under the deformation quill of the layout area (we only inflate the inside of a zone).
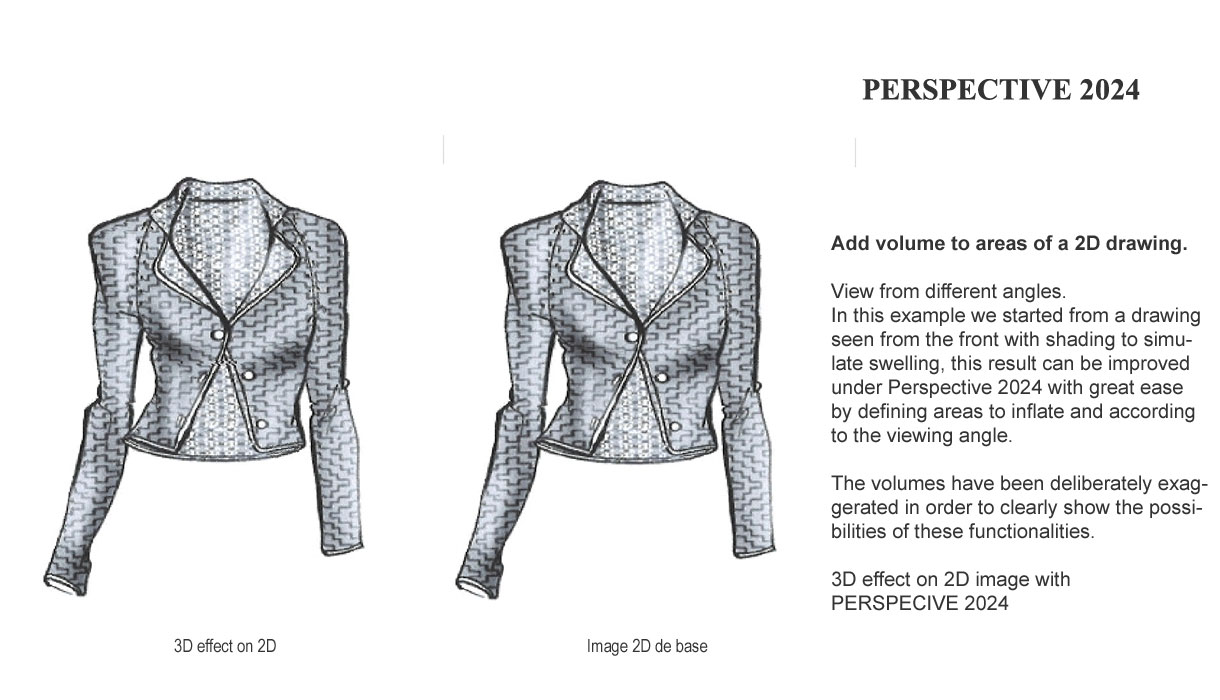
3) Adjustment of inflation and orientation parameters
Note: The default setting is (Rotation +45°) to the right with Horizontal projection.
|
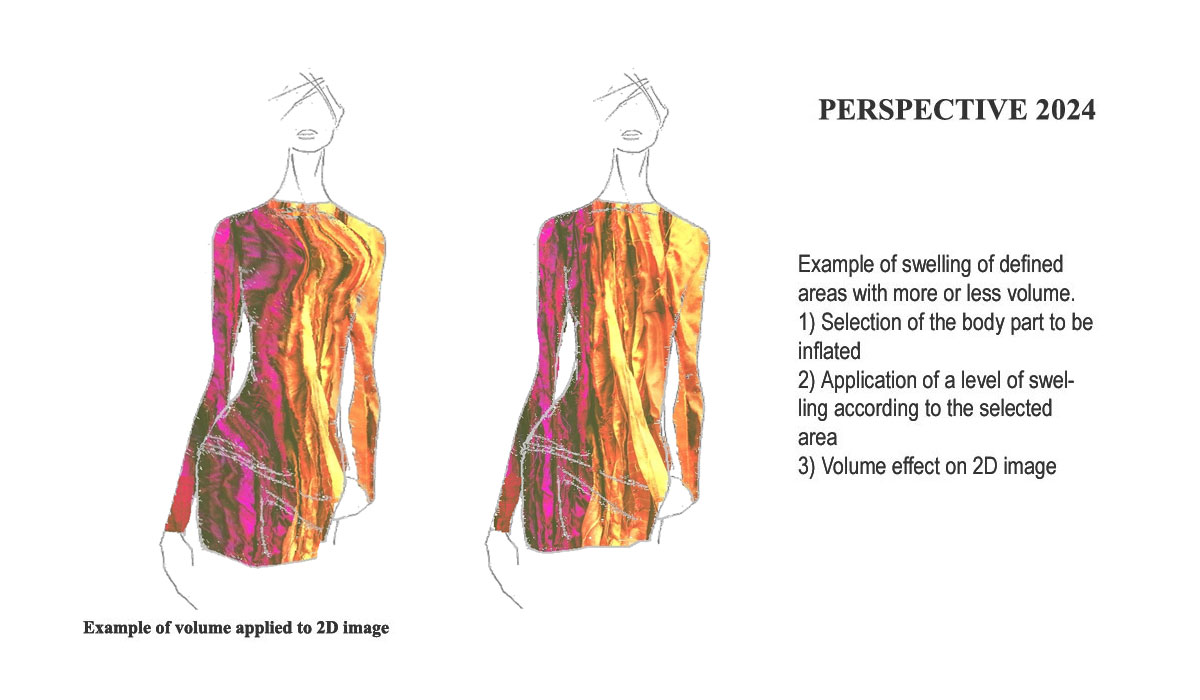
First possibility: If we have selected only 1 zone to inflate, we click on the (Inflate trace) button or on the (All) button if the group contains at least 1 memorized trace. Second possibility: If we have selected and memorized (M) at least 2 zones to inflate, click on the (All) button in order to use the zones one by one contained in the group (automatic procedure). Once the (Inflate plot) or (All) button, as the case may be, has been clicked, you must wait for the end of the 3D application carried out by PERSPECTIVE. Each zone will be inflated one after the other, this waiting time is more or less long depending on the number of zones and the surface to be treated (10 to 30 seconds). |
||
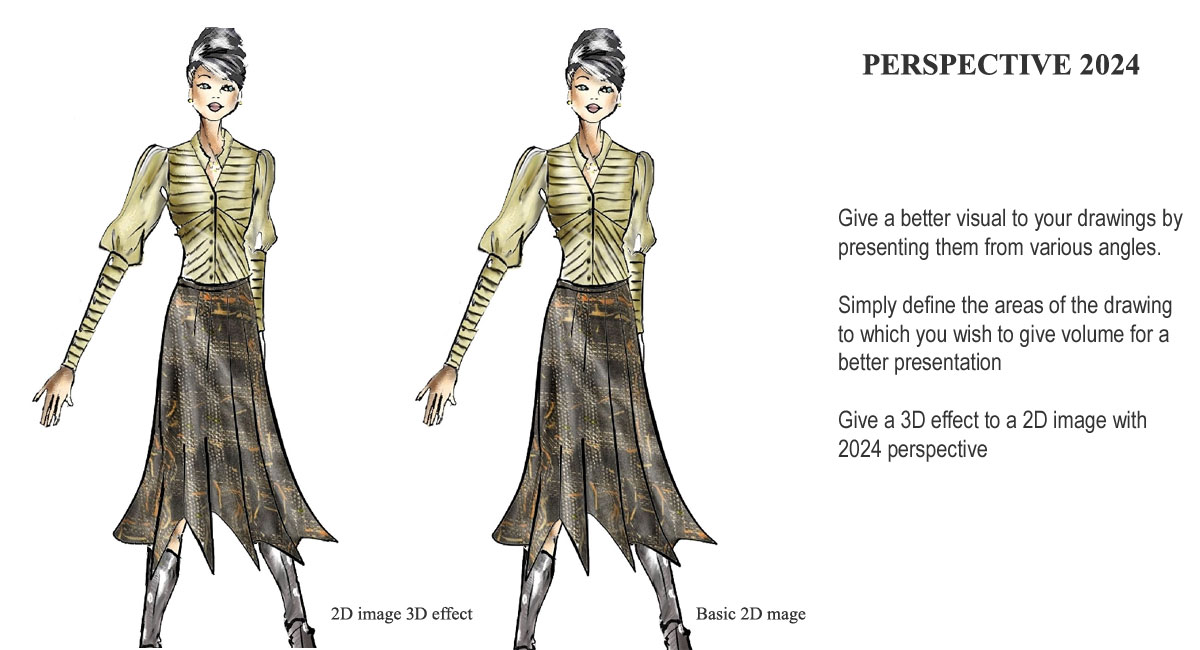
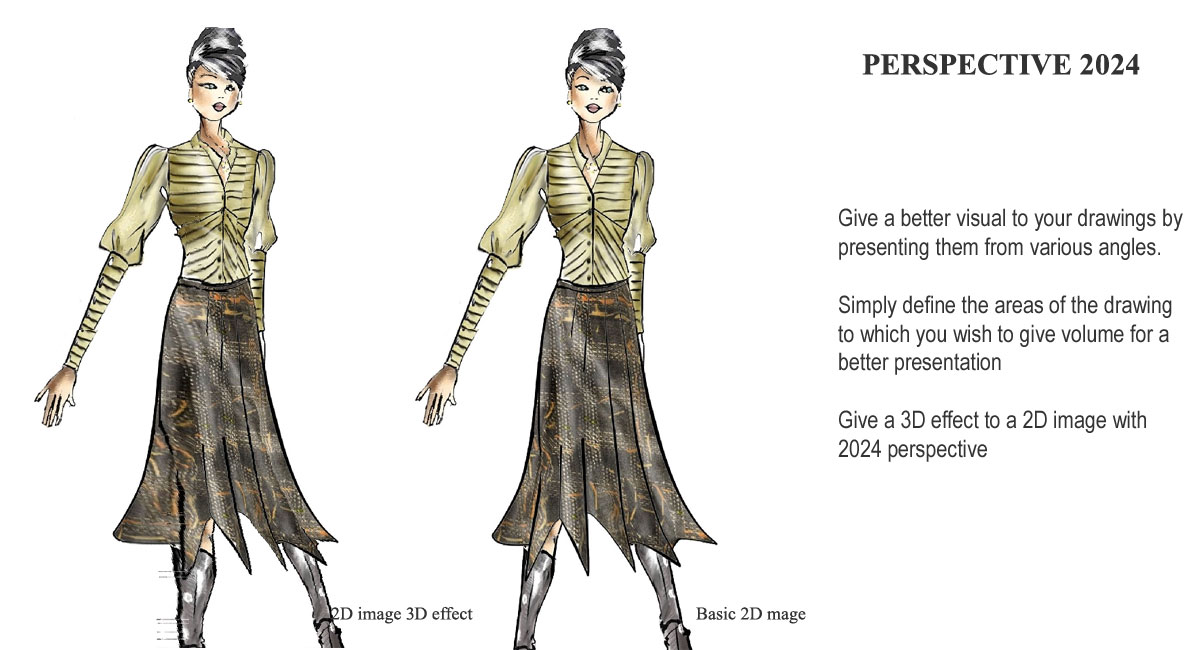
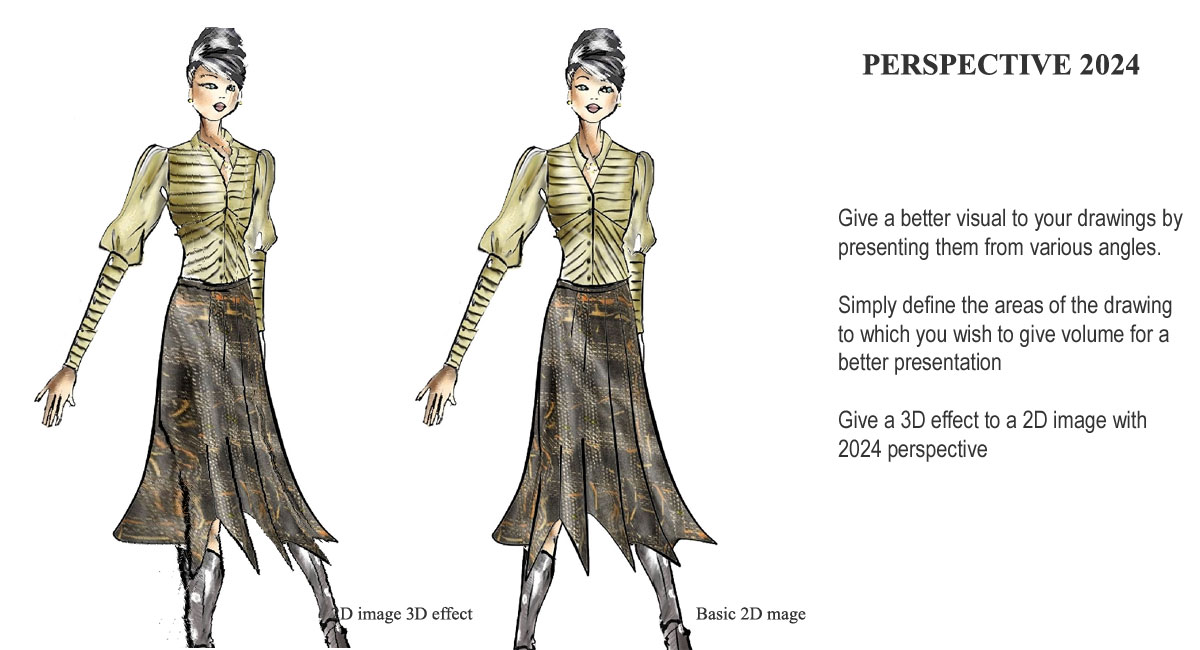
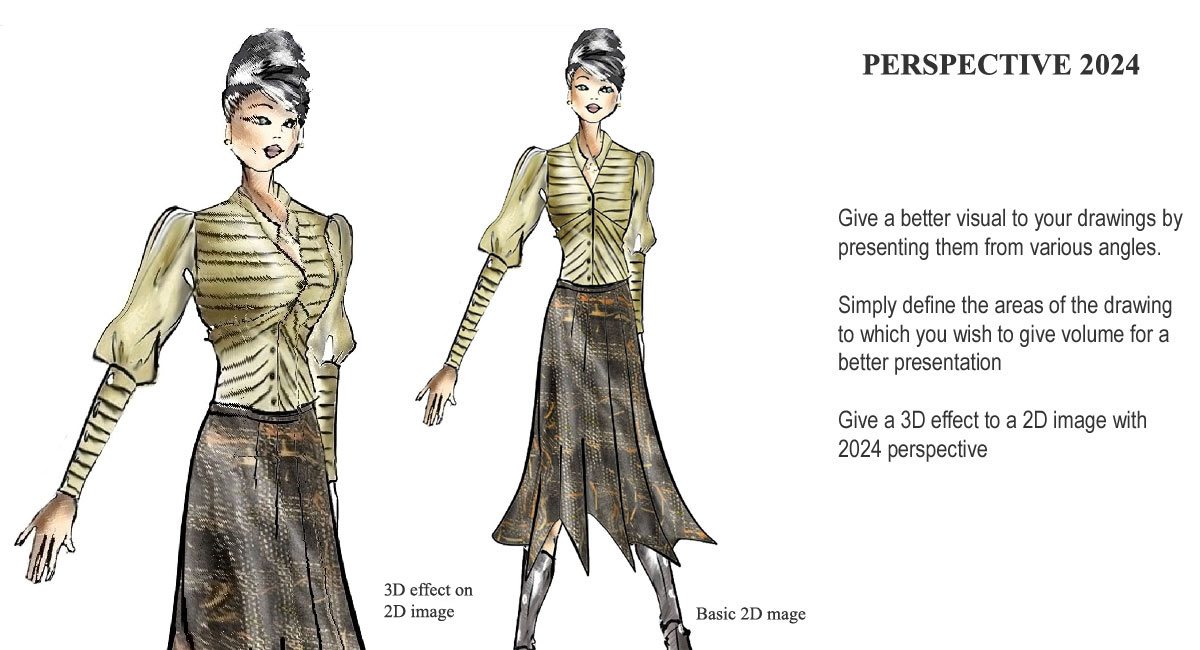
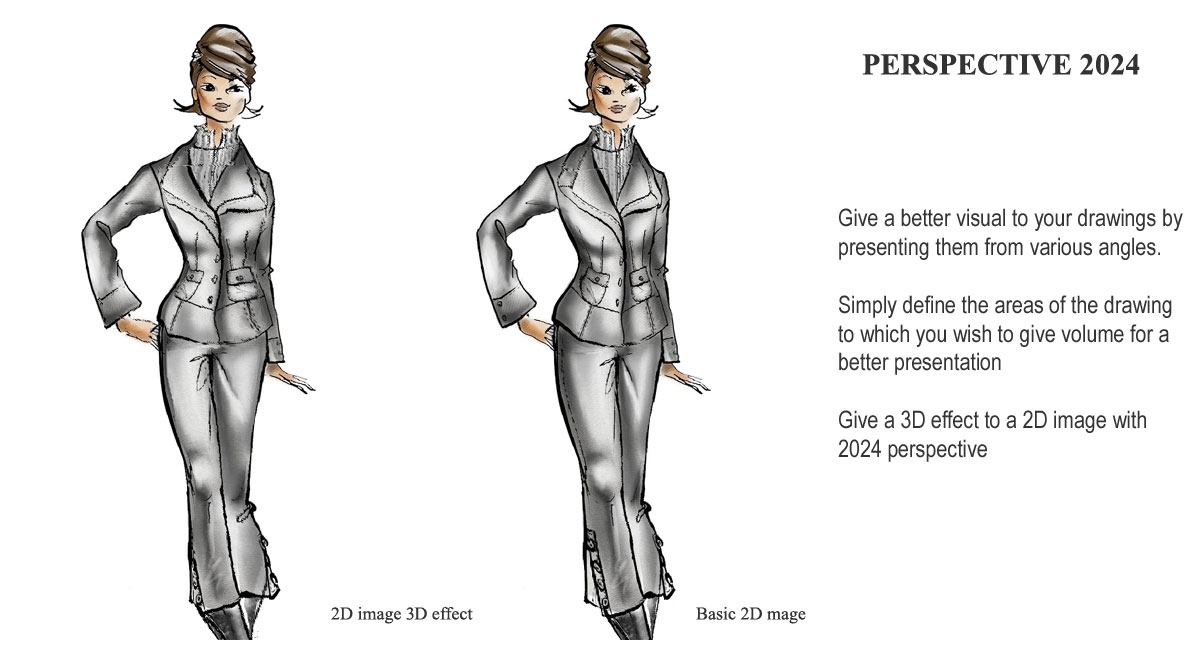
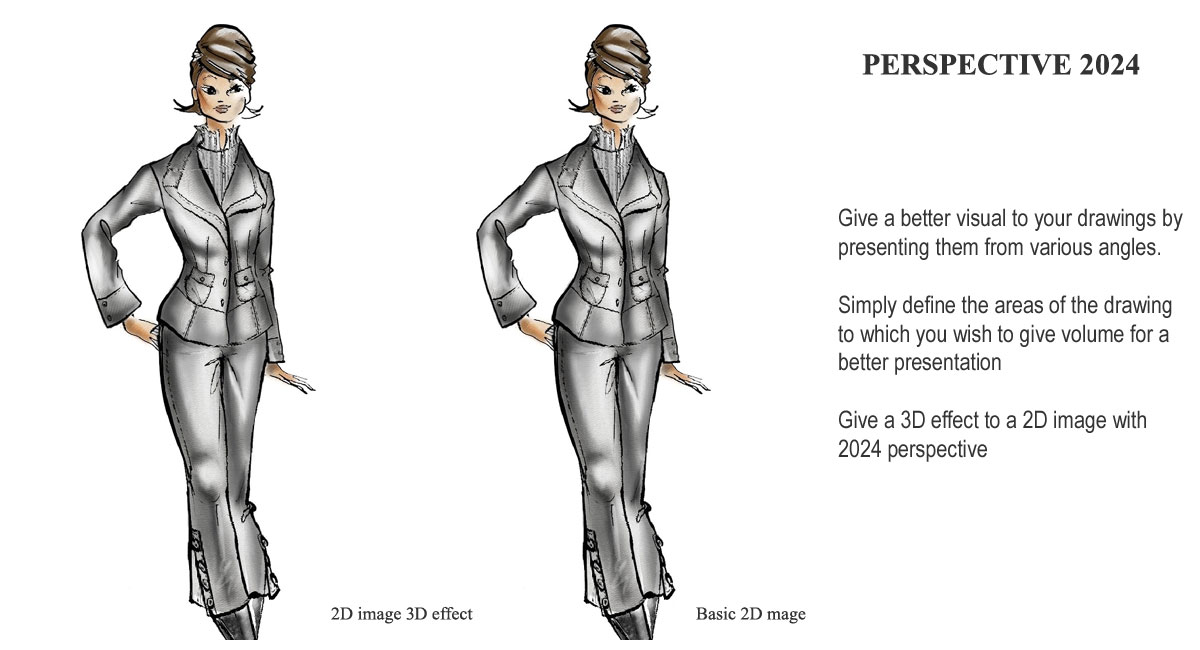
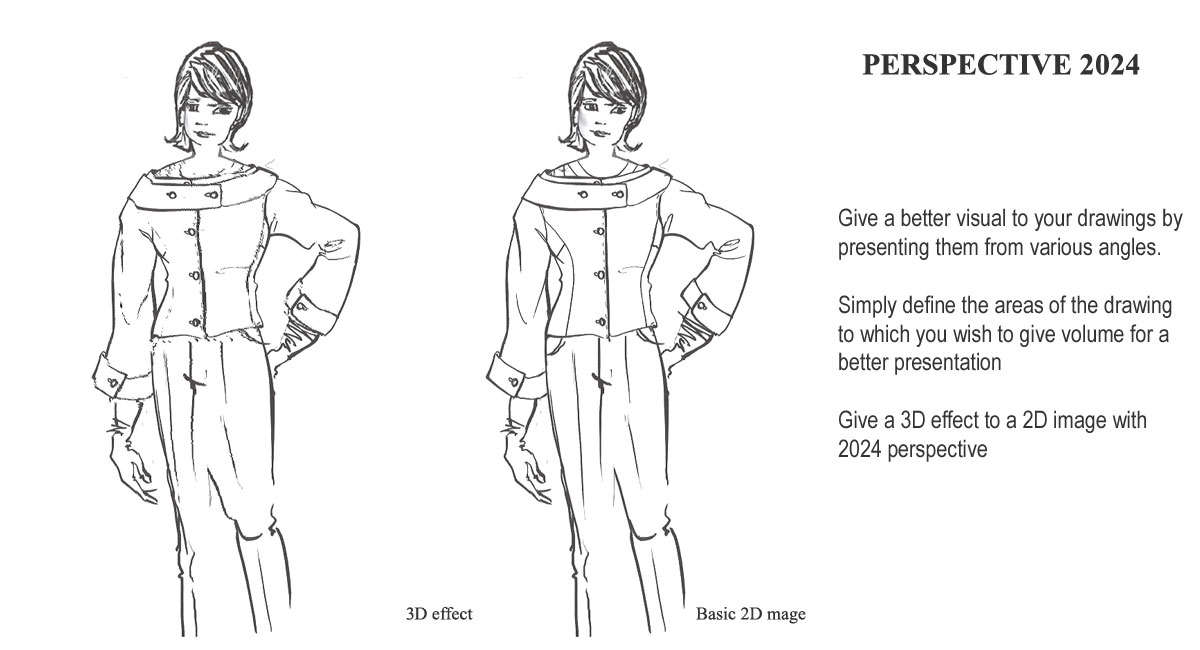
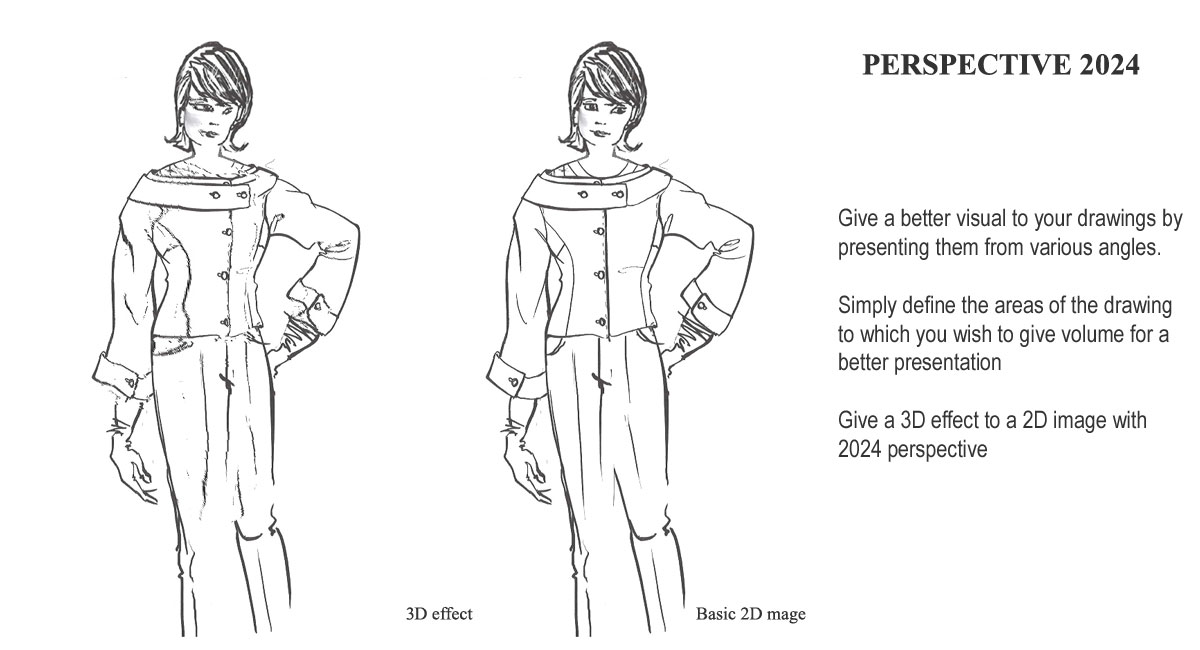
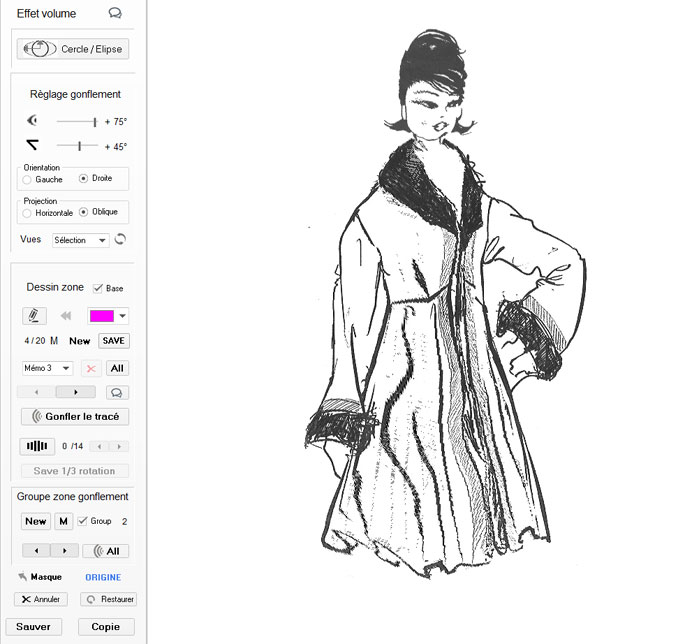
4) Applying 3D effect to selected areas
We will modify these parameters and put:
- an angle of +70° to the left
- with a Horizontal projection.
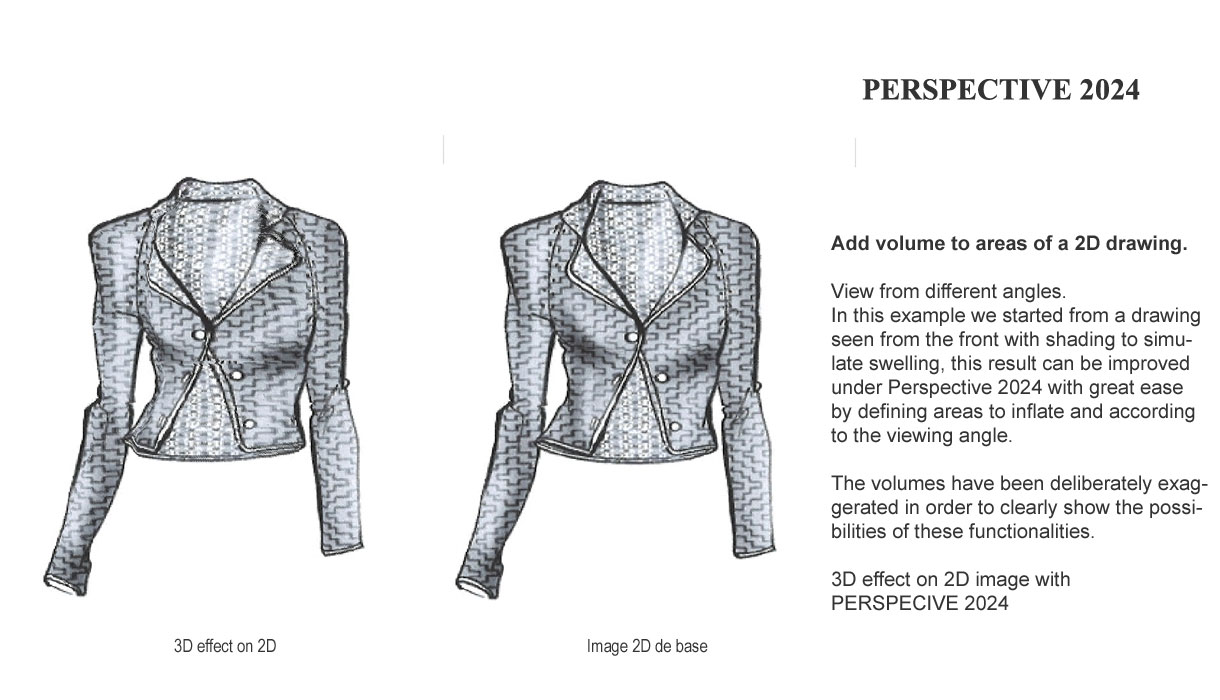
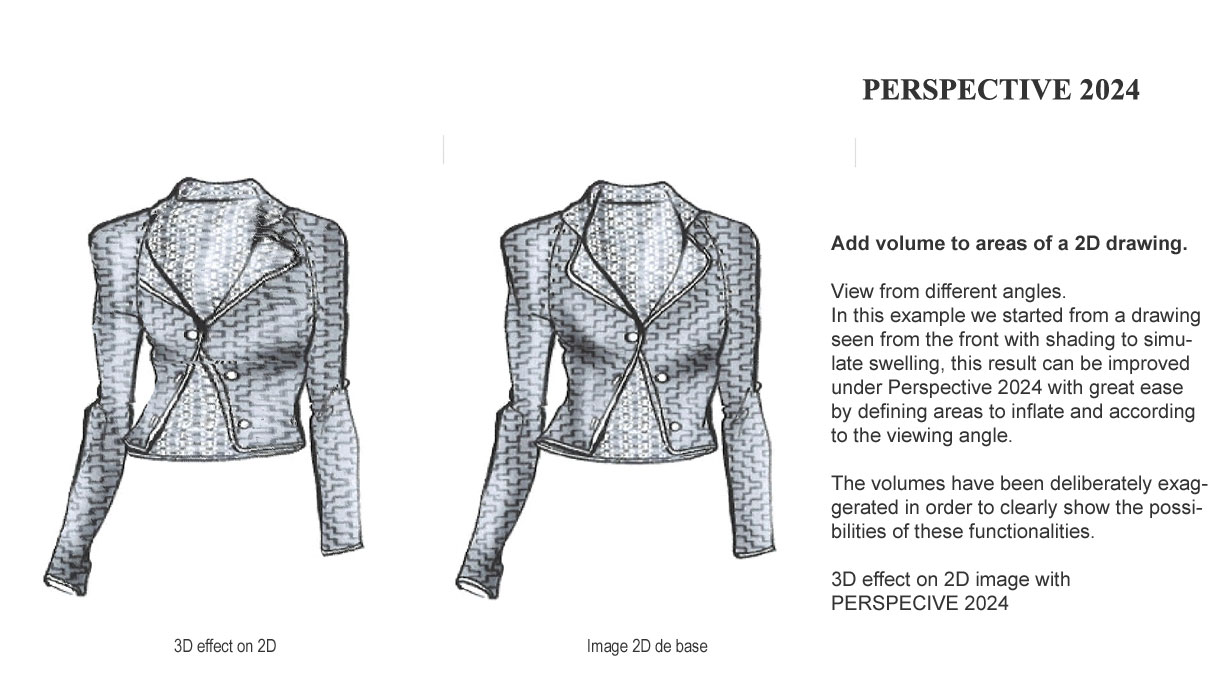
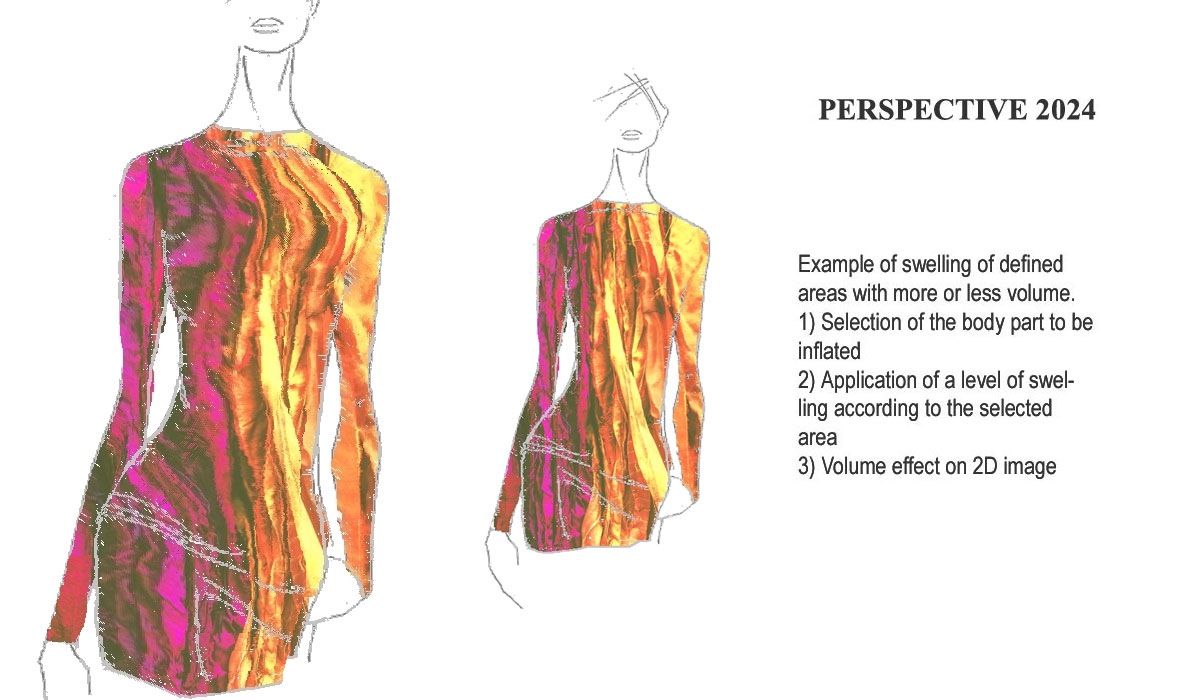
Two possible cases:
1) If we only had one plot selected, we could directly click on the button (Inflate Plot)
2) We have 2 plots in our group that can accept them (10 maximum), so we must click on the All button in order to apply the 3D effect
one after the other on the drawing, once click on the All button wait for the end of the construction of the final drawing with 3D effect.
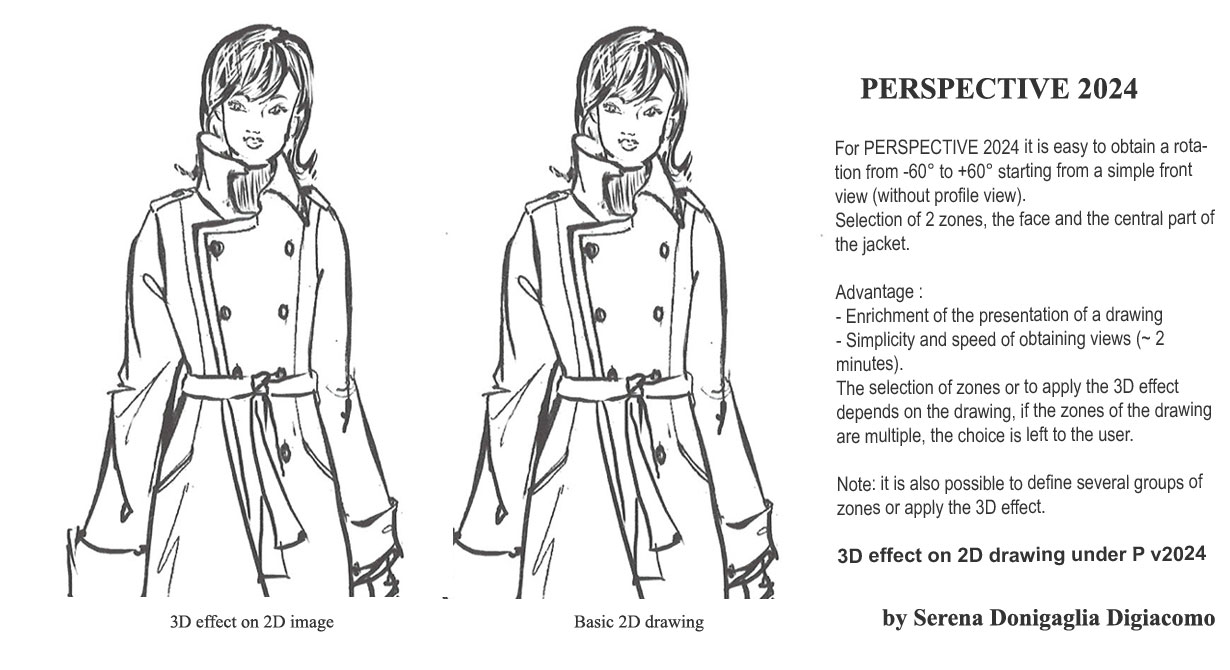
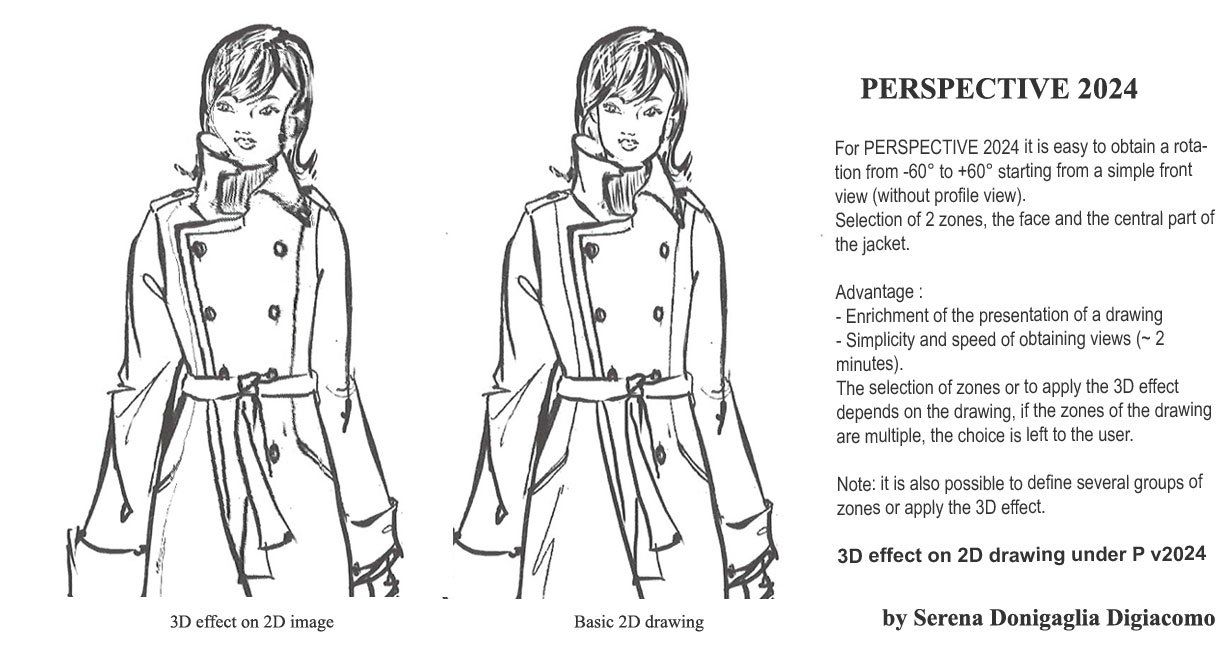
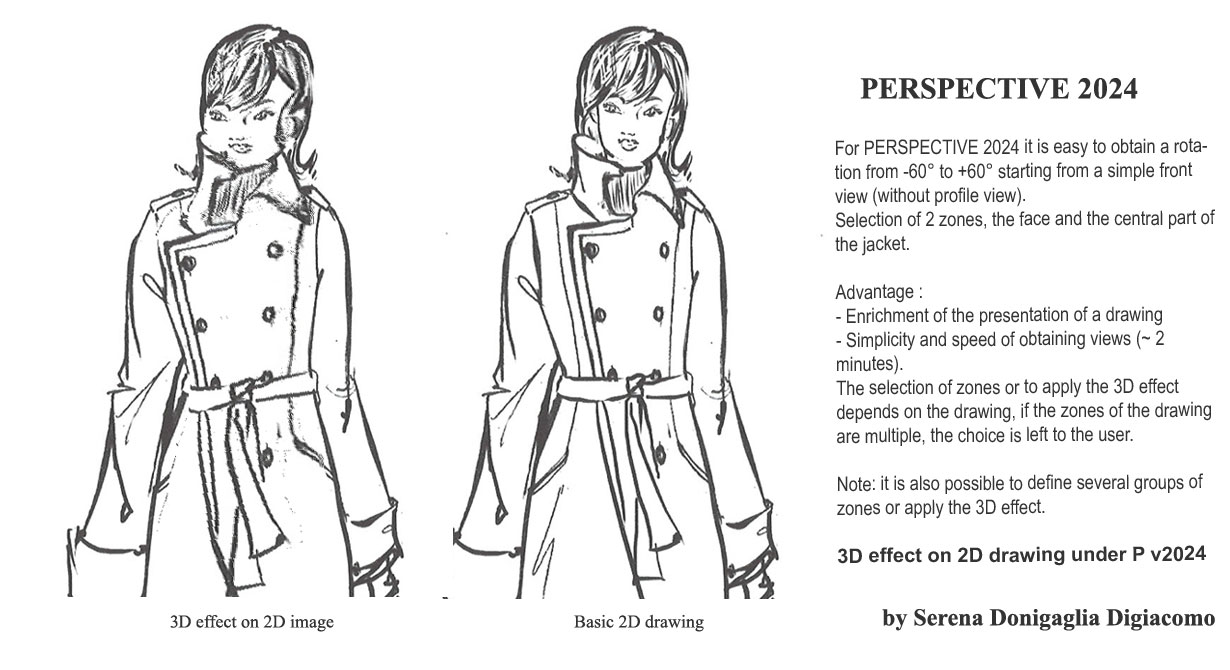
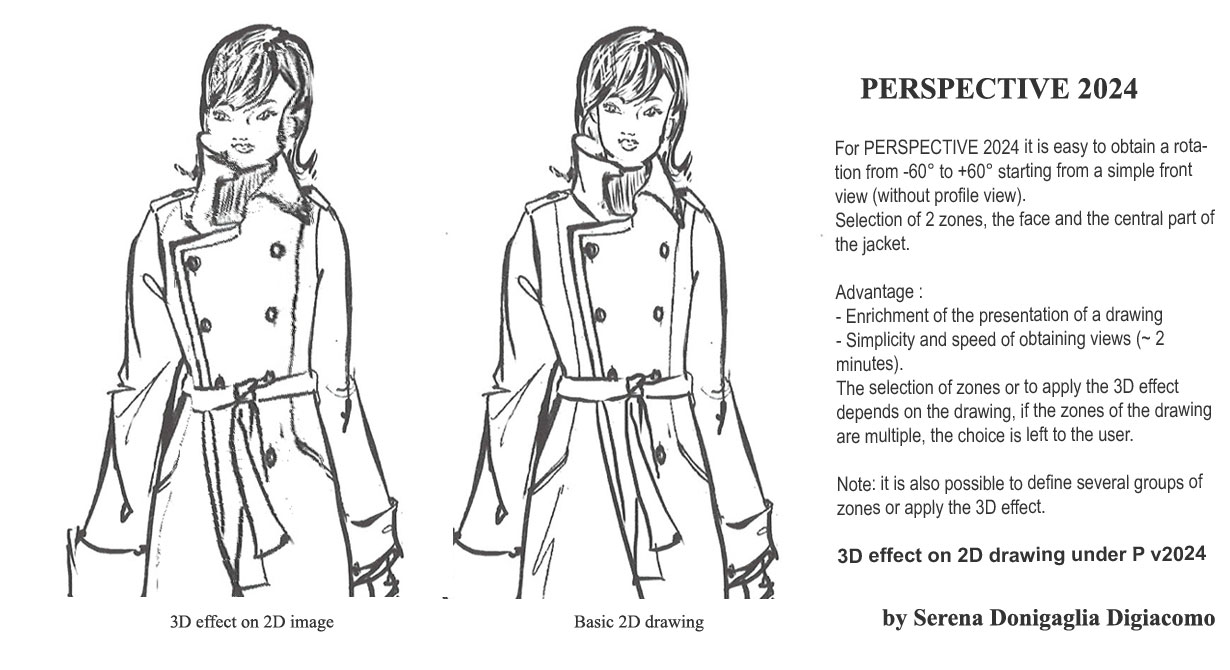
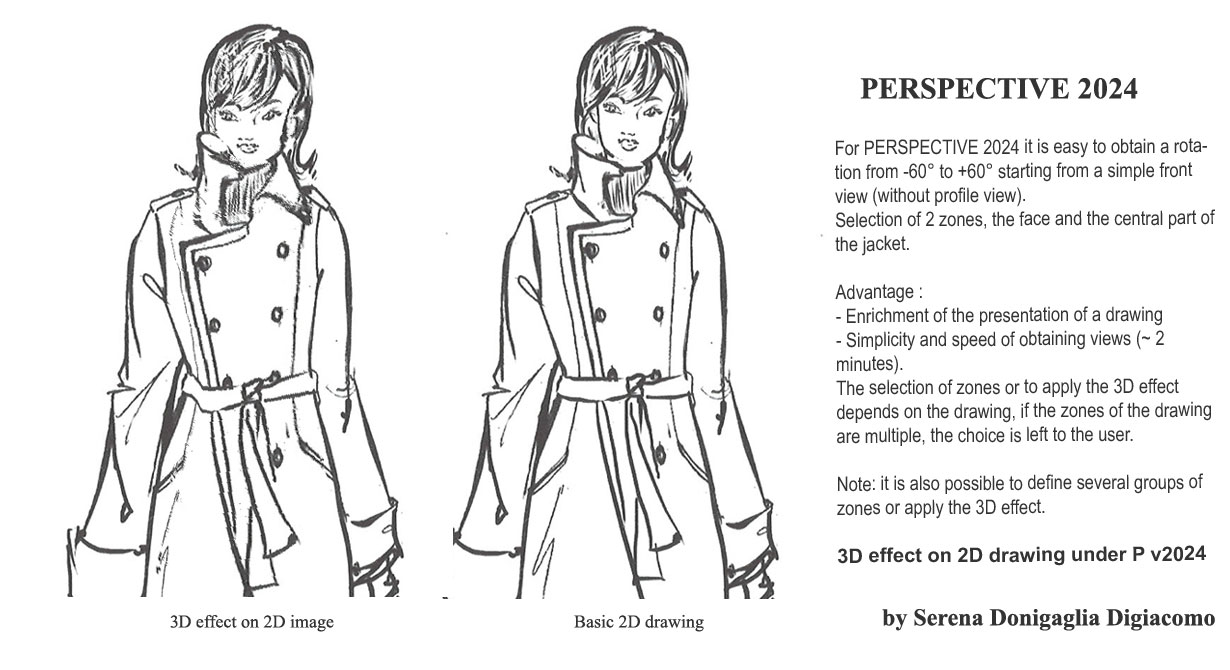
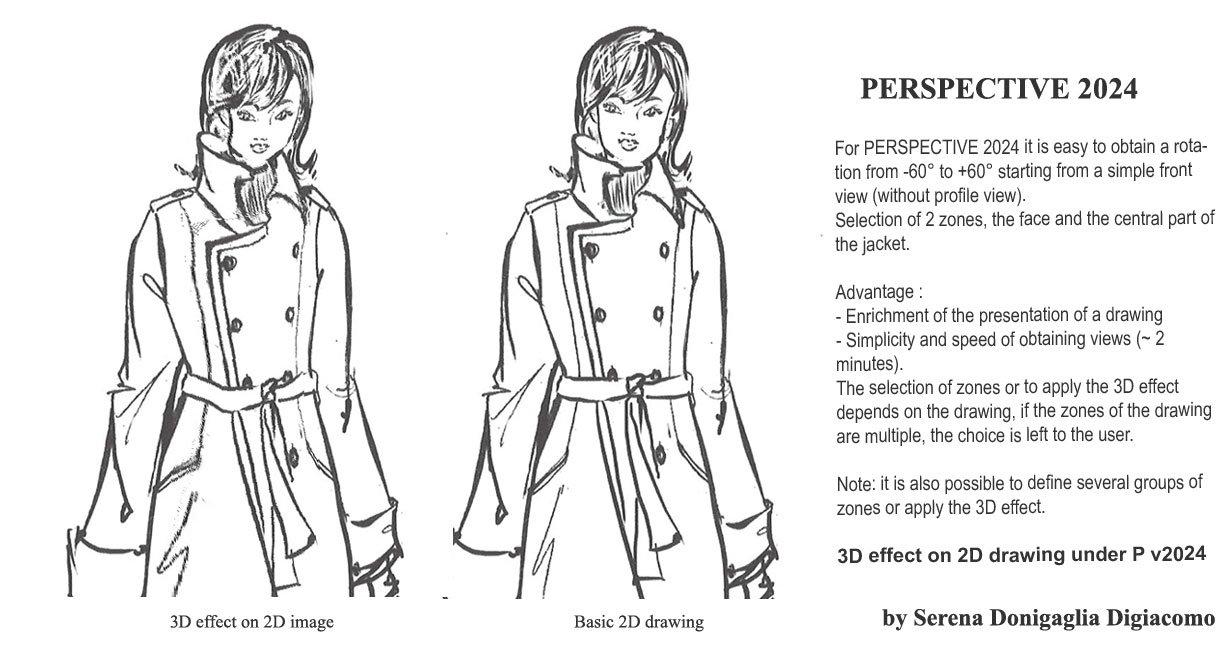
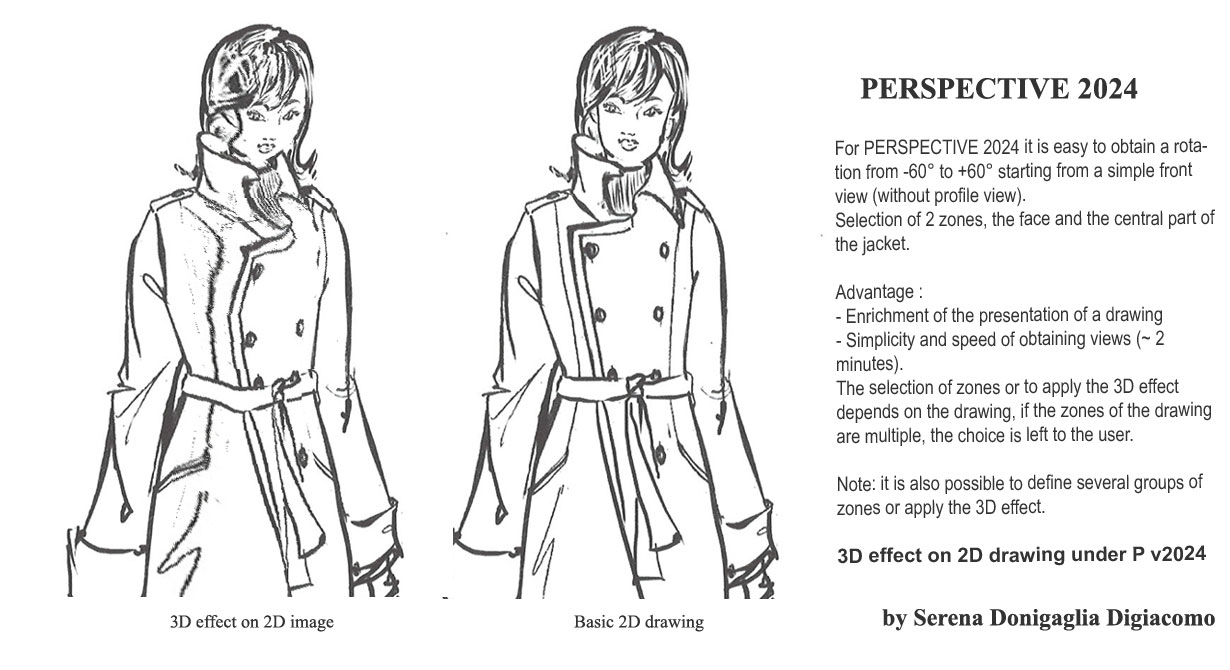
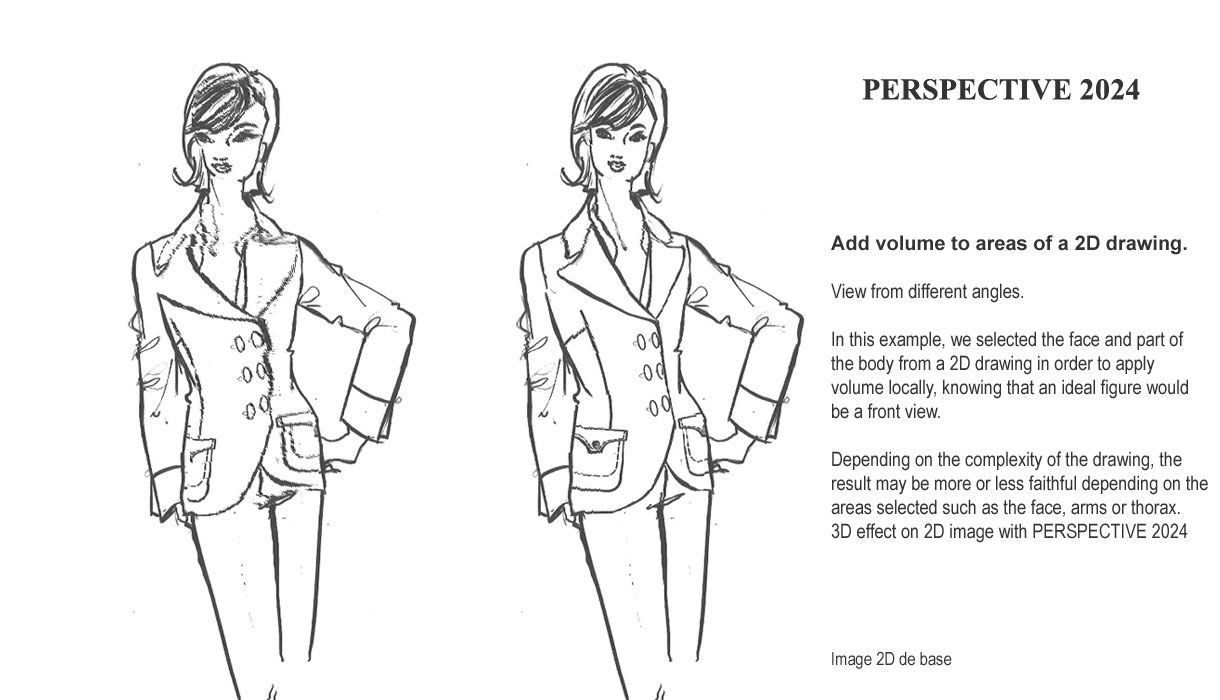
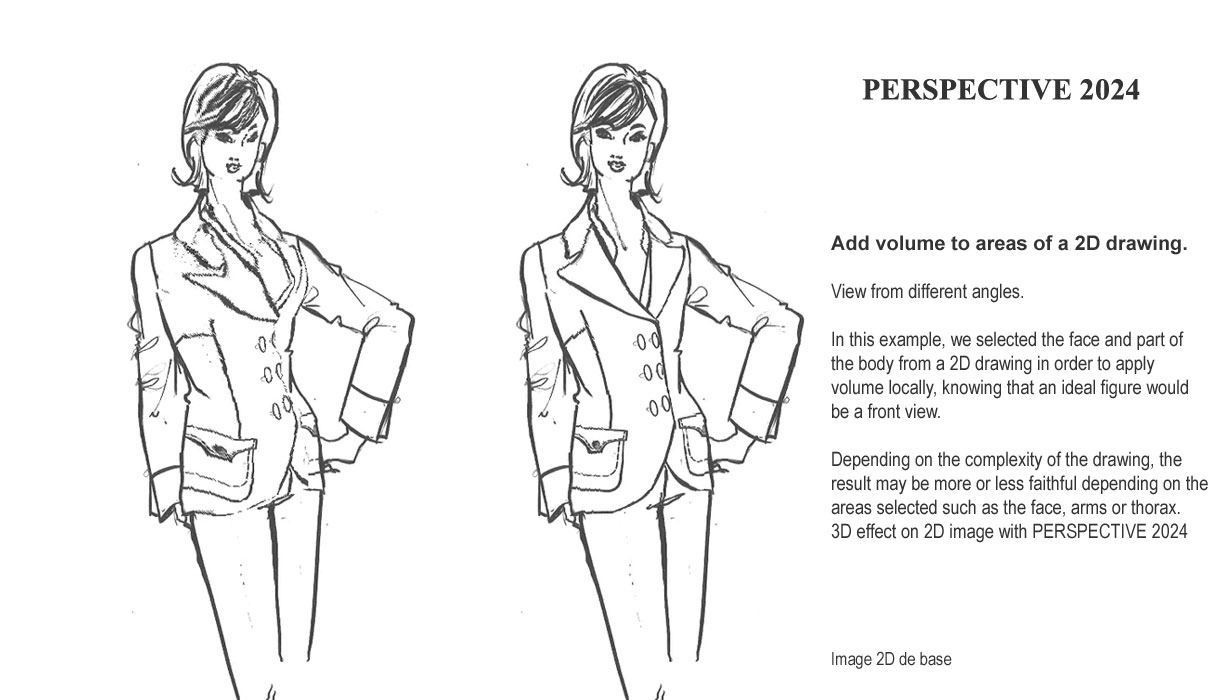
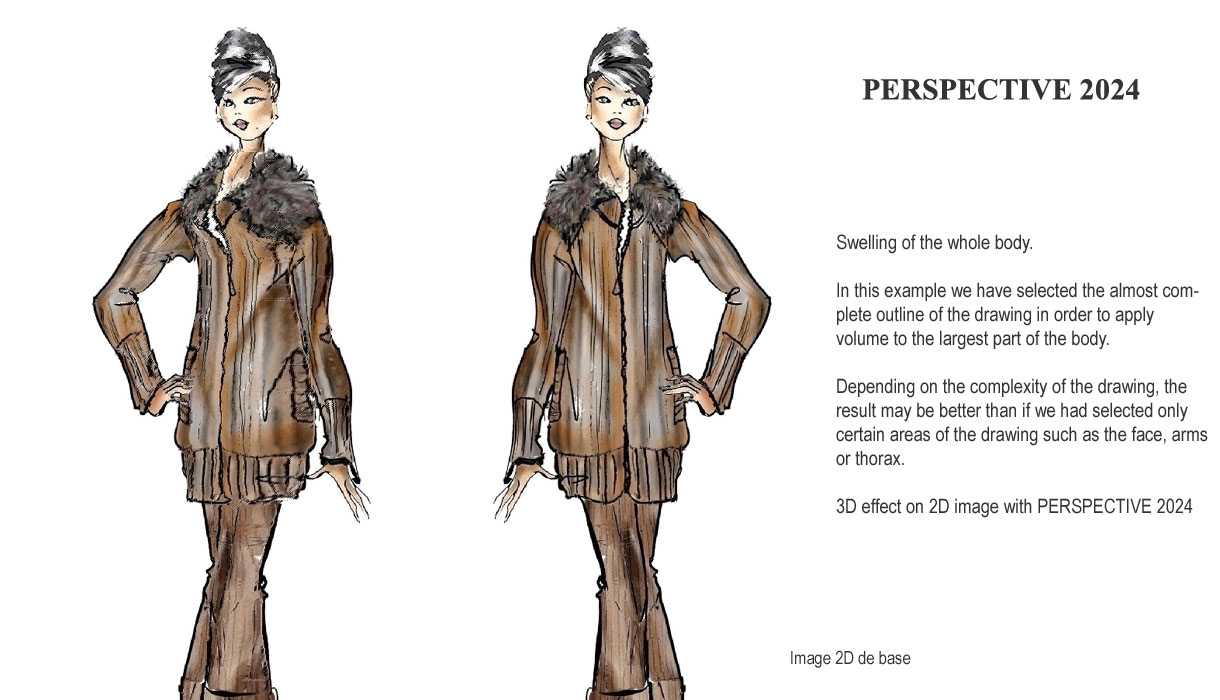
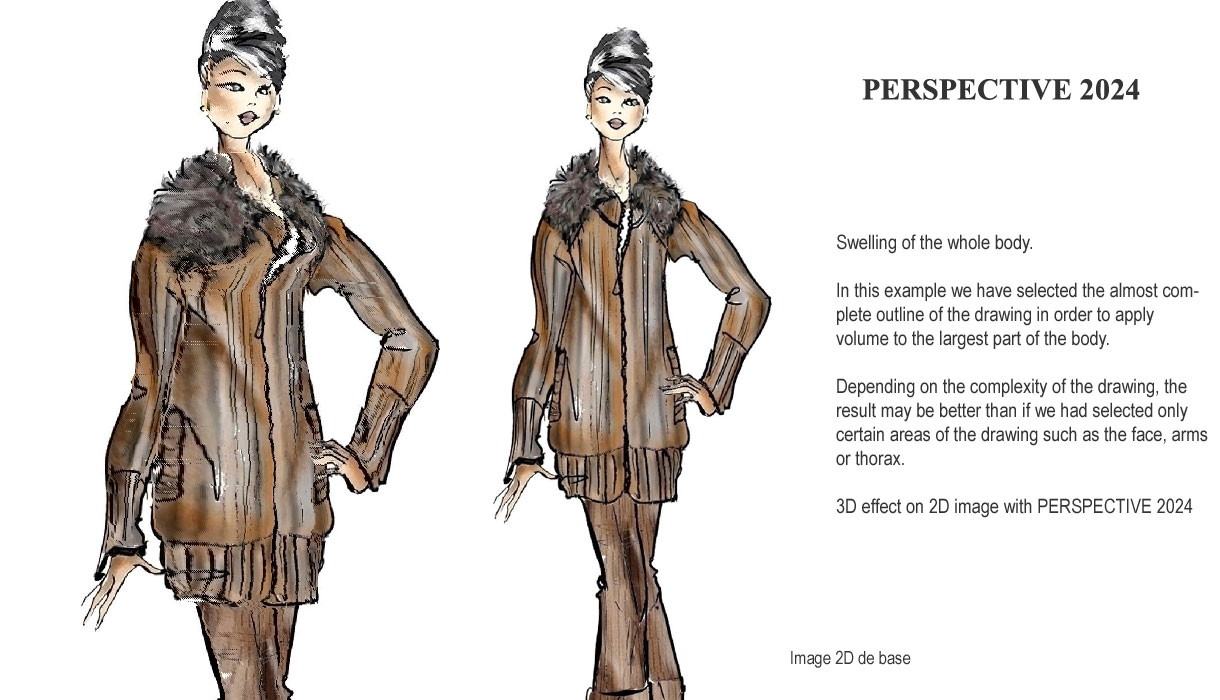
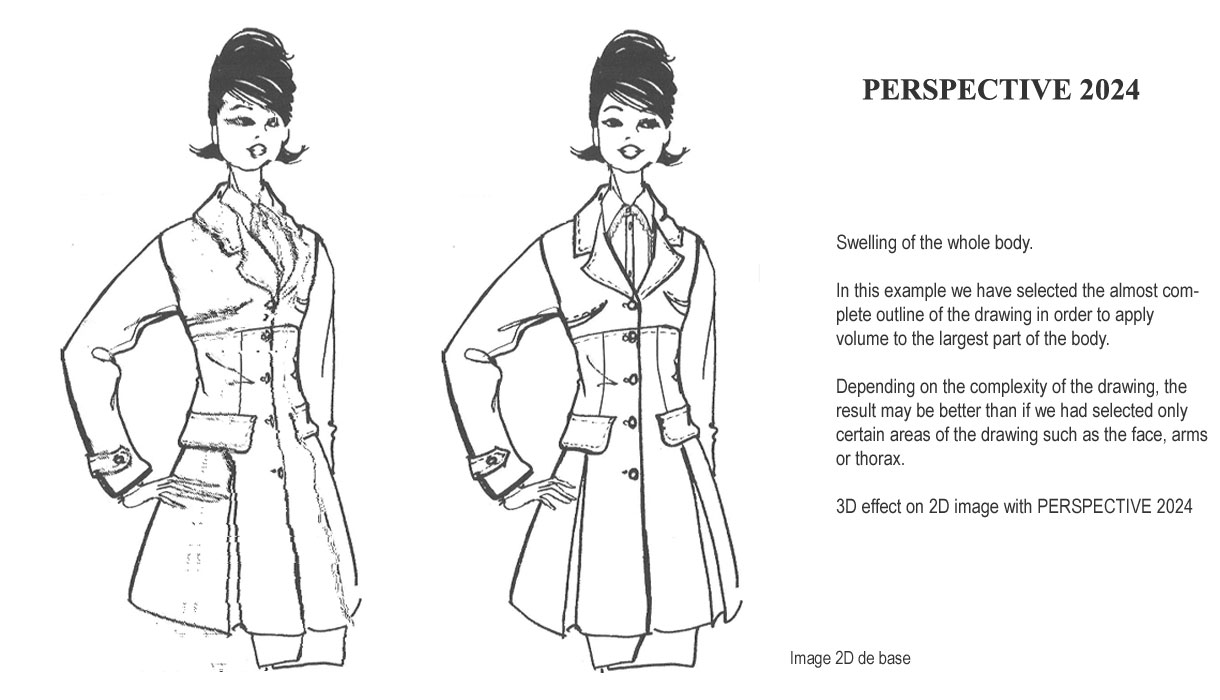
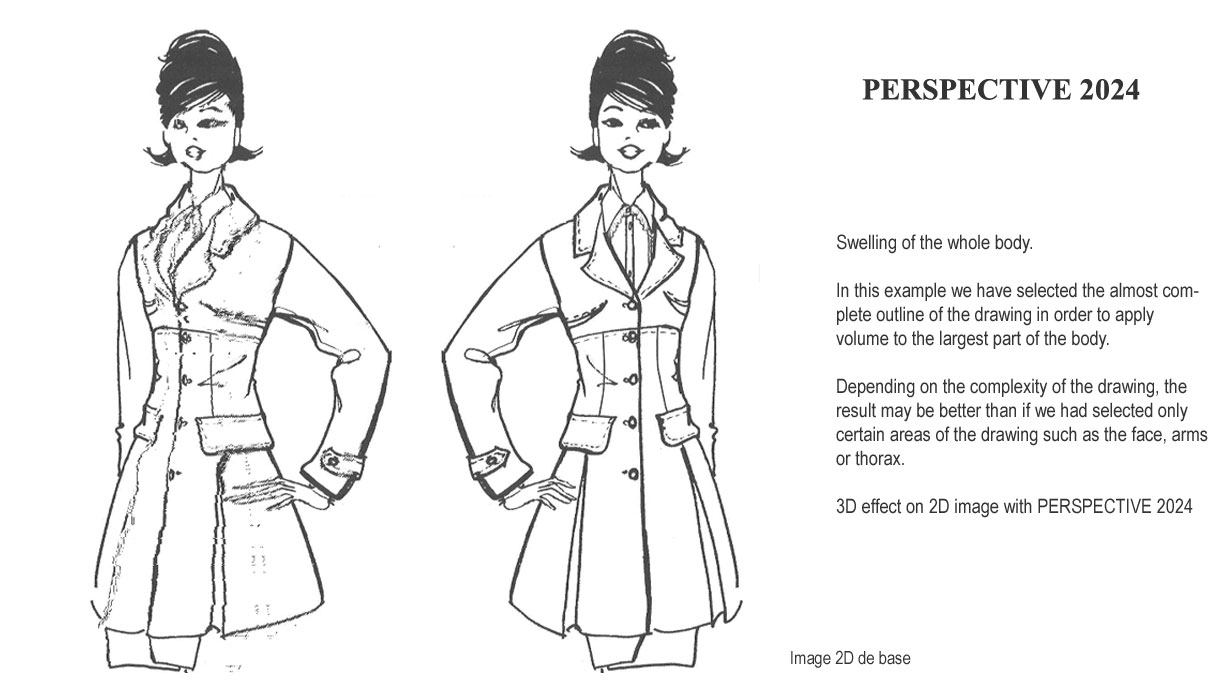
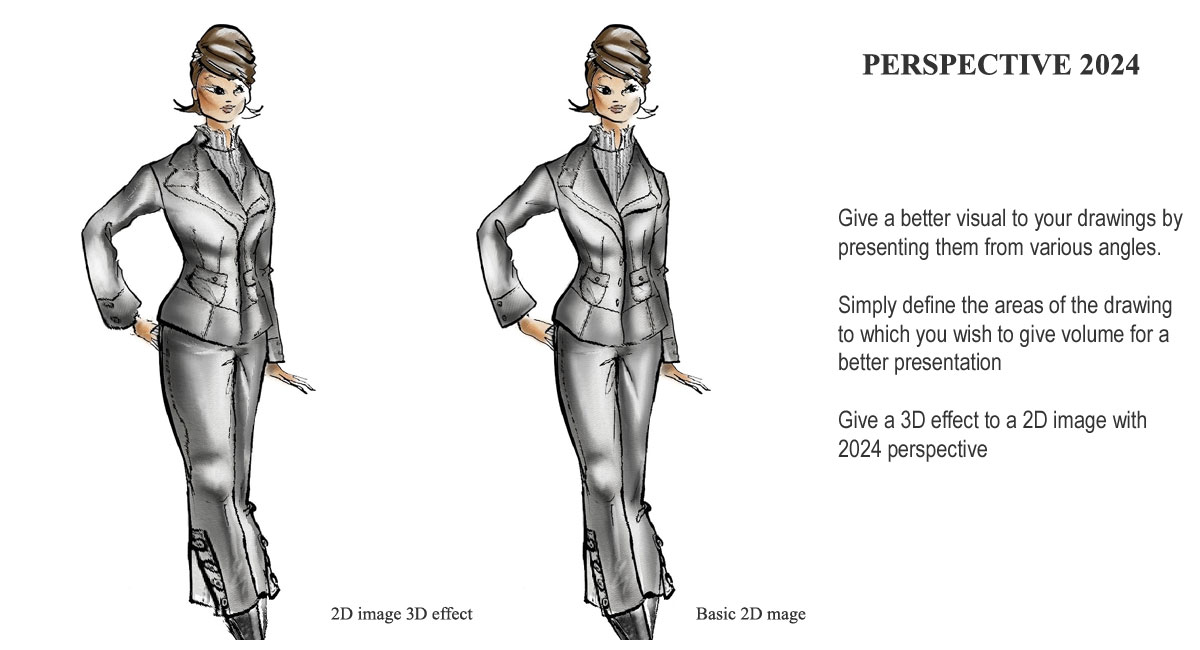
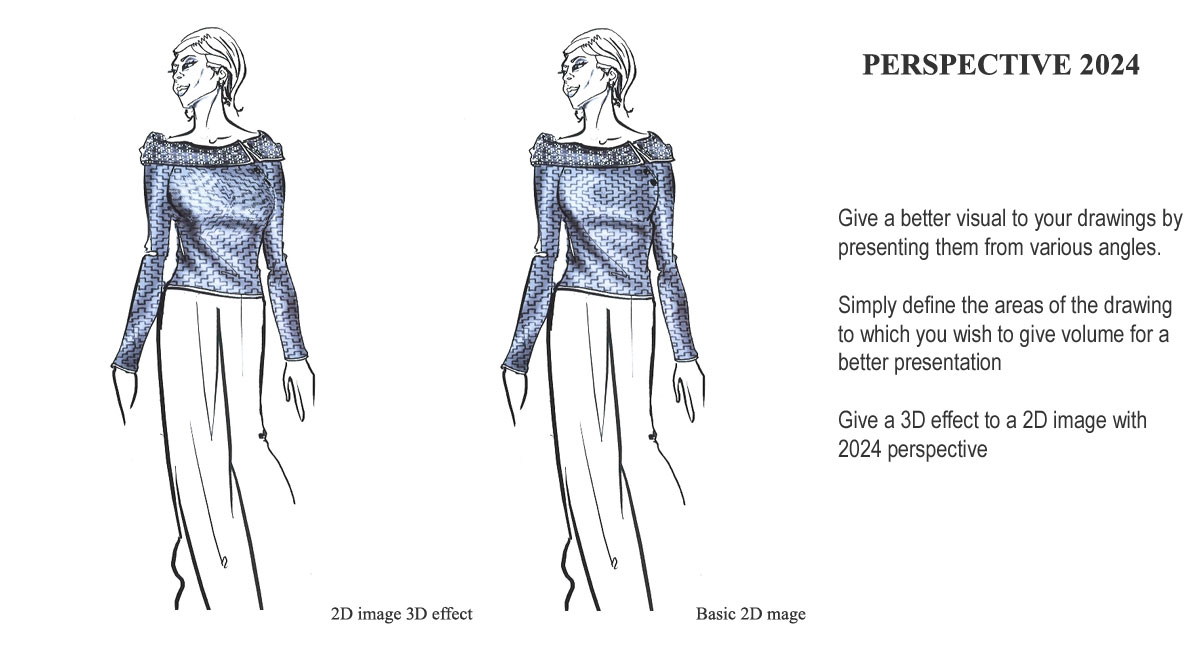
Note: the 3D Effect only applies to the 2 selected areas, here the face and a central part of the jacket (see below)
Note: the Rose paths disappear during the creation of the view with 3D Effect.
|
|
|
|
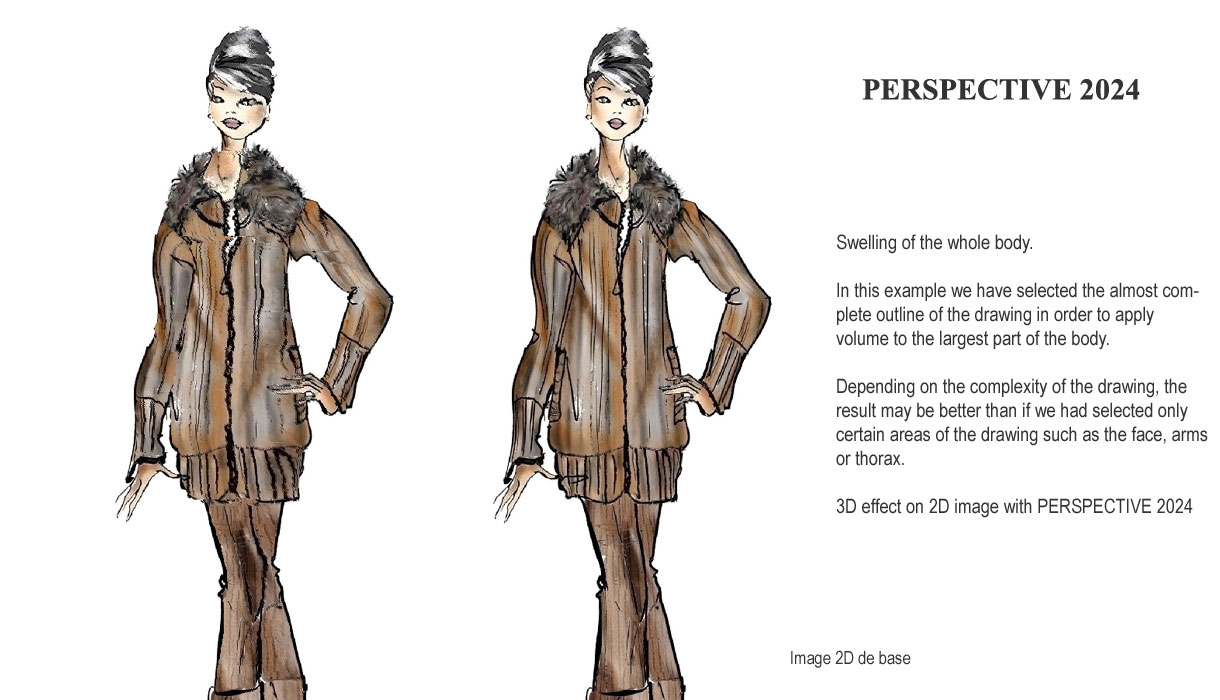
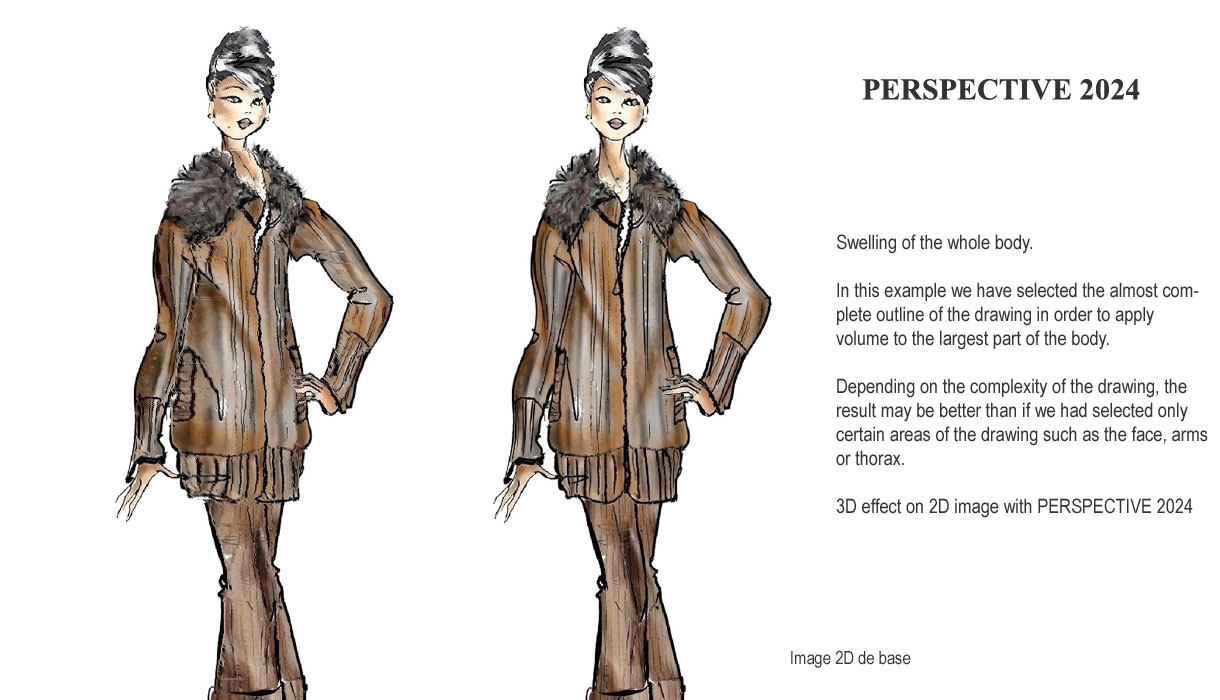
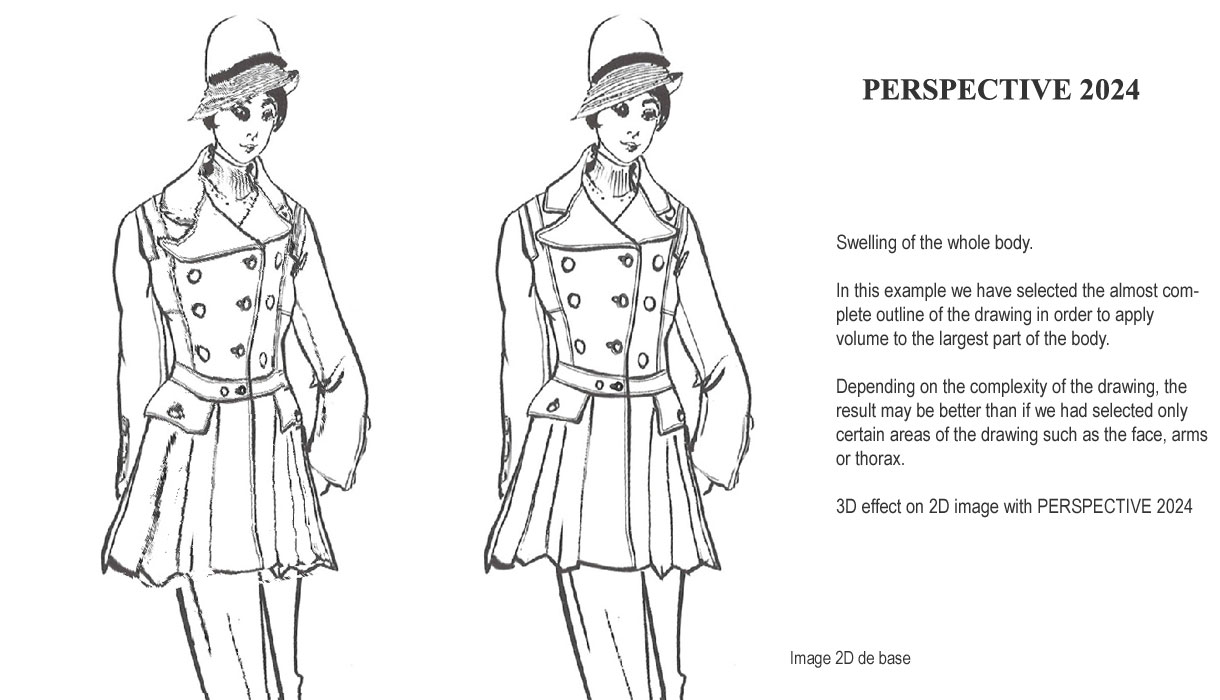
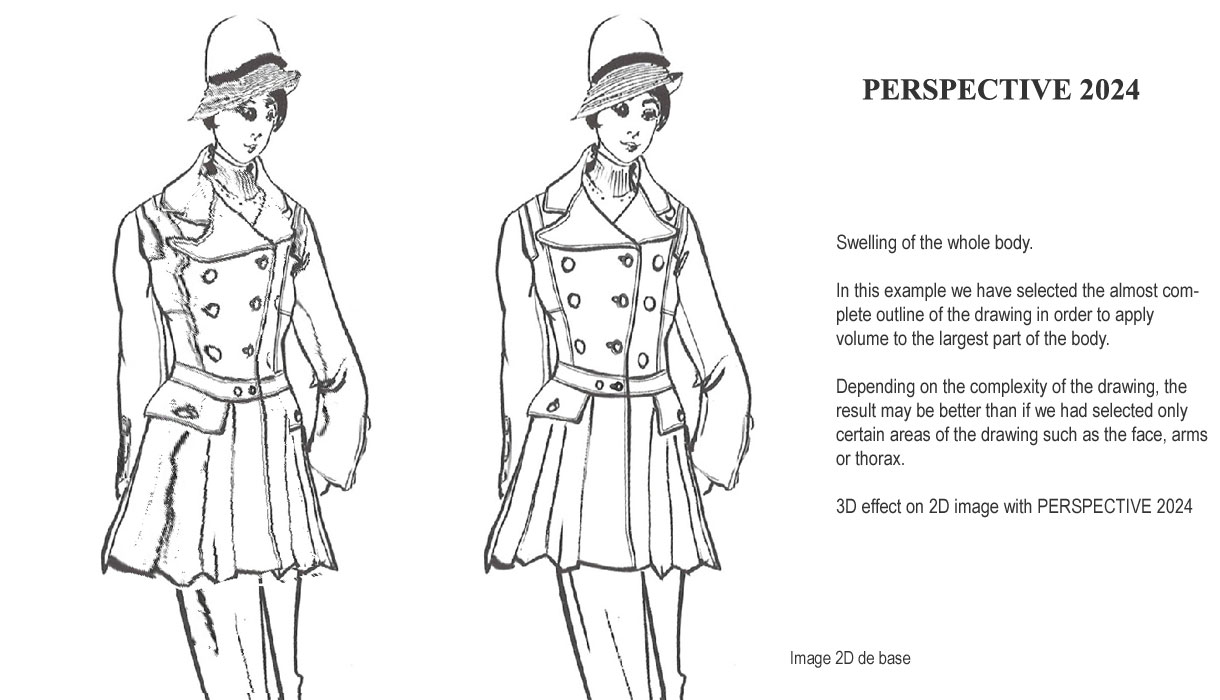
Basic 2D Image |
Voir le vidéos YouTube
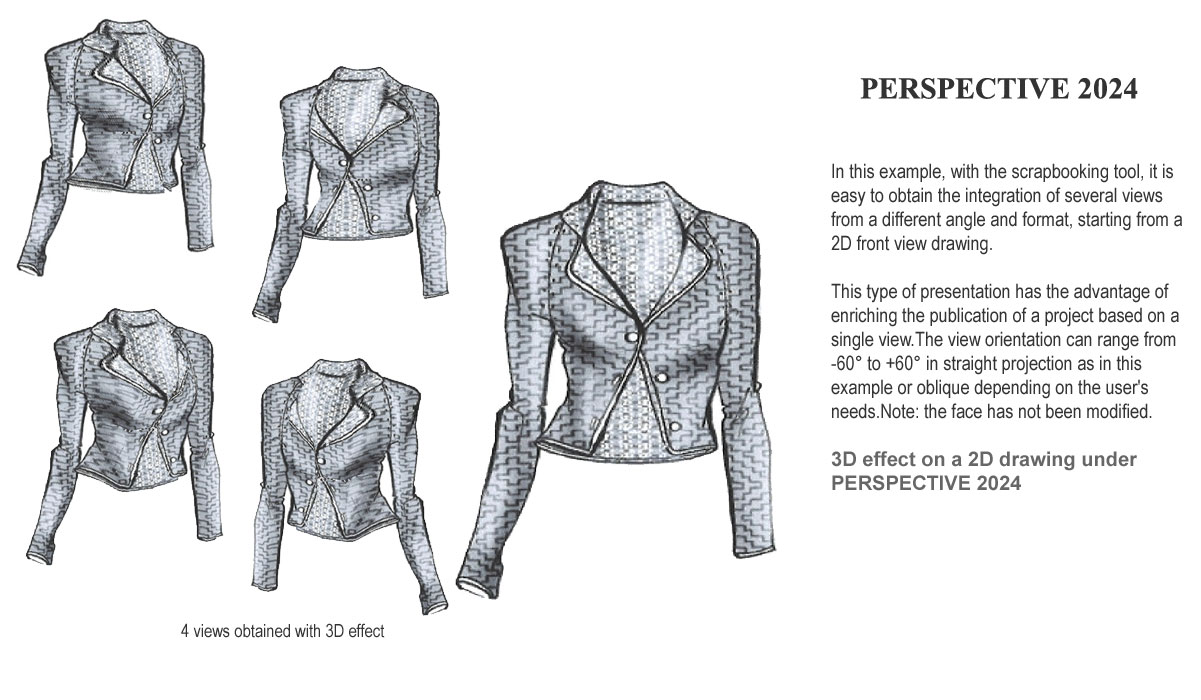
• Tracer de zone puis effet 3D sur image 2D et assemblage scrapbooking sous PERSPECTIVE 2024 v1
• Création d'un effet 3D sur un dessin 2D avec PERSPECTIVE 2024
• Création d'un StrapBooking avec PERSPECTIVE 2024
• Création d'une rotation de -60° à +60° soit 120° sur un dessin 2D avec PERSPECTIVE 2024
• Effet 3D sur plusieurs groupes de zones d'un dessin 2D
FAQs
Questions les plus fréquentes :
Ces questions concernent essentiellement l’utilisation des logiciels de Perspective et leur évolutions futurs.
Pour plus de détails sur certaines actions, il est conseillé de consulter l’aide en ligne de Perspective ou y sont expliquées les fonctions de bases pour chaque outil.
Vous êtes un professionnel
- Vous envisagez d’acheter plusieurs licences pour un des logiciels (Perspective, COLLECTION ou Quickworkbook).
Remise de 20% par groupe de 5 licences quelque soit le logiciel.
- Vous avez besoin d’une formation rapide ou complète sur un ou plusieurs outils d’une des versions complètes de Perspective.
Vos suggestions sur des fonctionnalités avenir.
Remise de 20% par groupe de 5 licences quelque soit le logiciel.
- Vous avez besoin d’une formation rapide ou complète sur un ou plusieurs outils d’une des versions complètes de Perspective.
Vos suggestions sur des fonctionnalités avenir.
Vous êtes un étudiant
- Vous êtes étudiant ou un groupe d’étudiants et vous envisagez d’acheter plusieurs licences pour un des logiciels (Perspective, COLLECTION ou Quickworkbook).
Remise de 20% par groupe de 2 licences quelque soit le logiciel.
- Vous avez besoin d’une formation rapide ou complète sur un ou plusieurs outils d’une des versions complètes de Perspective.
Vos suggestions sur des fonctionnalités avenir.
Remise de 20% par groupe de 2 licences quelque soit le logiciel.
- Vous avez besoin d’une formation rapide ou complète sur un ou plusieurs outils d’une des versions complètes de Perspective.
Vos suggestions sur des fonctionnalités avenir.
vos remarques ou demandes
Envoyez nous vos remarques:
Vos observations
Envoyez nous vos observations:
Vos suggestions sur des fonctionnalités avenir
Envoyez nous vos suggestions:
Vos réalisations :
Vous souhaitez promouvoir votre Nom ou votre Marque en proposant vos mannequins ou / et accessoires en libre de droits et utilisation dans une des banques de Perspective.
Proposer vos créations.


")
")

")
