THE DRESSING TOOL
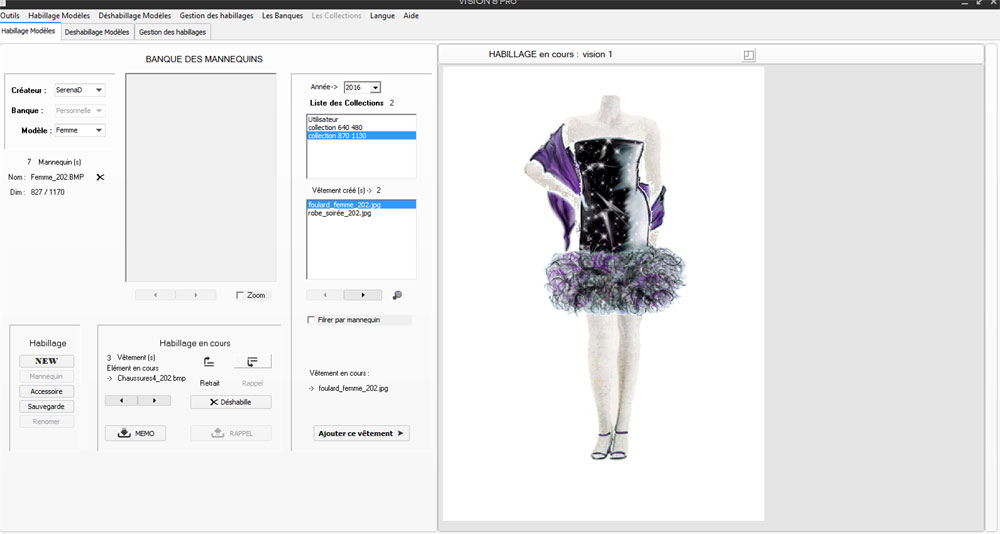
Create a skin:
1) selection of a model from the personal bank
2) Selection and addition of one or more accessories as appropriate
3) Selection of the desired collection then selection and addition of clothing.
 Creating a skin in Vision 8.
Example 1: (Video on YouTube)
Example 2: VISION 8.1
The dressing tool allows you to create complete sets (mannequin, clothing and accessories) constituent elements extracted from personal banks.
Composition of a covering:
- A model, taken from the model bank.
- The garment(s) taken from one of the collections created by the user.
- The accessory(s) extracted from one of the banks of accessories created by the user.
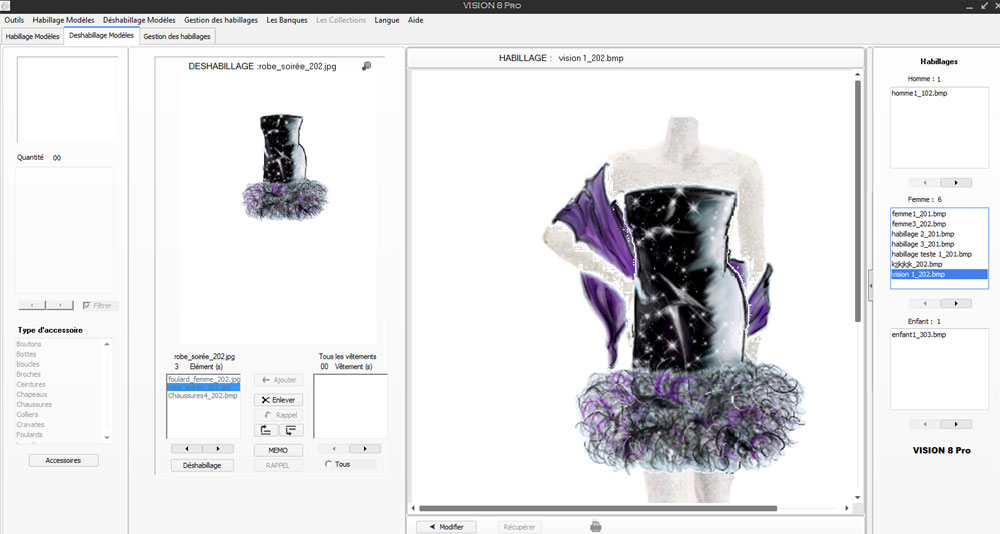
THE UNDRESSING TOOL
Modifying a skin already created (Undressing) in Vision 8.
Example 1: VISION 8 (Video on YouTube)
Example 2: VISION 8.1
The undressing tool allows you to recall a dressing according to the current year in order to modify it according to needs.
Advantage :
Example, if you want to modify an accessory or an associated item of clothing, nothing could be easier.
Method :
reminder of the dressing
removal of the desired garment or accessory (or several).
Addition of the new item of clothing or accessory to the current skin (or several).
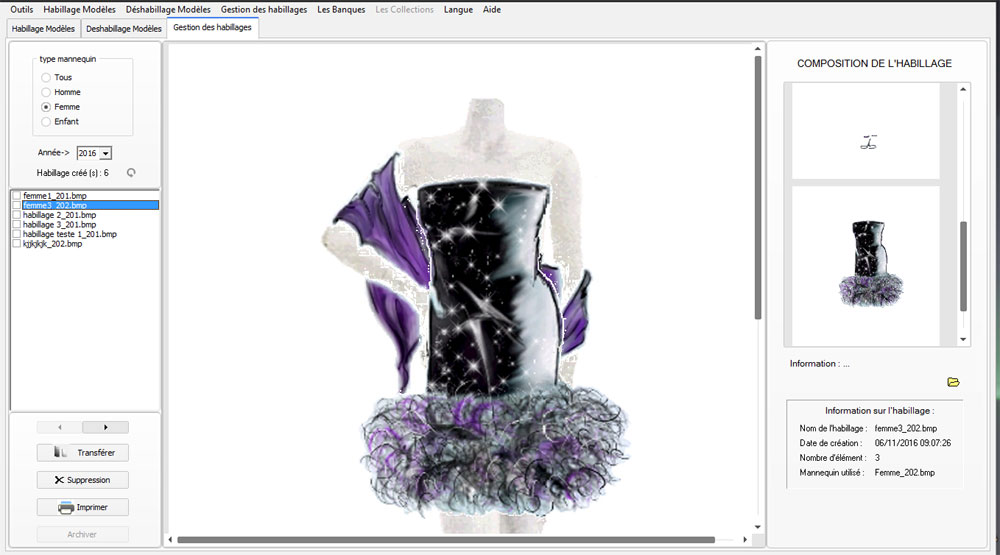
THE VISUALIZATION AND MANAGEMENT TOOL
The visualization and management tool allows you to display the skins in a larger format, but also to transfer the skins to the collection of your choice.
Advantage :
We can create clothes in an overall collection or we can put all the tests and evolution of a garment.
Then in VISION, create several skins which are saved in the final collection.
Method :
In VISION (Skin Management tab)
We recall the skin (we check its checkbox to select it)
We press the button (Transfer)
In the transfer tool we select the destination collection
")
")

")